Your first usage example, start to finish
This guide follows one usage example from an empty folder to a branch on GitHub that is ready for a pull request. The screenshots show what you should see at each step. Your username, folder names and version numbers differ from these, and that is fine.
The worked example is rectangle_from, a function that builds a rectangle from four numbers. The
finished example opens a window, draws a blue banner and writes the banner’s four numbers underneath
it.
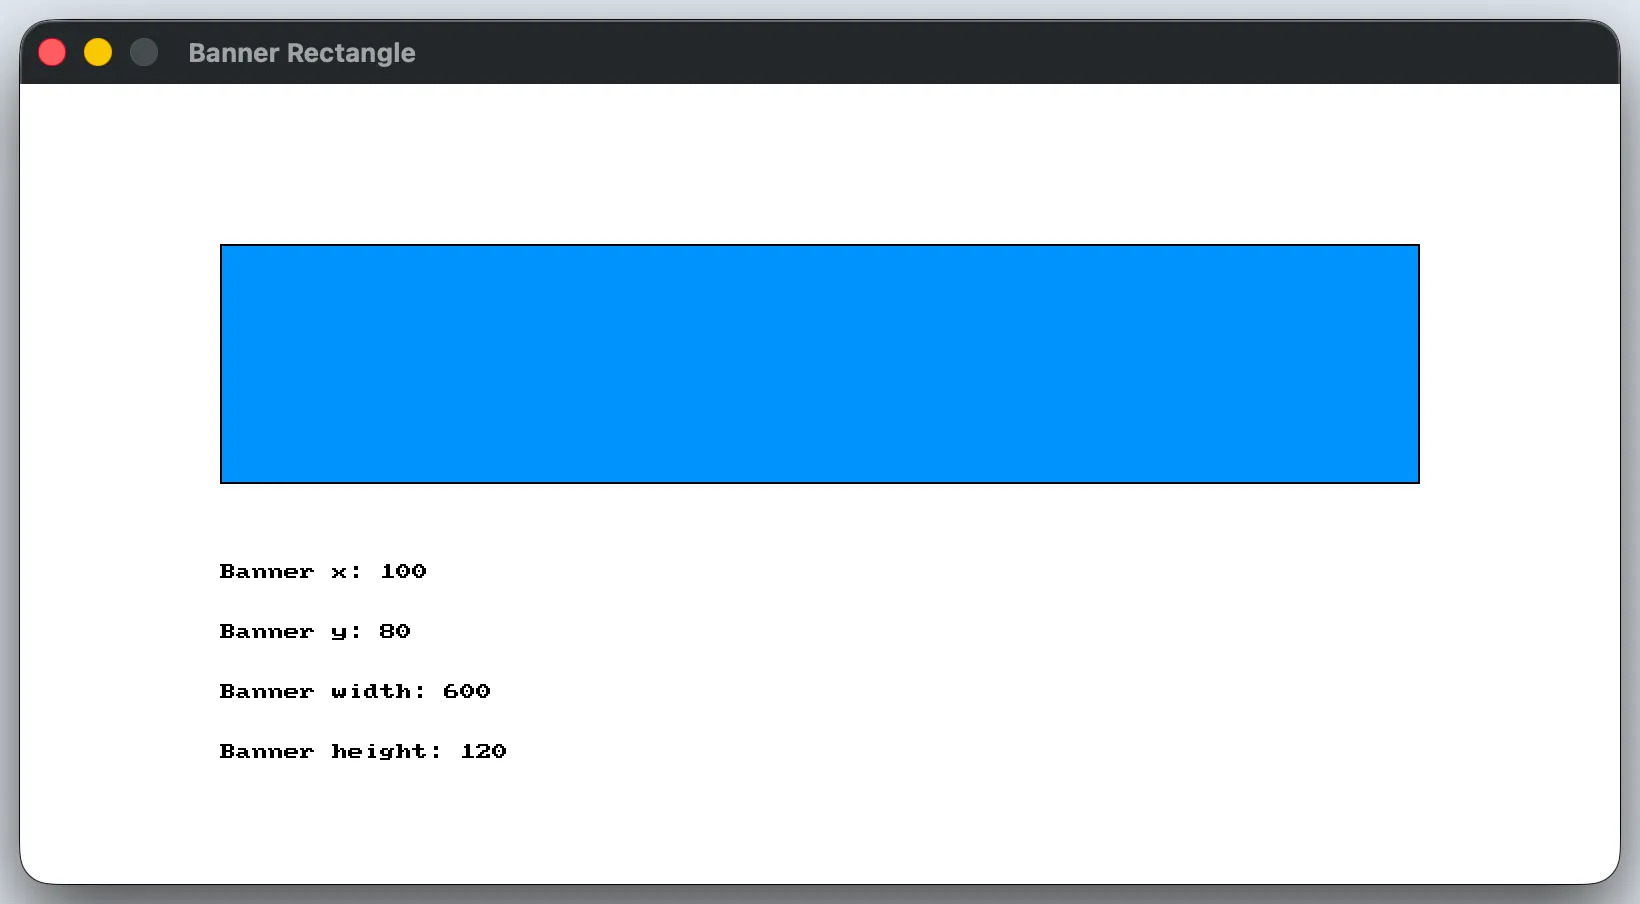
When you finish, you have:
- six files in
public/usage-examples/geometry/ - a program that runs in C++, in both C# styles and in Python
- a picture of the running window
- one commit on a new branch, pushed to your fork
Before you start
Section titled “Before you start”You need:
- a GitHub account
- Git, Node.js with
npm, VS Code, and SplashKit. The Get Your Environment Set Up guide walks through each one. - the
.NETSDK, if you want to test the C# versions
The screenshots come from a Mac. On Windows, use the terminal that the setup guide has you install. The commands are the same, and the few keys that differ are noted.
Read the Guide to creating usage examples and the Usage Example Style Guide once as well. This guide shows the process. Those two pages hold the rules.
This guide uses VS Code because the setup guide installs it. Any editor works, because the files and commands are the same.
Set up the project
Section titled “Set up the project”1. Check your tools
Section titled “1. Check your tools”Open a terminal and run each command. Each one should print a version number.
node --versionnpm --versiongit --versiondotnet --version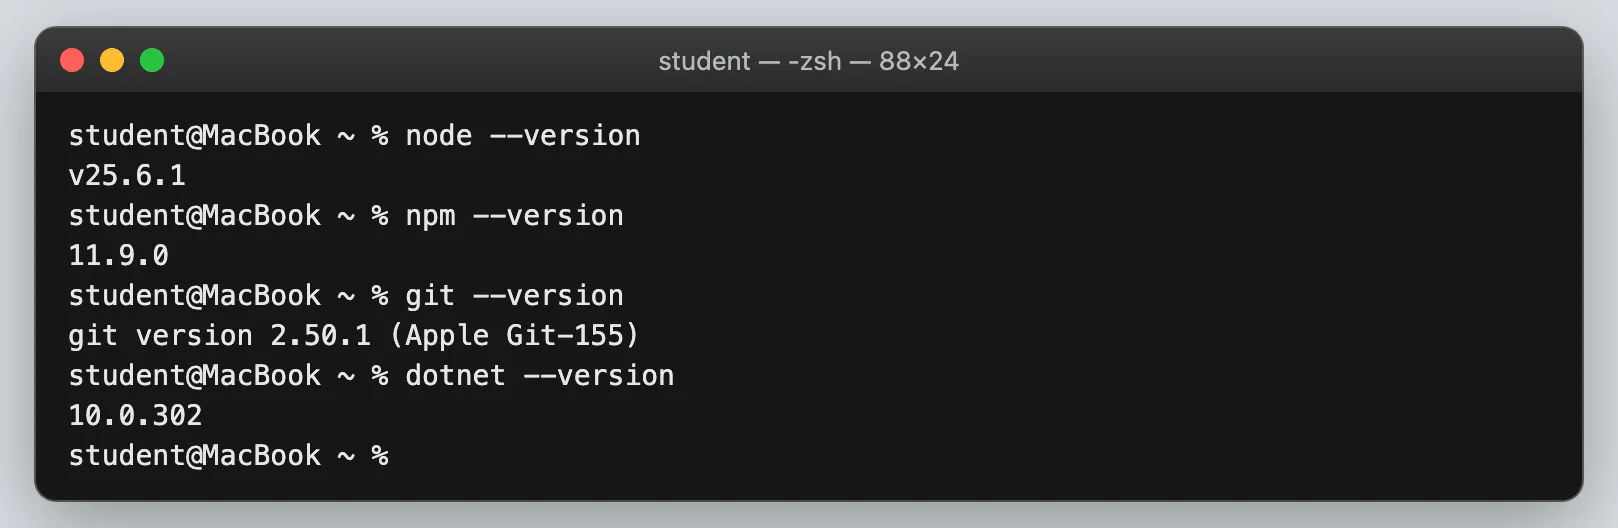
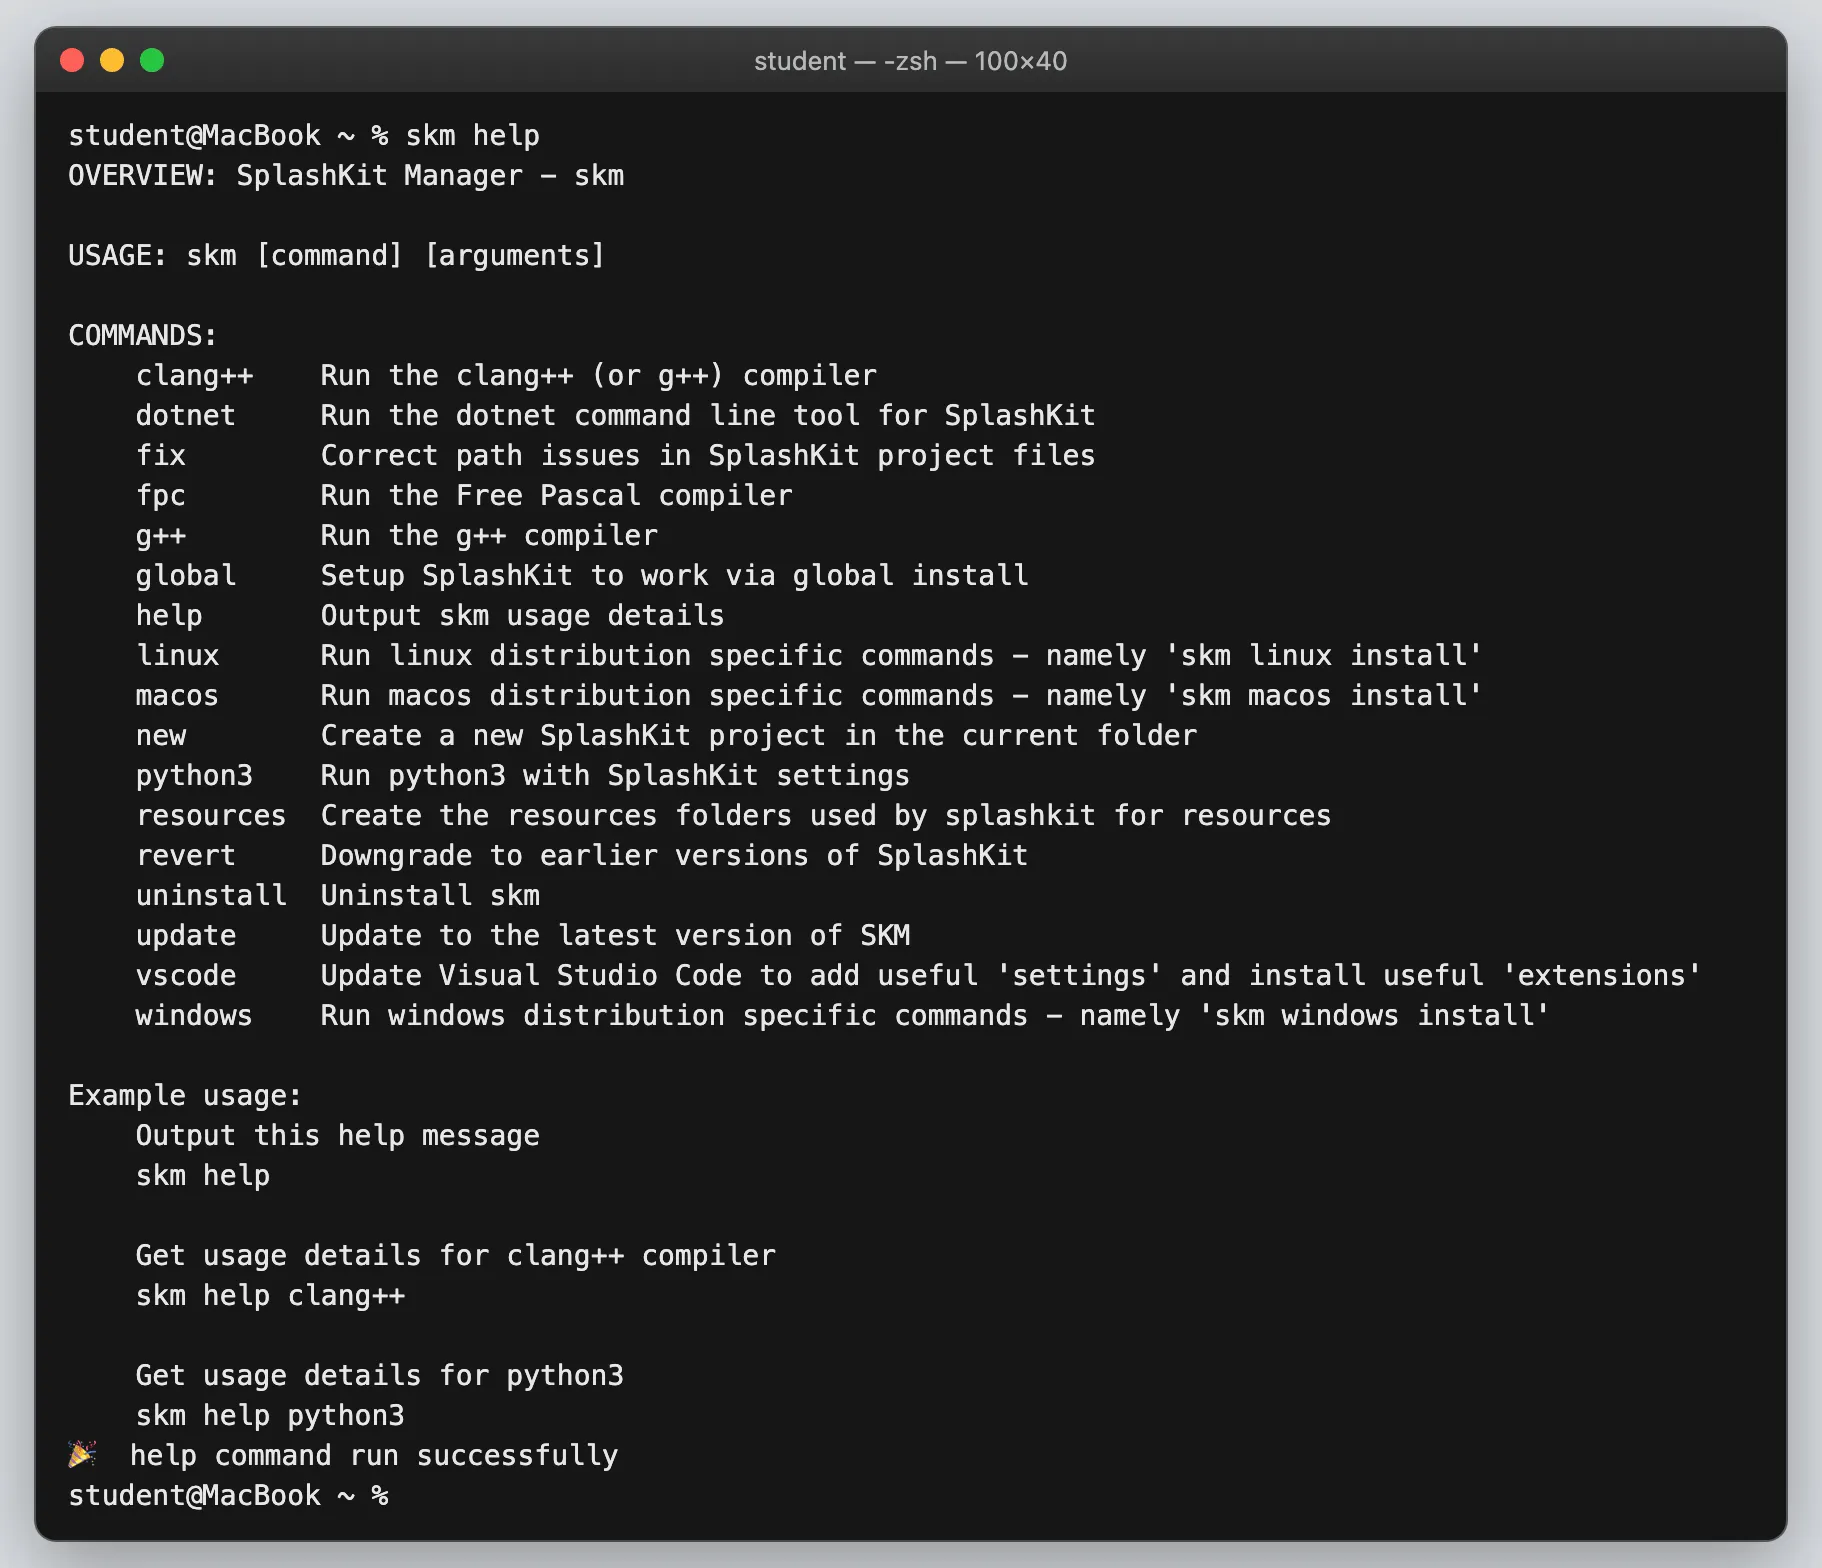
Now check SplashKit’s manager tool, skm:
skm helpYou should see a list of commands that ends with a success message.
If a command says command not found, go back to the
setup guide. Close and reopen the terminal after installing
something, so it can find the new tool.
2. Fork and clone the repository
Section titled “2. Fork and clone the repository”The team repository is thoth-tech/splashkit.io-starlight. You work on your own copy of it, called a fork, and send your changes back with a pull request. The splashkit.io GitHub Guide shows how to make a fork, with screenshots.
Then clone your fork. Use your own GitHub username in place of octocat:
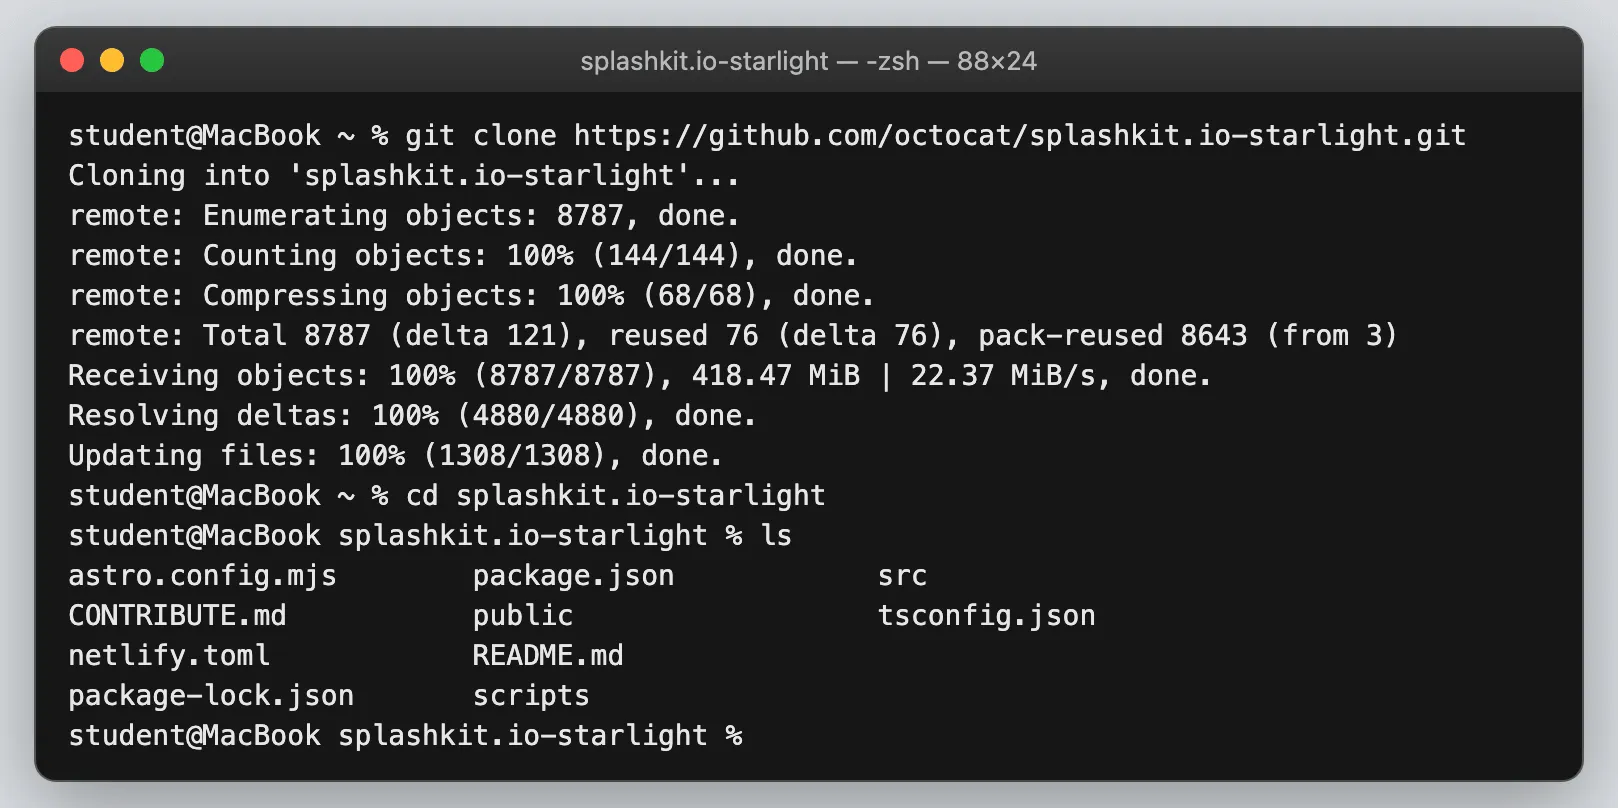
git clone https://github.com/octocat/splashkit.io-starlight.gitcd splashkit.io-starlightlsThe download is about 420 MB, so wait for the line that says Updating files: 100%.
3. Open the folder in VS Code
Section titled “3. Open the folder in VS Code”From inside the project folder, run:
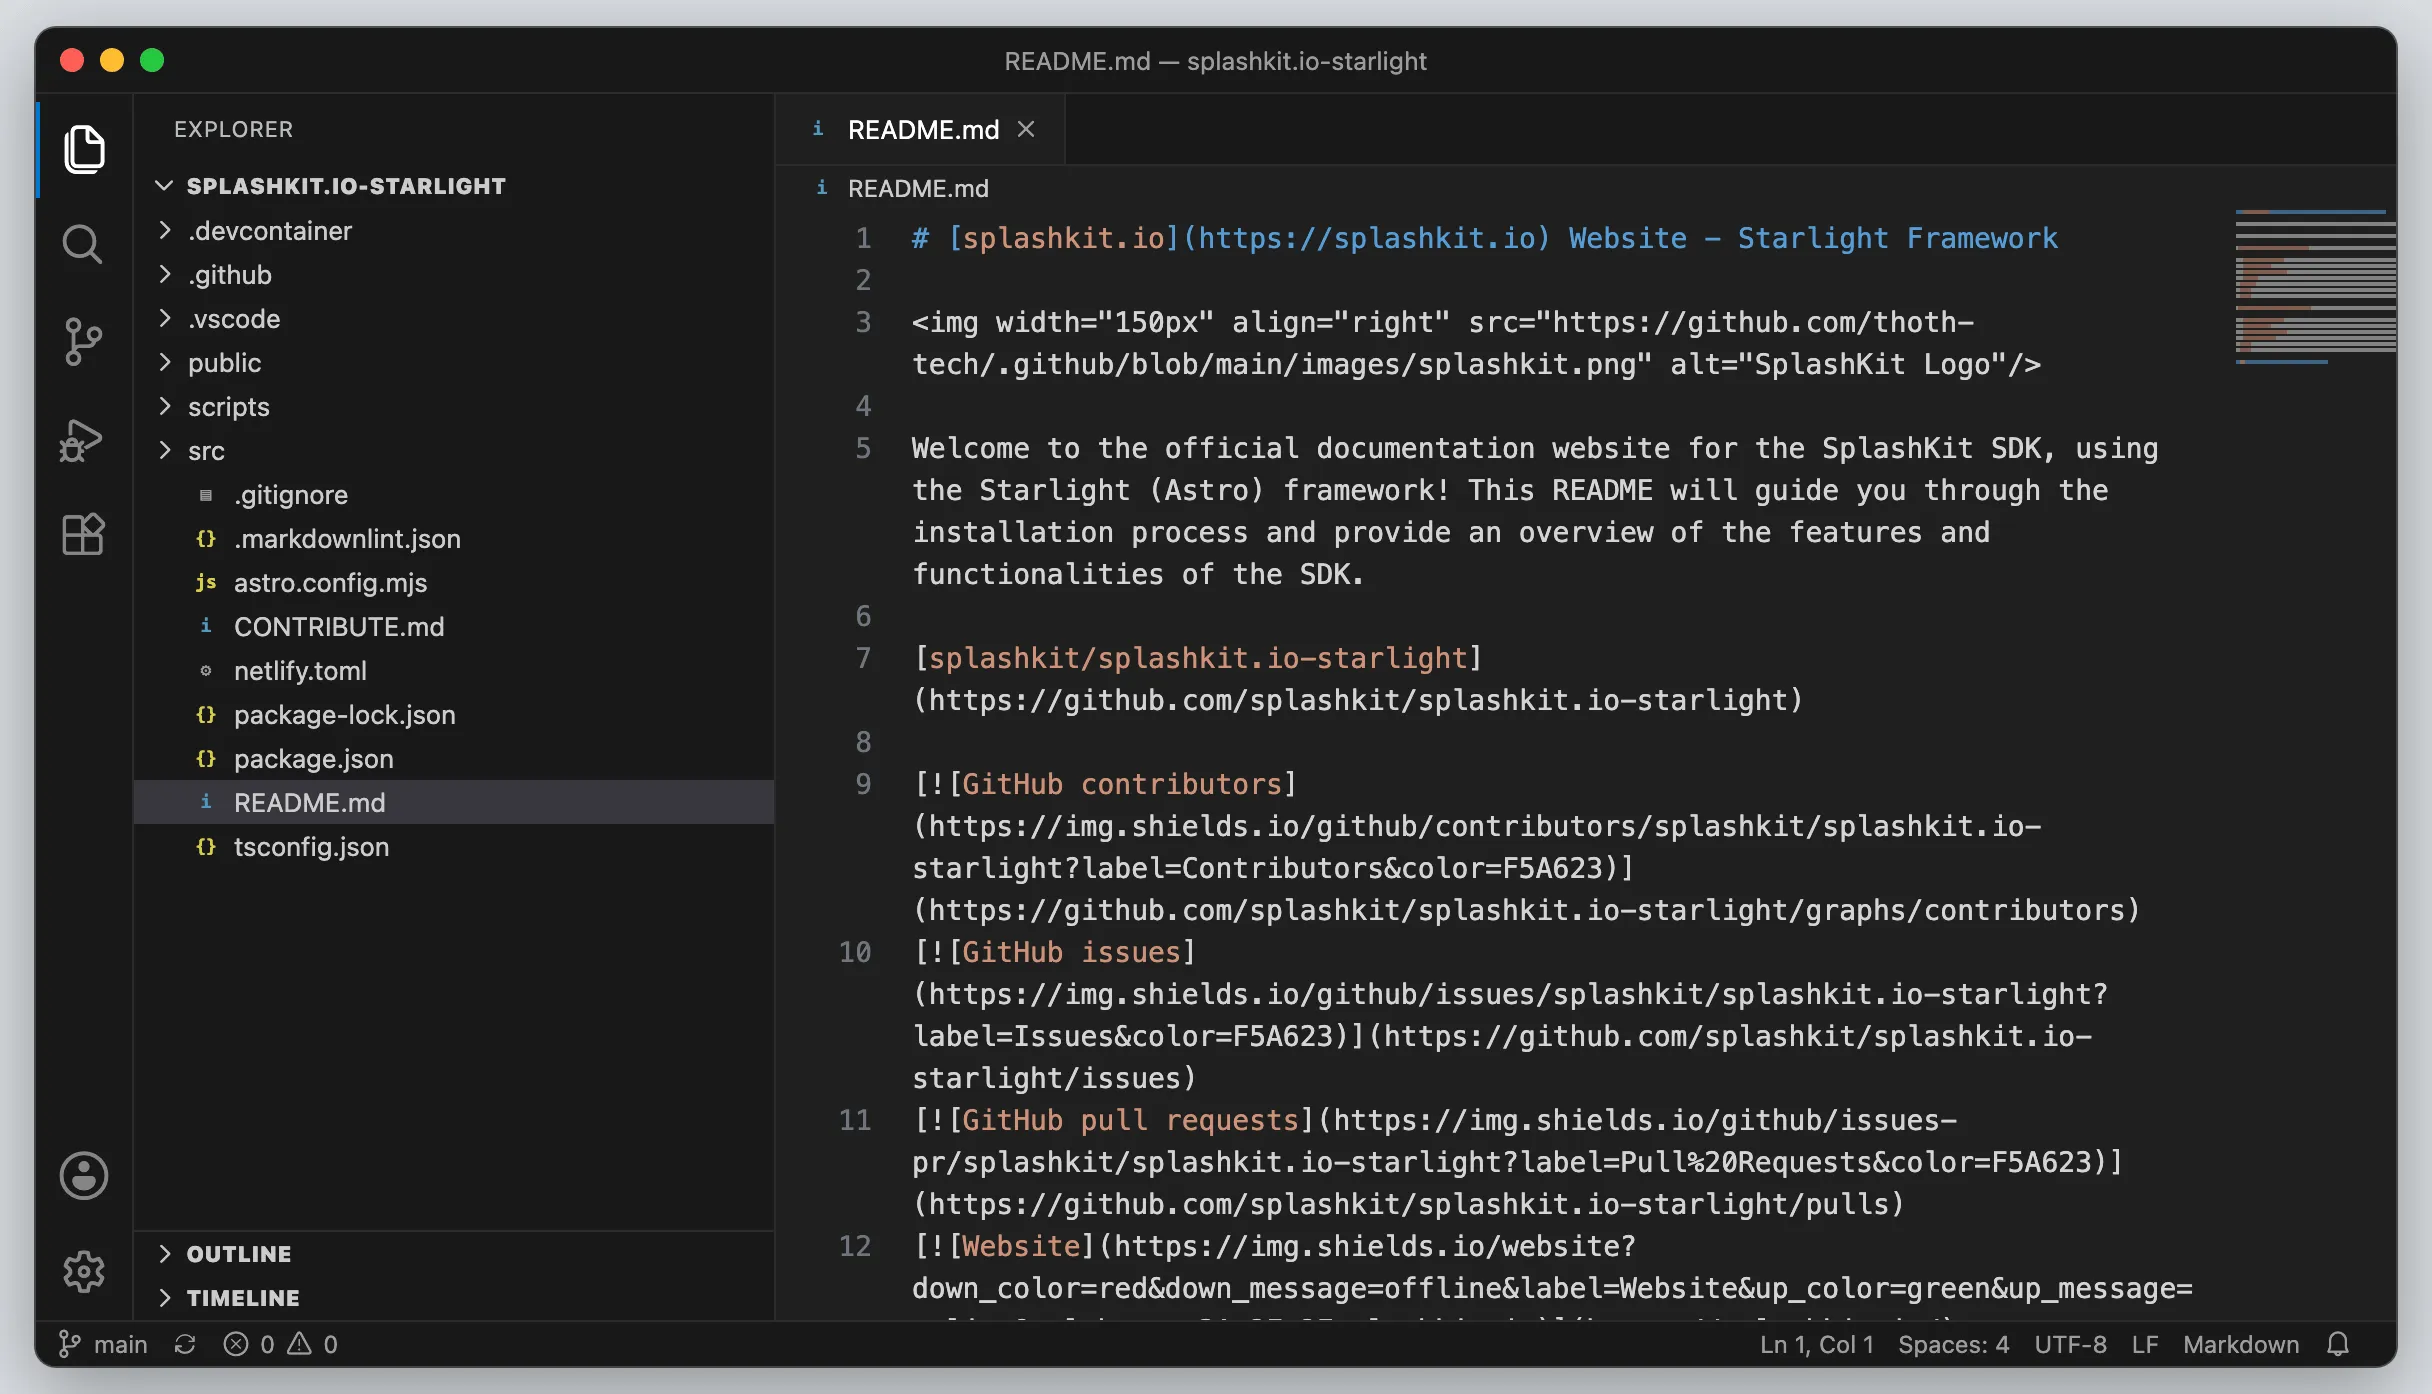
code .If the terminal says code isn’t found, open VS Code and choose File → Open Folder instead.
Select README.md in the file list to open it.
4. Install the packages
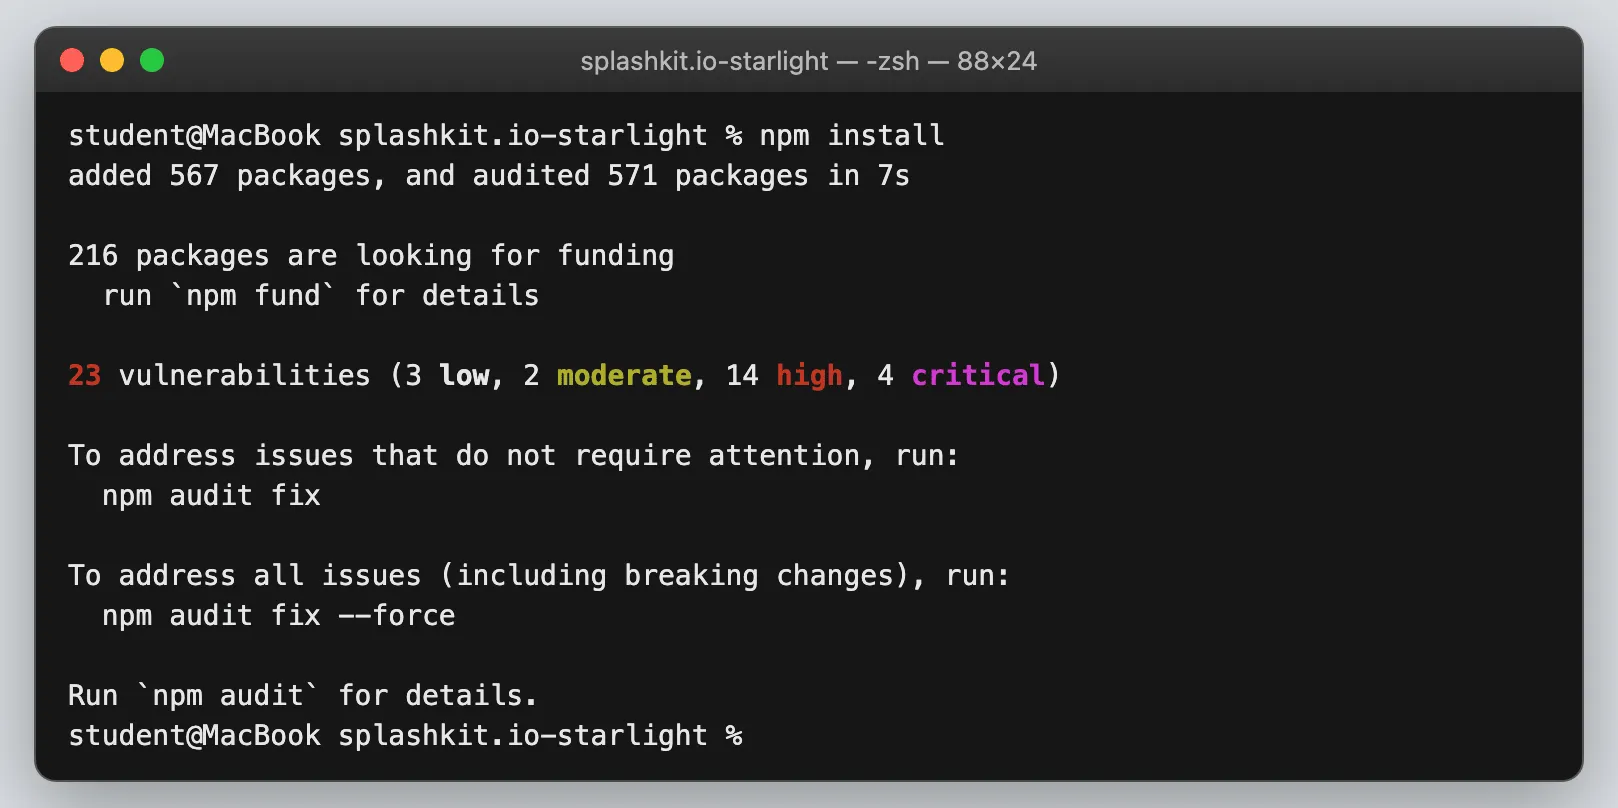
Section titled “4. Install the packages”npm installThis downloads everything the website needs into a folder called node_modules. The last lines
mention vulnerabilities. This warning is normal for this project. Do not run npm audit fix,
because it rewrites package-lock.json and that change would end up in your pull request.
5. Start the website on your computer
Section titled “5. Start the website on your computer”npm run devThe first time, it stops with an error:
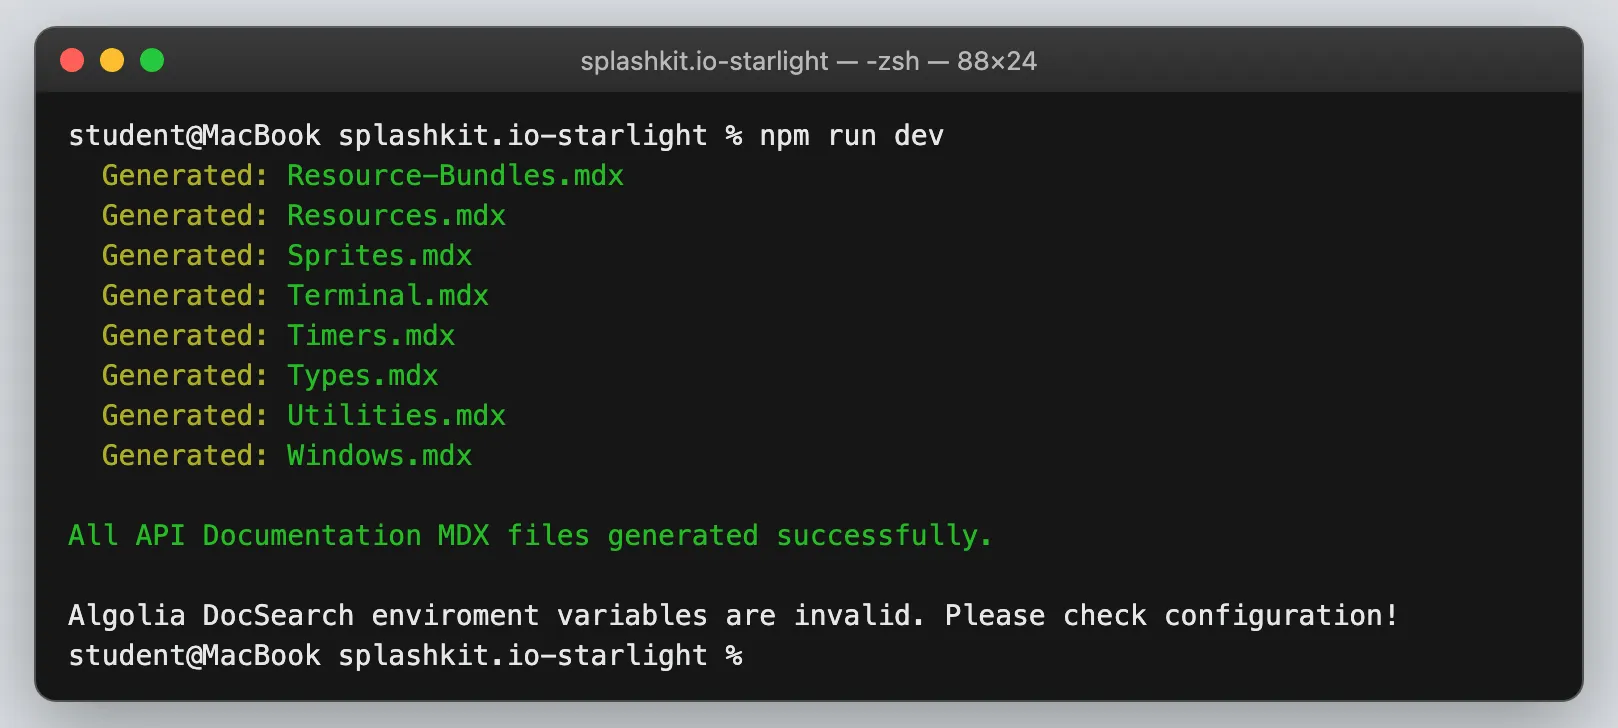
The website’s search box needs three settings. You do not need real ones to work on your own
computer, so use placeholders. In VS Code, create a new file called .env in the top folder of the
project, next to package.json, with these three lines:
DOCSEARCH_API_ID=placeholderDOCSEARCH_API_SEARCH_KEY=placeholderDOCSEARCH_INDEX_NAME=placeholder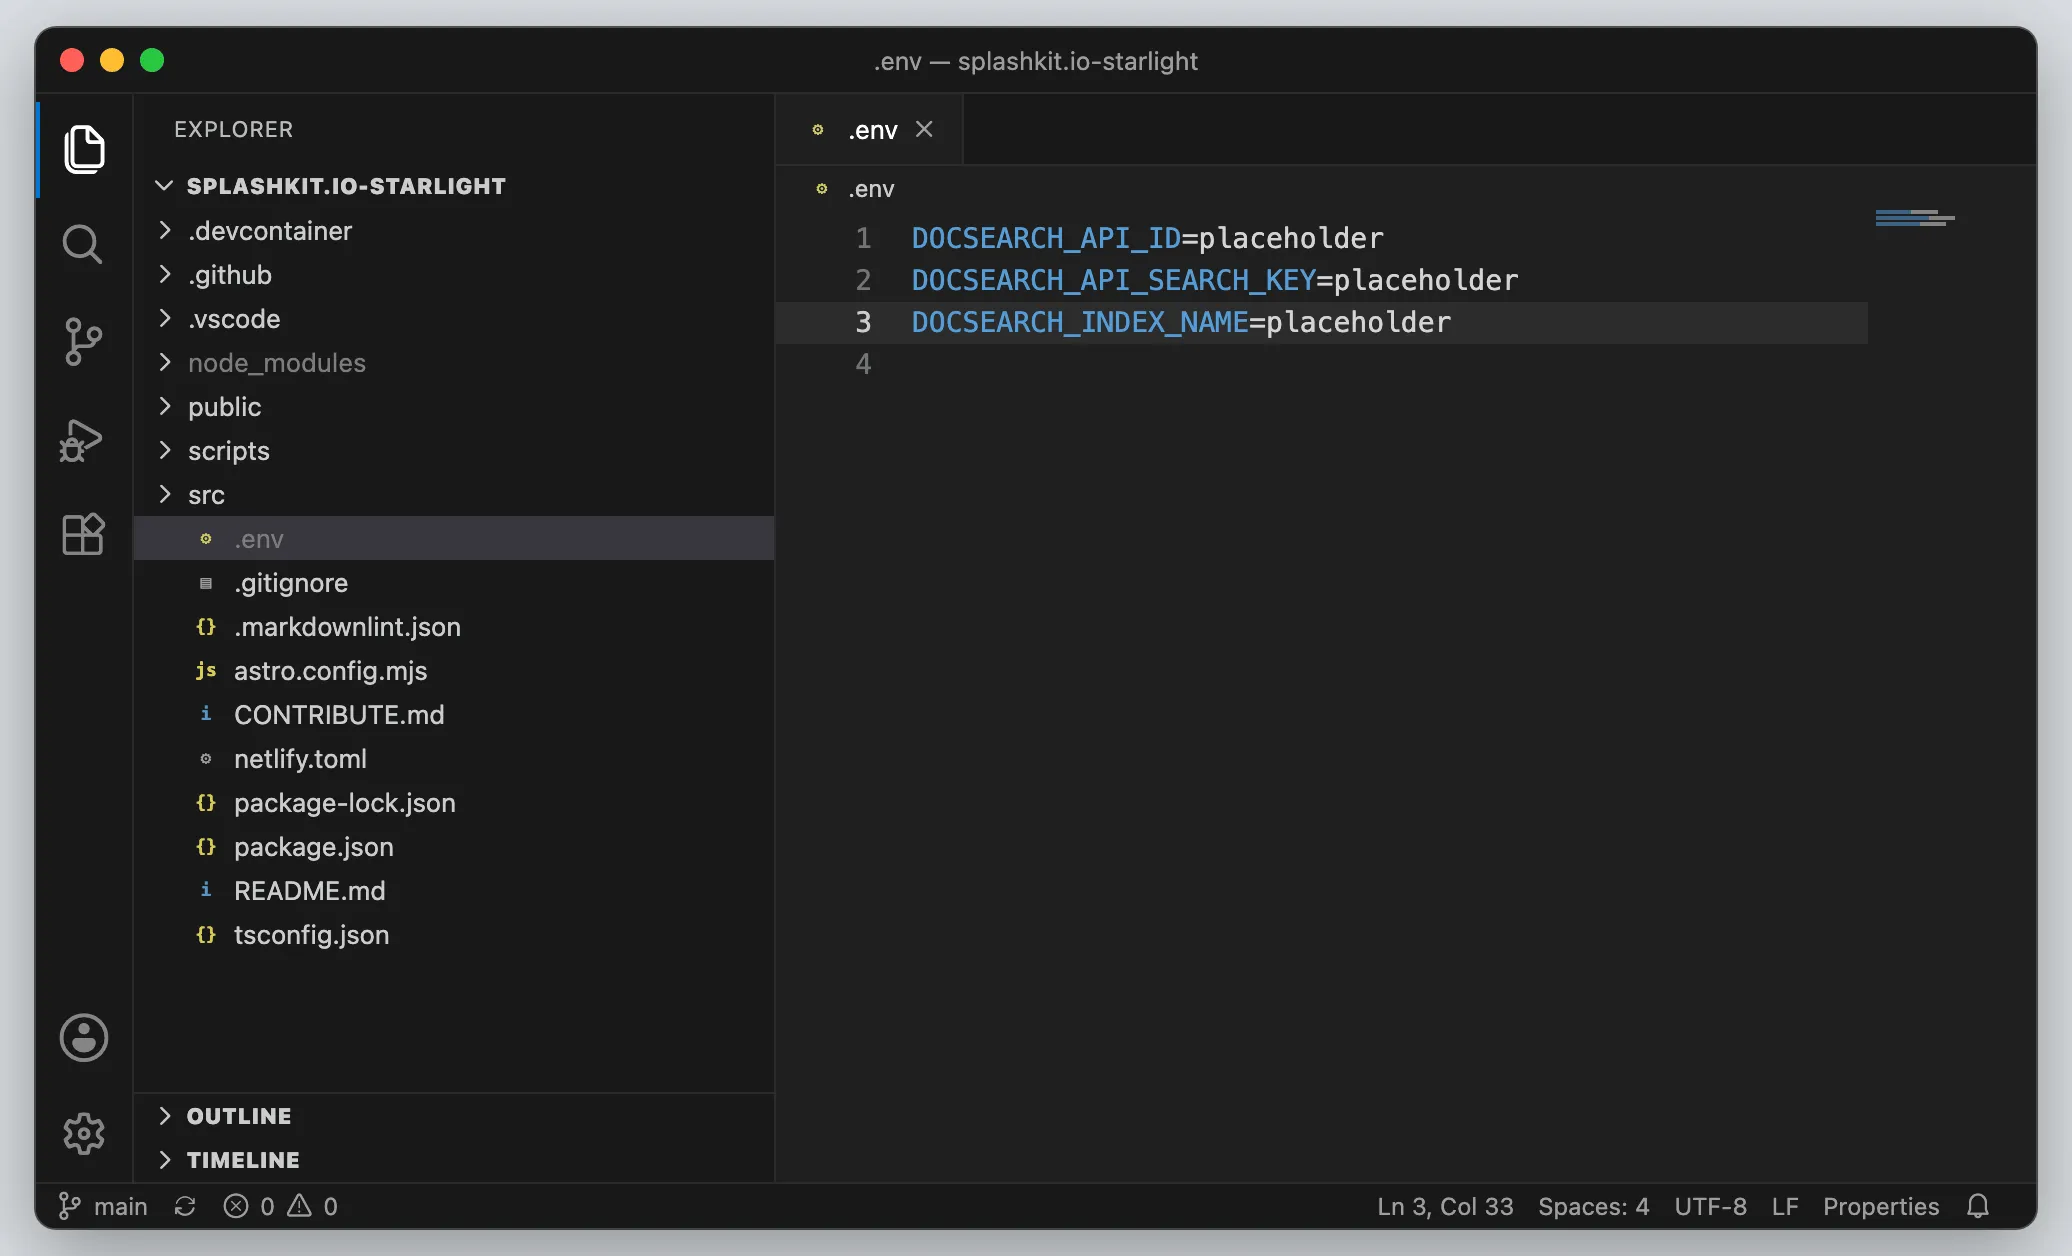
Git ignores .env, so it never goes into your commit. The search box does not work on your
computer, and that is fine.
Run the command again:
npm run dev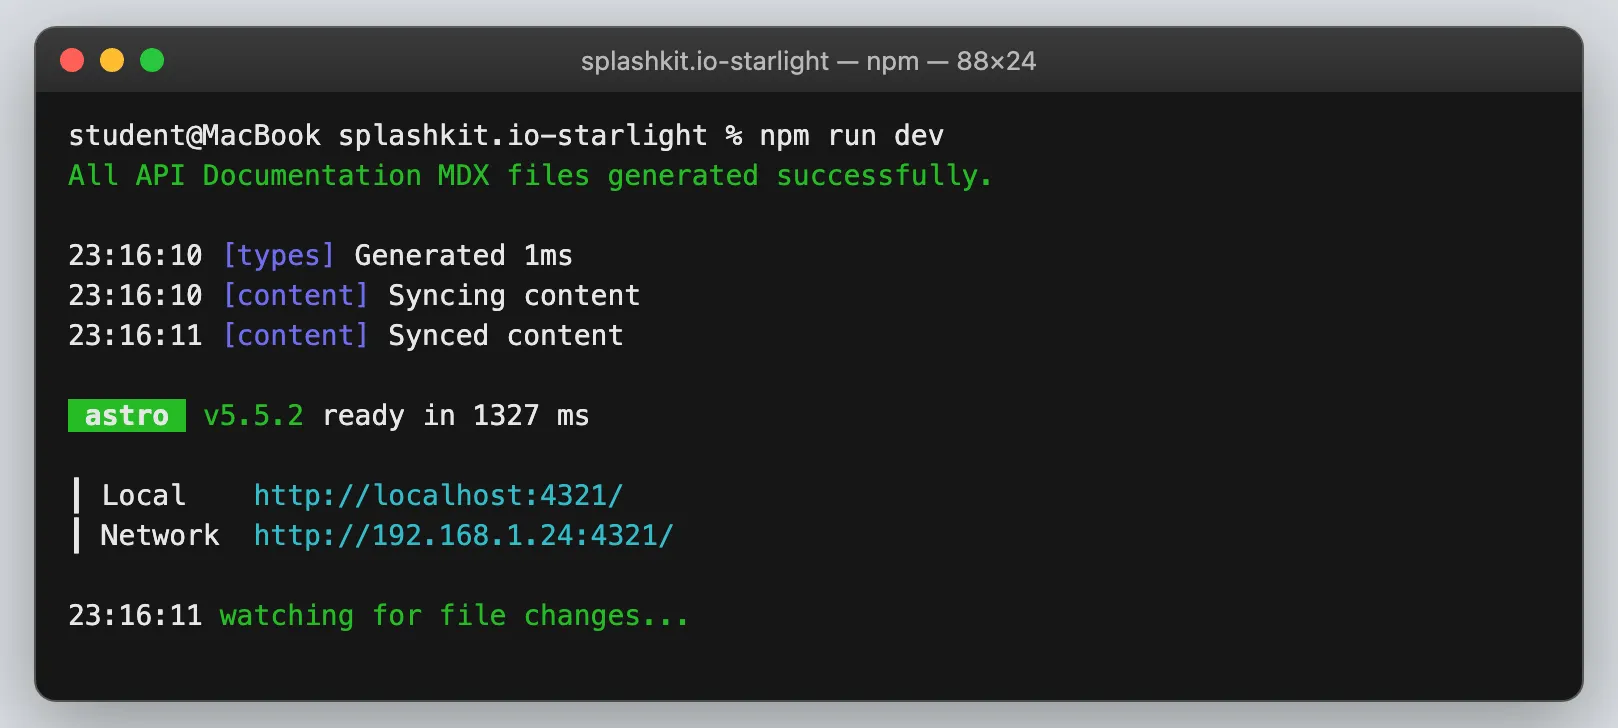
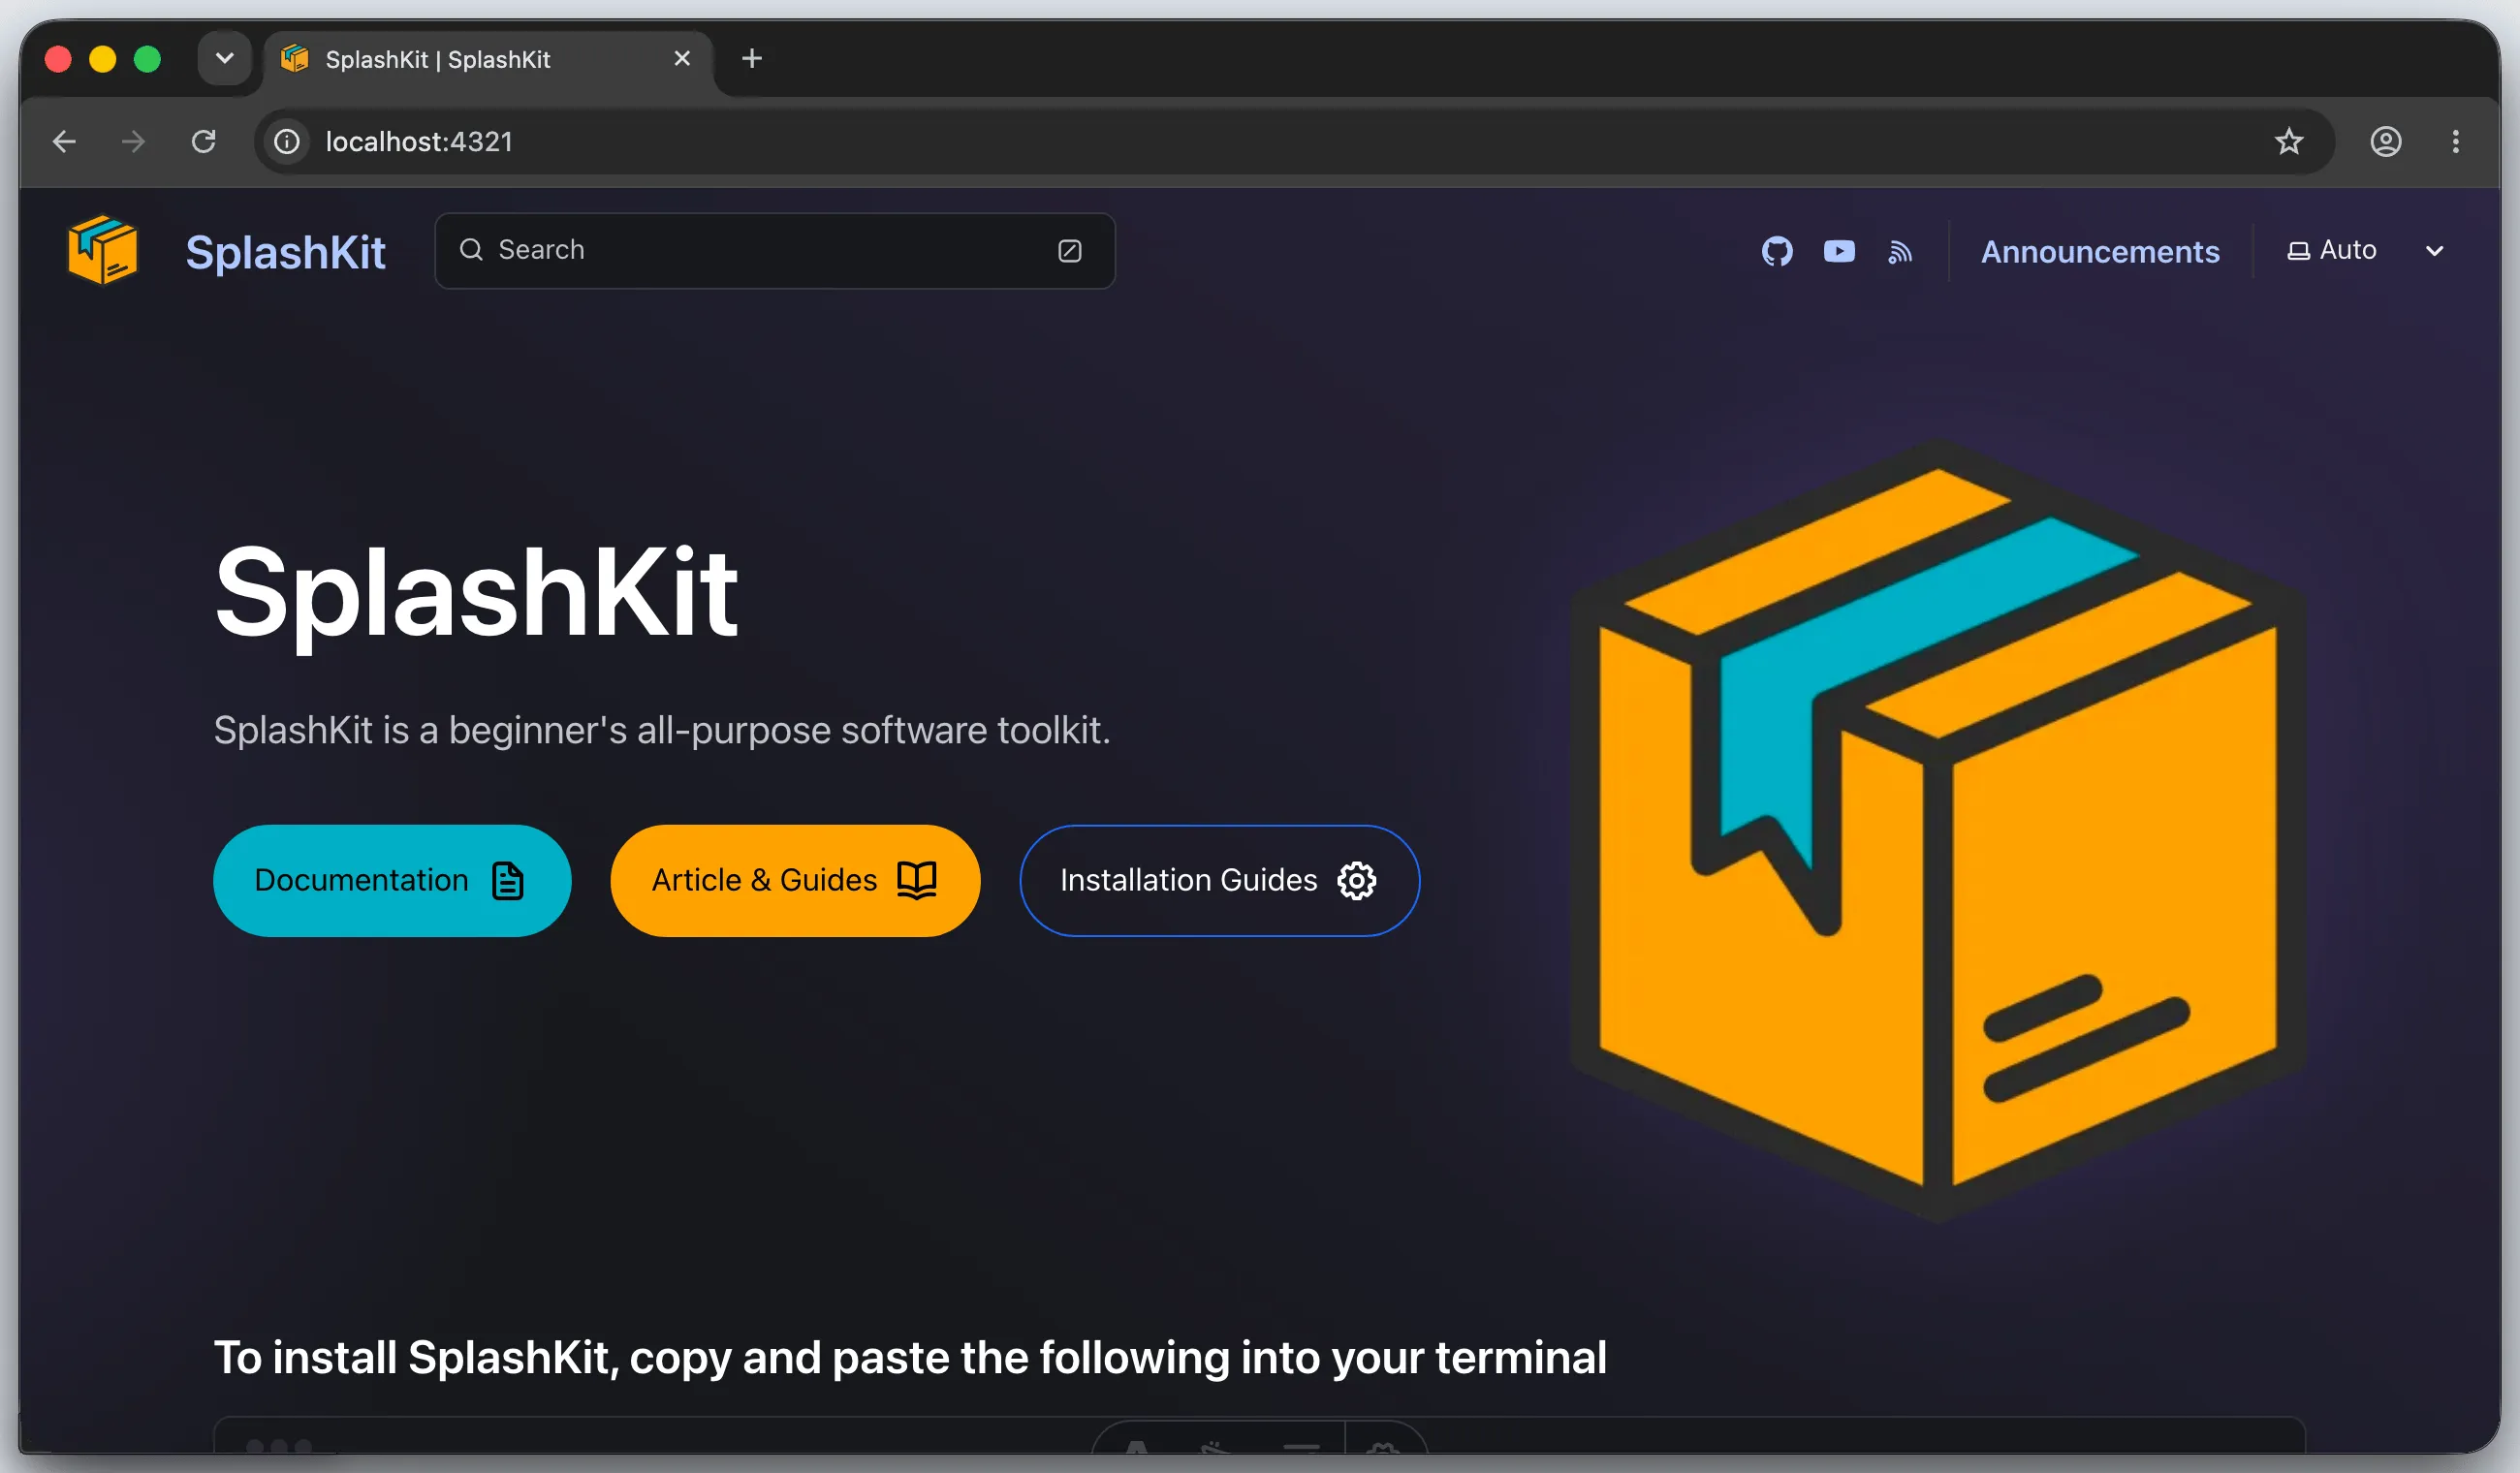
Open localhost:4321 in your browser. The SplashKit home page appears.
Leave this terminal running. Open a second terminal for everything else. In VS Code, choose Terminal → New Terminal.
Choose your function
Section titled “Choose your function”6. Make sure nobody else has it
Section titled “6. Make sure nobody else has it”Two people writing the same example wastes both their time. Check all of these before you write anything:
- Search the pull requests for the function’s name, and include the closed ones. For example, pull requests that mention rectangle_from.
- Look on the Planner board for a card with the function’s name. The Planner Board Etiquette page explains how the board works.
- Look in the examples folder. This prints nothing when the function has no example files:
ls public/usage-examples/geometry | grep rectangle_fromThen find the function on your local website. The address is /api/ followed by the category, then
# and the function’s name with hyphens. For our function, that is
localhost:4321/api/geometry/#rectangle-from.
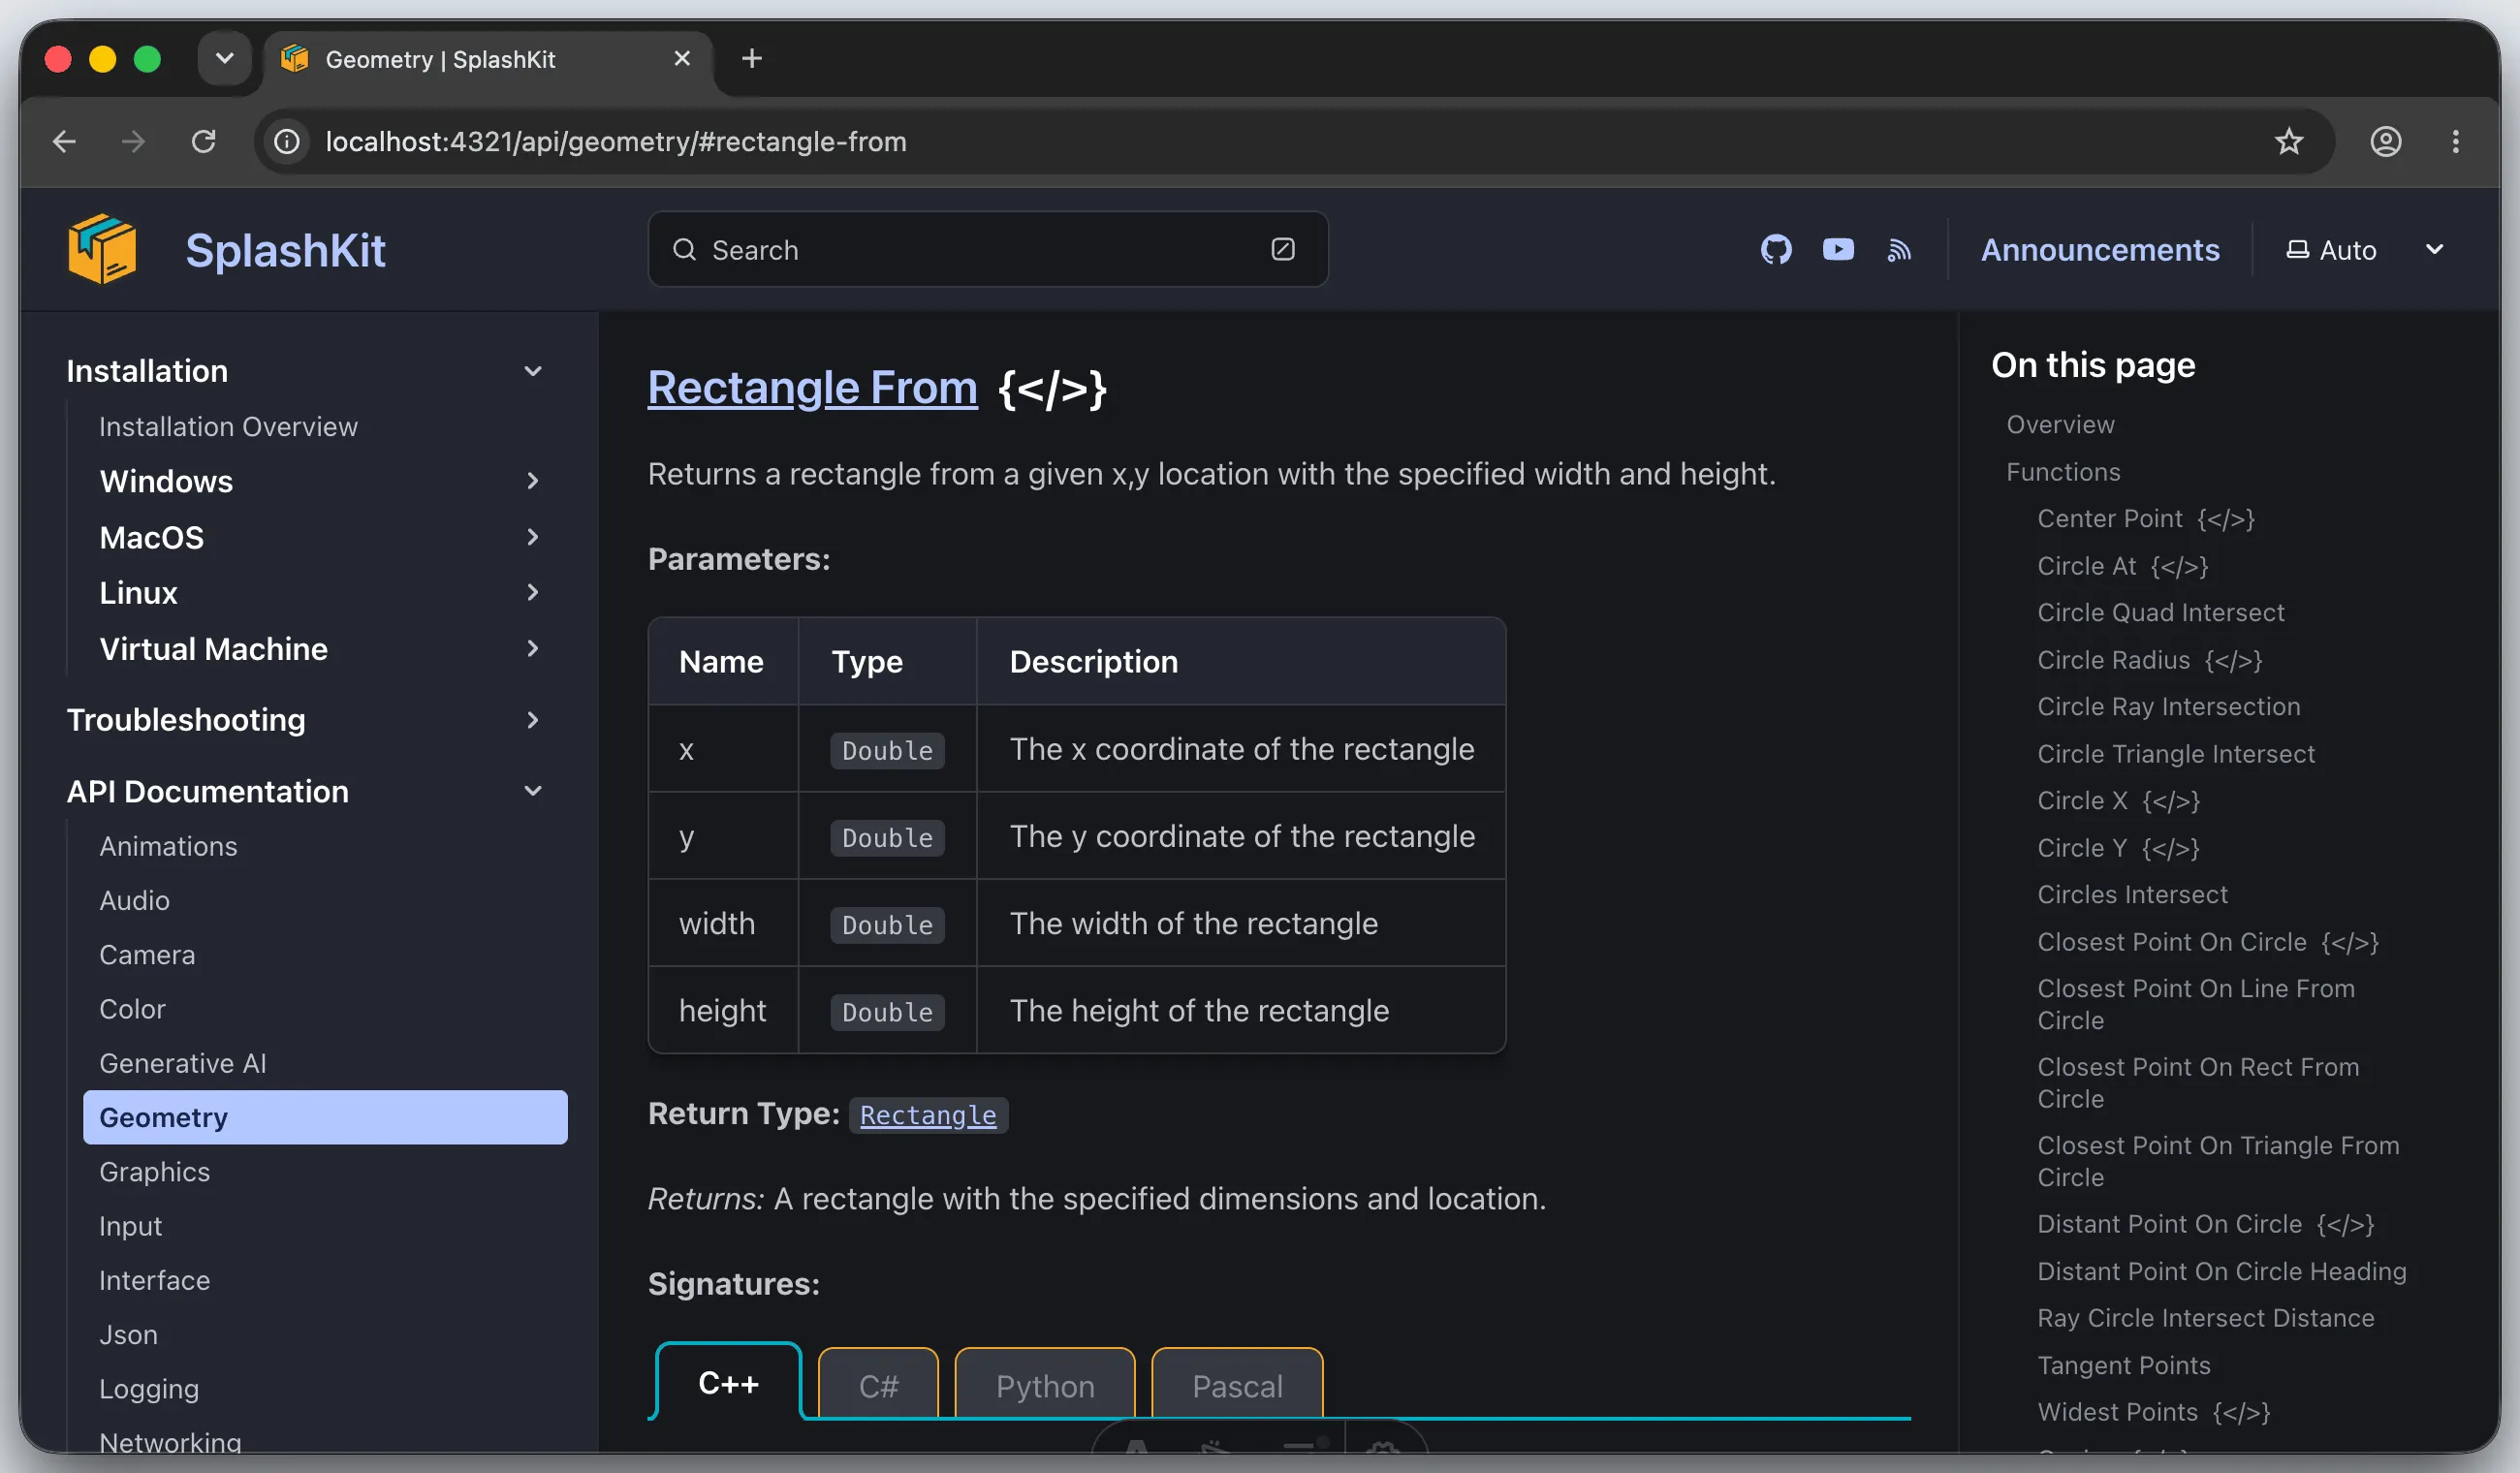
The See Code Examples button under Usage only appears when example files exist for that function.
7. Find the function’s exact name
Section titled “7. Find the function’s exact name”Example filenames are built from the function’s unique_global_name. It is the same as the
function’s name most of the time. A function with several versions gets a different one for each
version. rectangle_from has three.
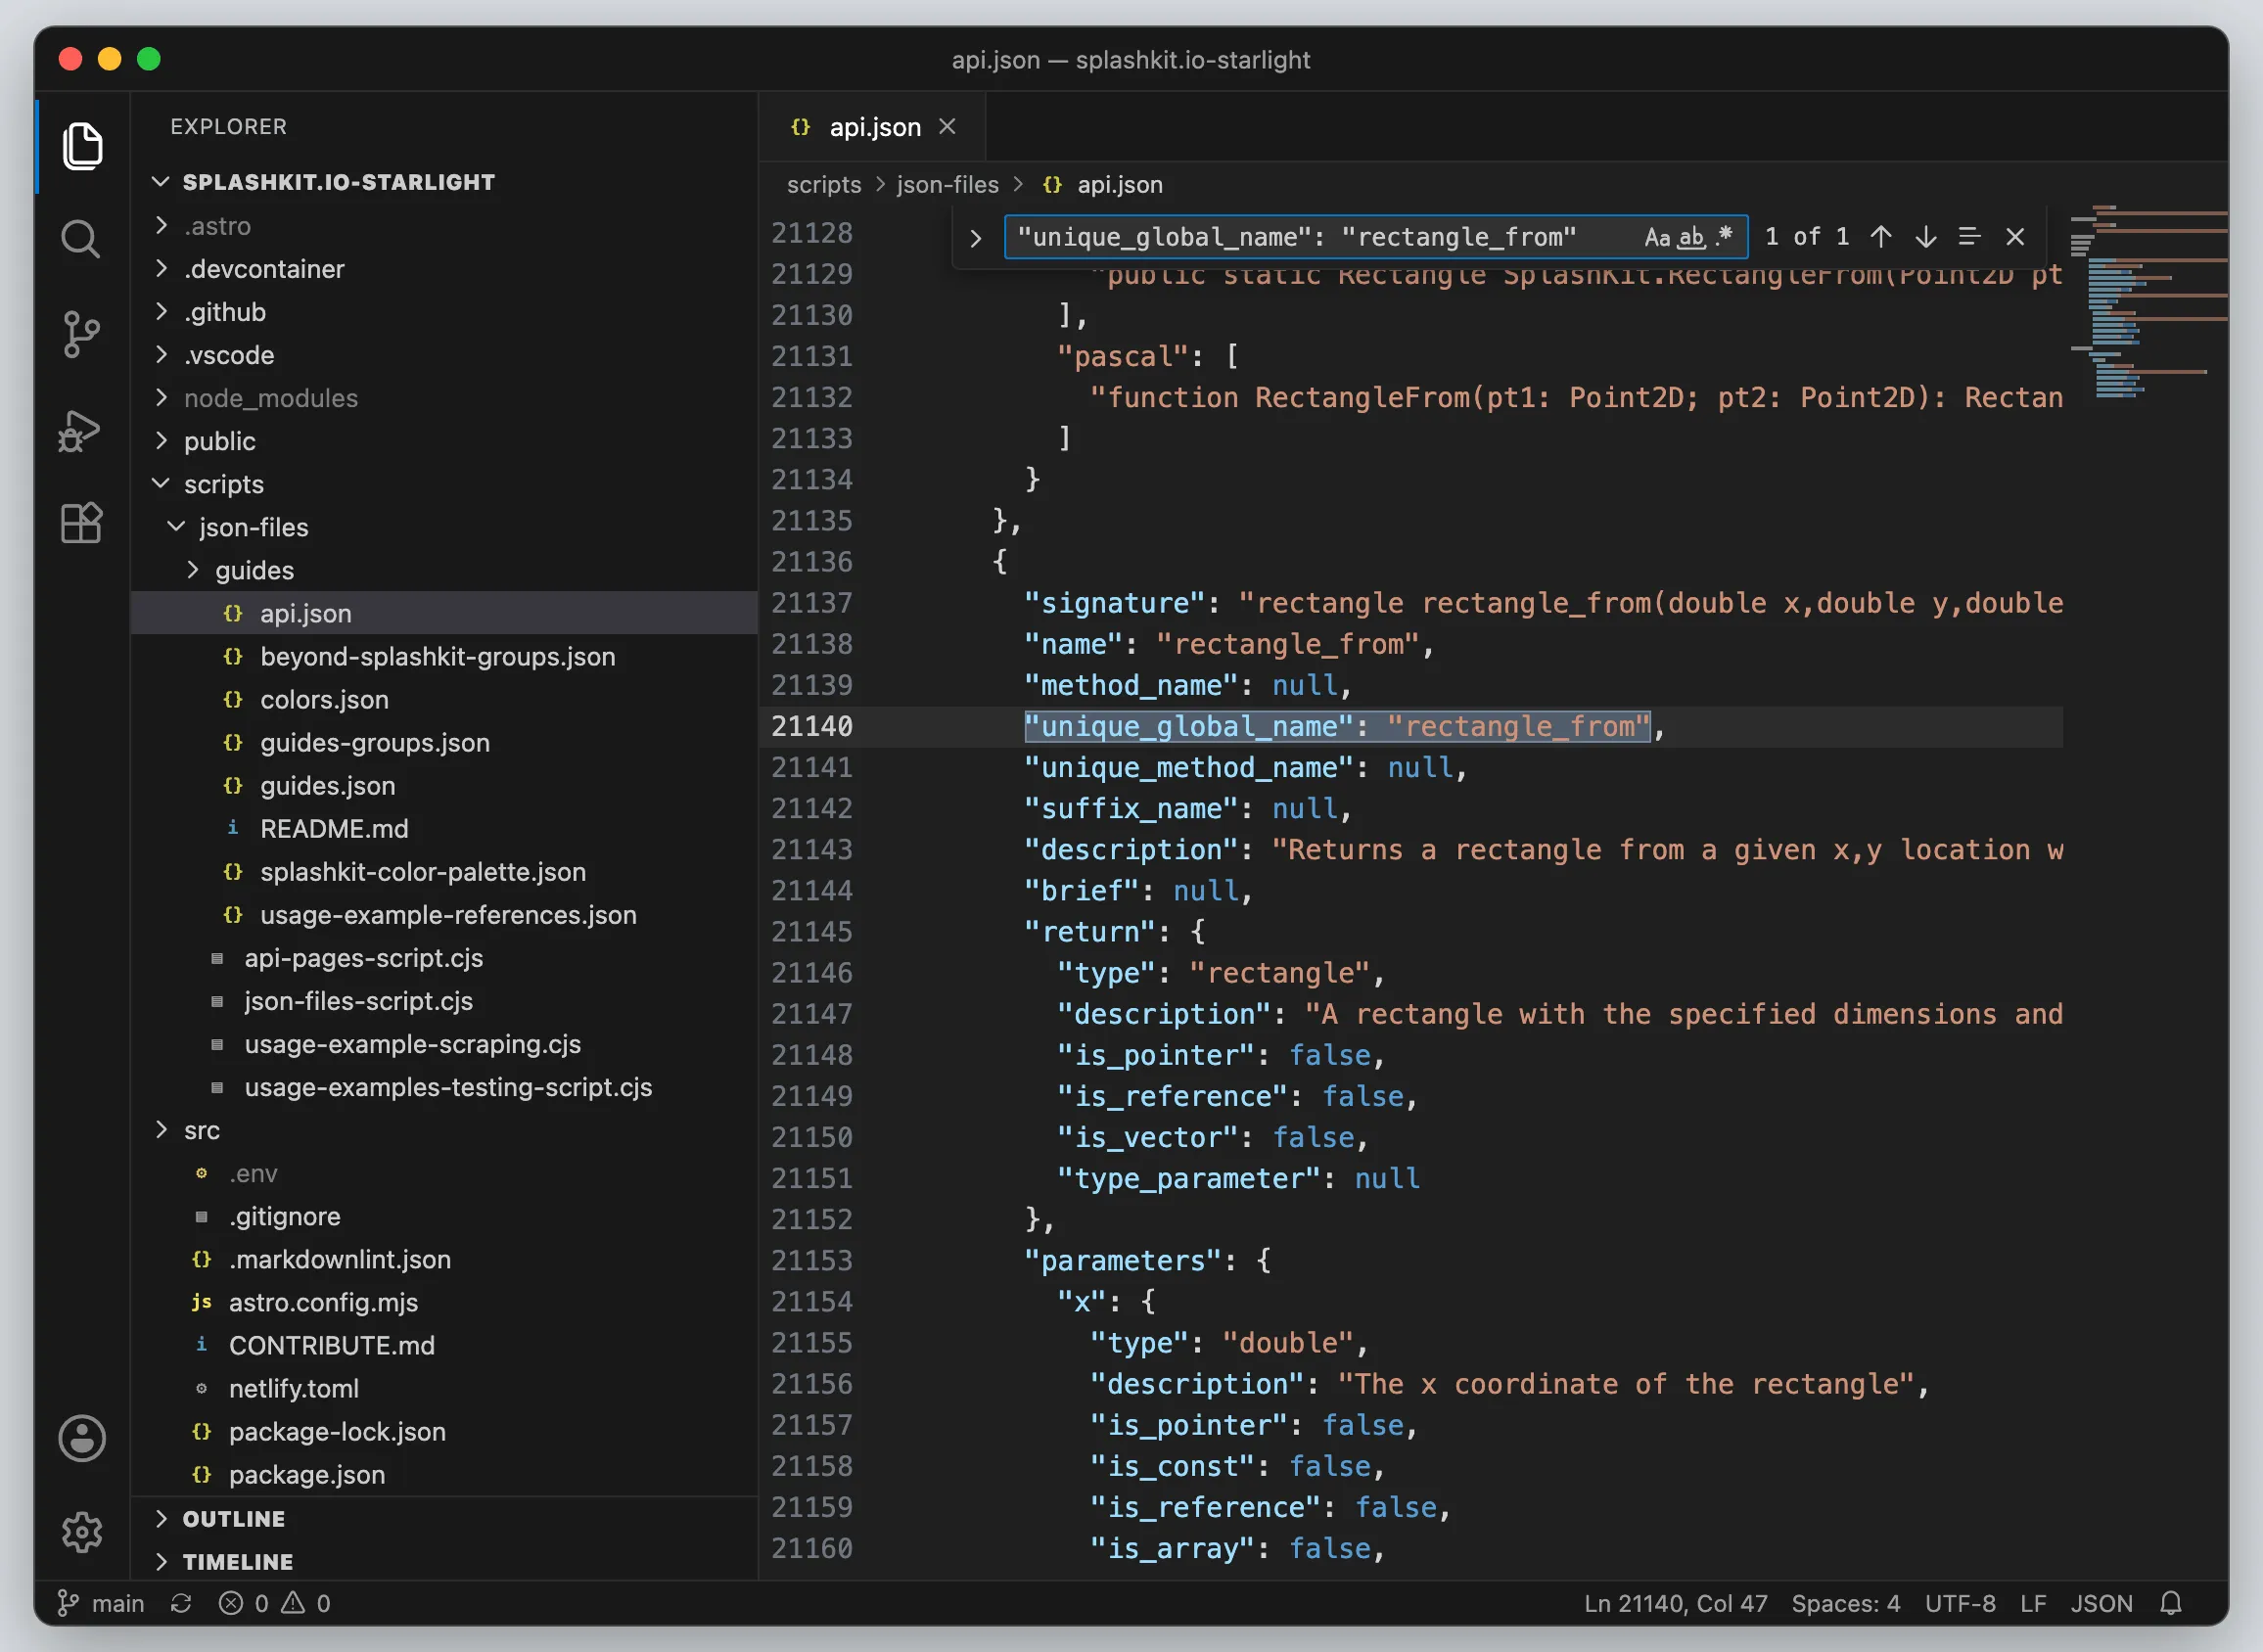
Open scripts/json-files/api.json and search for "unique_global_name": "rectangle_from",
including the closing quote. Press Cmd+F on macOS, or Ctrl+F on Windows and Linux. The signature a
few lines above the match shows which version you have found: this one takes x, y, width and
height.
You can also ask the terminal. This prints every name that starts with rectangle_from, with its
line number:
grep -n '"unique_global_name": "rectangle_from' scripts/json-files/api.jsonThe three results are rectangle_from_point_and_size, rectangle_from_points and rectangle_from.
The version that takes four numbers is plain rectangle_from, so that is the name for our files.
The category in the website address, geometry, is also the name of the folder your files go in:
public/usage-examples/geometry/.
8. Make a branch
Section titled “8. Make a branch”A branch keeps your work separate from main. Name it after what it does, and never commit to
main.
git checkout -b add-rectangle-from-example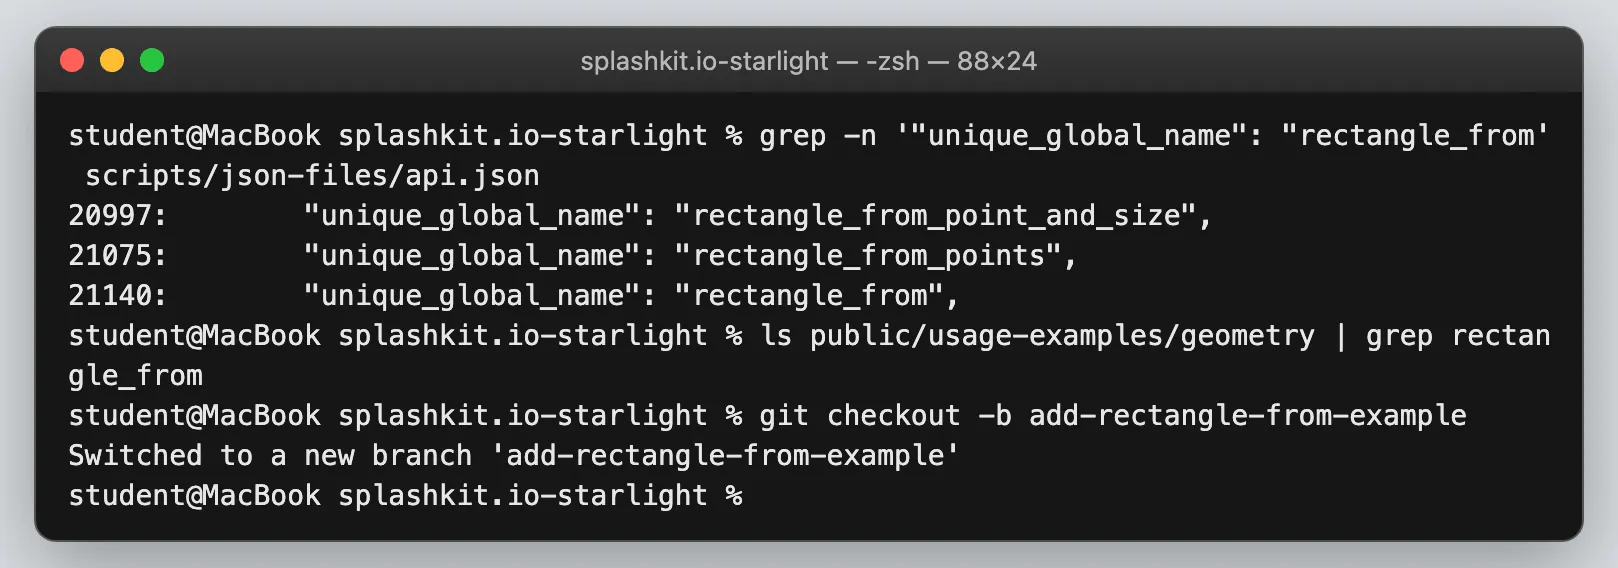
Write the example
Section titled “Write the example”9. Create the six files
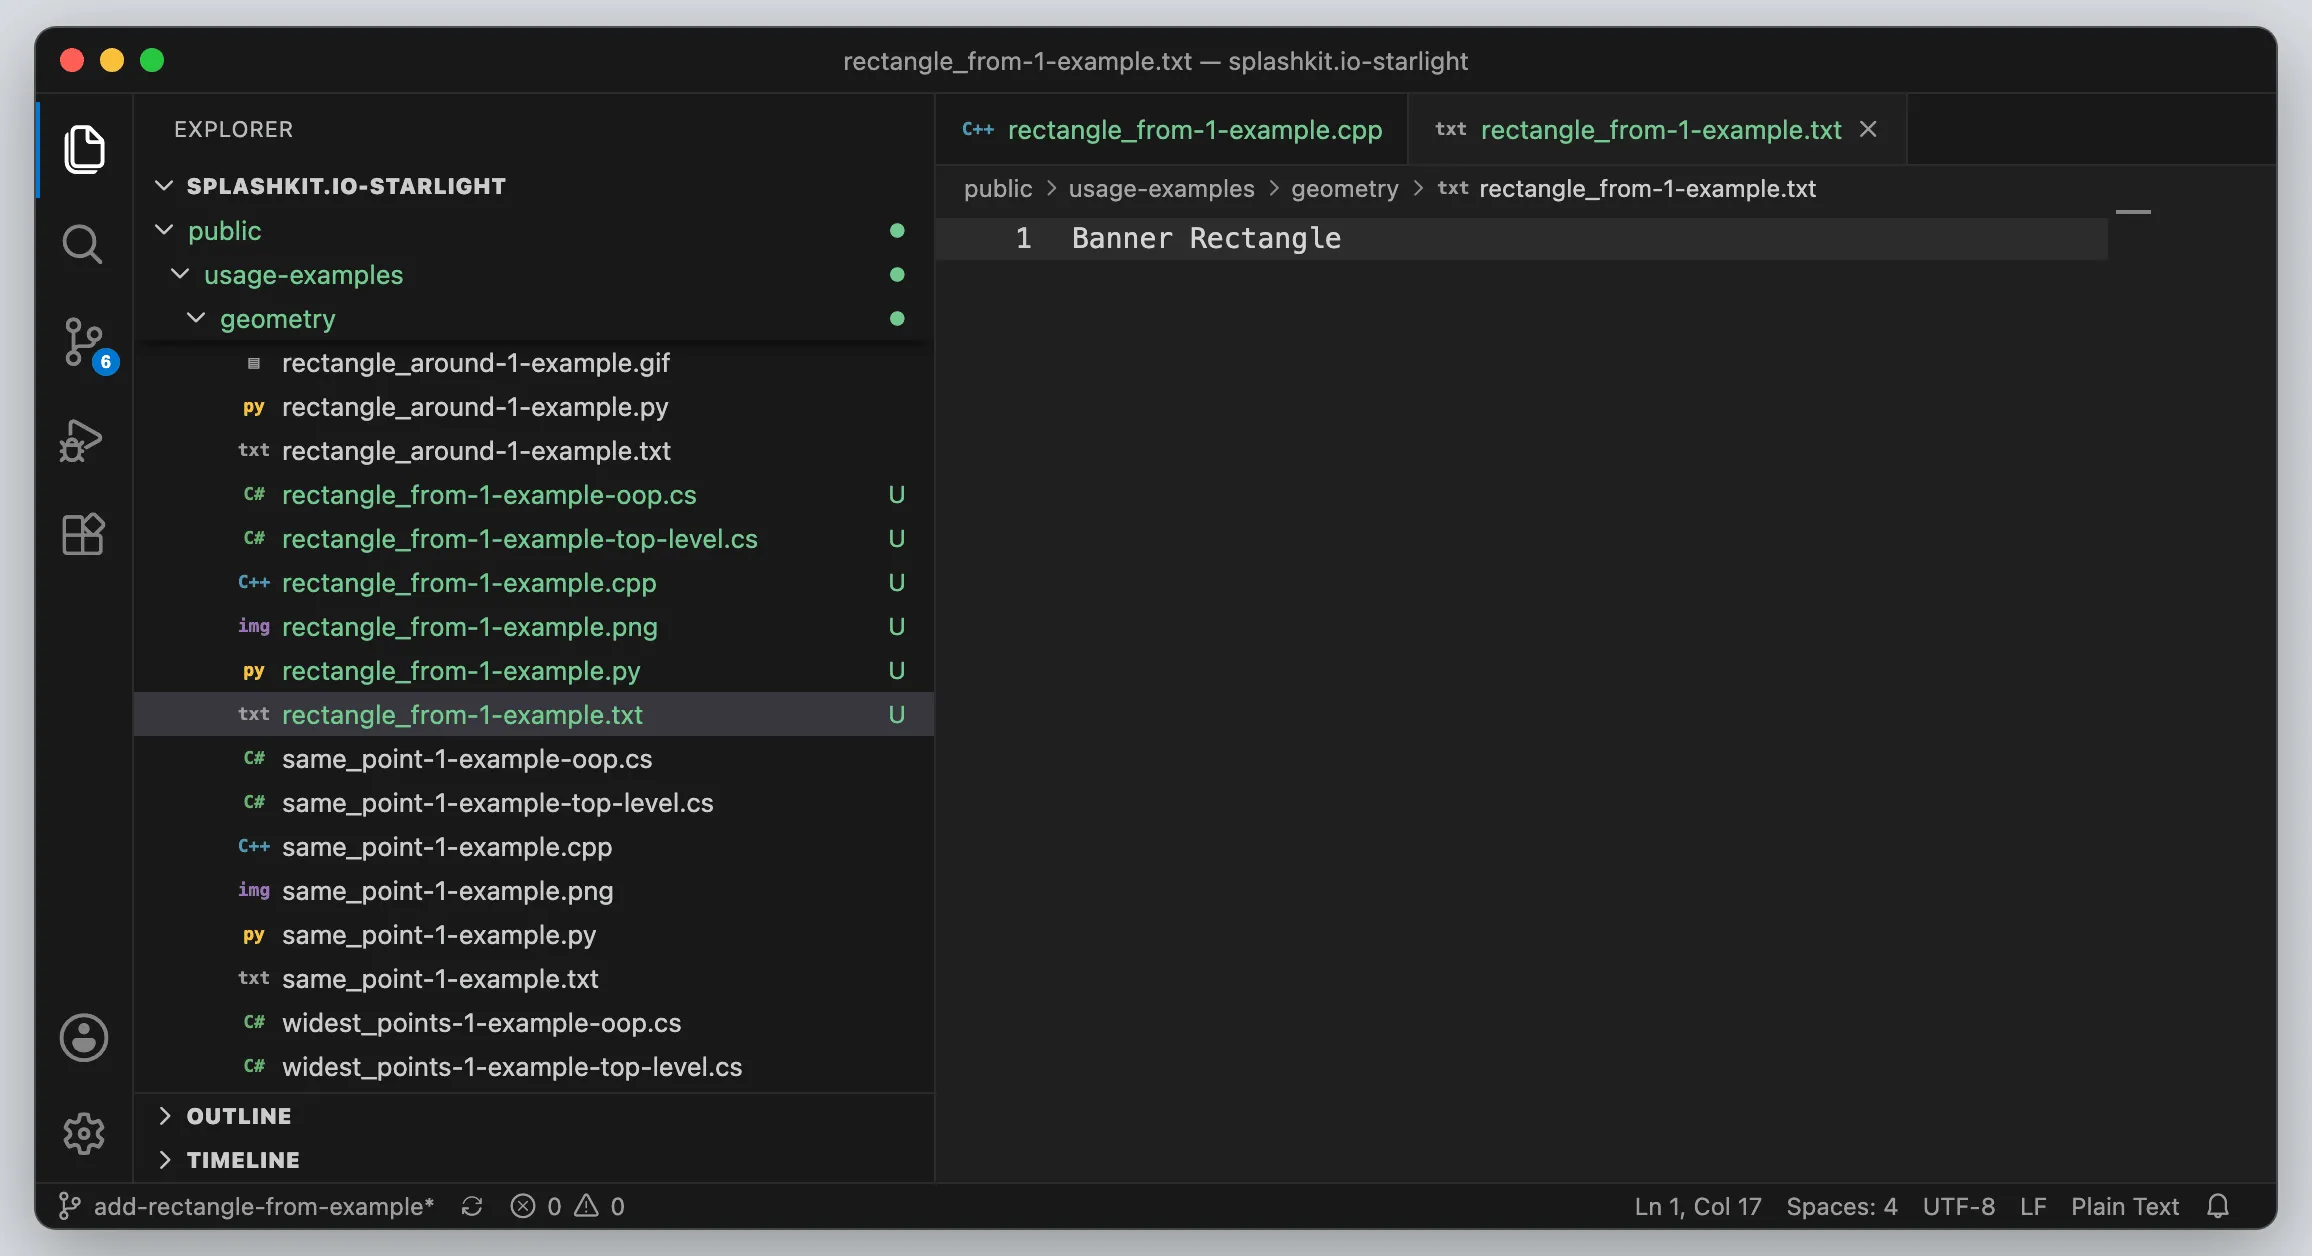
Section titled “9. Create the six files”Every example is six files in the category’s folder. The name of each one is the
unique_global_name, then -1-example, then an ending that says what the file is. The 1 is the
example’s number. Use 2 if the function already has a first example.
| File | What goes in it |
|---|---|
rectangle_from-1-example.txt | The title, on one line: Banner Rectangle |
rectangle_from-1-example.cpp | The C++ version |
rectangle_from-1-example-top-level.cs | The C# version, top-level statements |
rectangle_from-1-example-oop.cs | The C# version, object-oriented |
rectangle_from-1-example.py | The Python version |
rectangle_from-1-example.png | A picture of the program running (you take it in step 11) |
In VS Code, select the geometry folder in the file list, then select the New File icon above
the list. Do this for each one. New files show a green U, which means Git has not seen them
before. The screenshot below is taken once all six exist. Yours has only five until step 11.
The website shows the title from the .txt file as Example 1: Banner Rectangle.
10. Write and run each version
Section titled “10. Write and run each version”All the versions follow the same shape:
- Open a window with a name that describes the example, not the function.
- Call the function you are showing (
rectangle_fromin this example) once, before the loop. - Loop until the window is closed. Each time round the loop, process events, clear the screen, draw, then refresh the screen.
- Close the windows at the end.
Comments say why the code does something, not what it does. Keep the whole program short enough for a beginner to read in one go. The style guide has the full rules.
Save this as rectangle_from-1-example.cpp:
#include "splashkit.h"
int main(){    open_window("Banner Rectangle", 800, 400);
    // A rectangle record keeps a shape's position and size together in one variable    rectangle banner = rectangle_from(100, 80, 600, 120);
    while (!quit_requested())    {        process_events();
        clear_screen(COLOR_WHITE);
        fill_rectangle(COLOR_DODGER_BLUE, banner);        draw_rectangle(COLOR_BLACK, banner);
        // The record's fields hold the numbers that were passed in        draw_text("Banner x: " + to_string(static_cast<int>(banner.x)), COLOR_BLACK, 100, 240);        draw_text("Banner y: " + to_string(static_cast<int>(banner.y)), COLOR_BLACK, 100, 270);        draw_text("Banner width: " + to_string(static_cast<int>(banner.width)), COLOR_BLACK, 100, 300);        draw_text("Banner height: " + to_string(static_cast<int>(banner.height)), COLOR_BLACK, 100, 330);
        refresh_screen(60);    }
    close_all_windows();
    return 0;}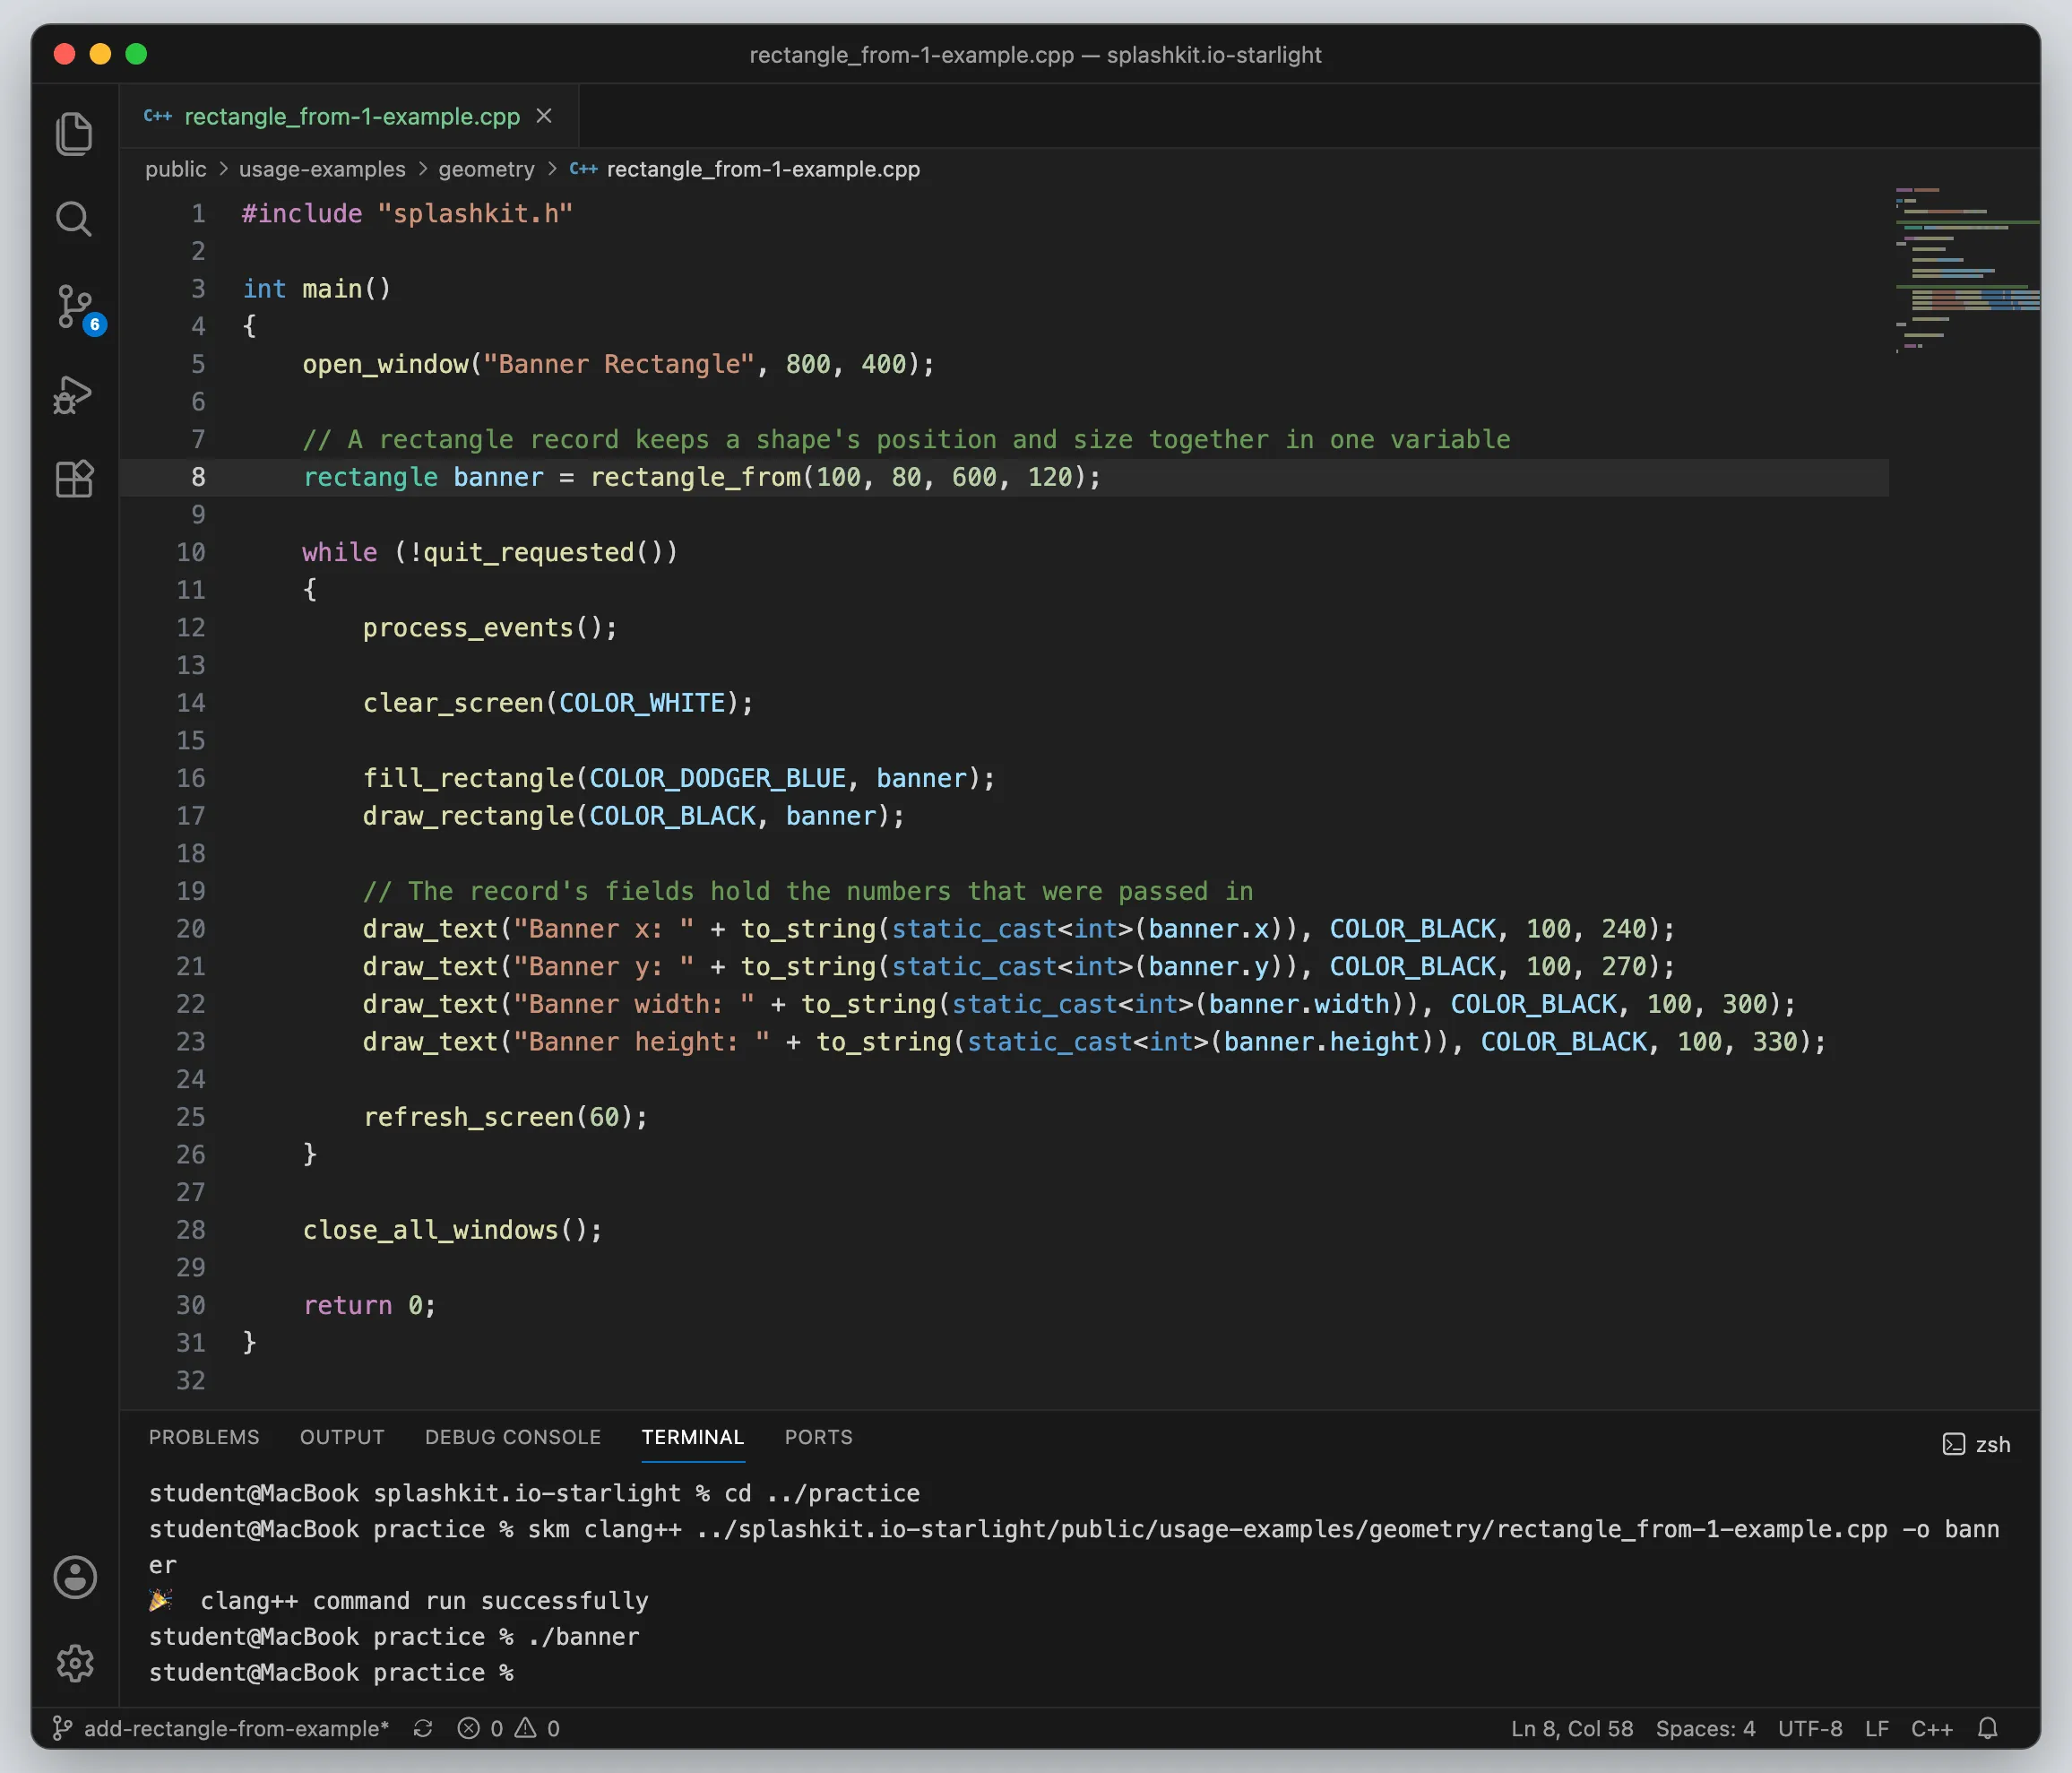
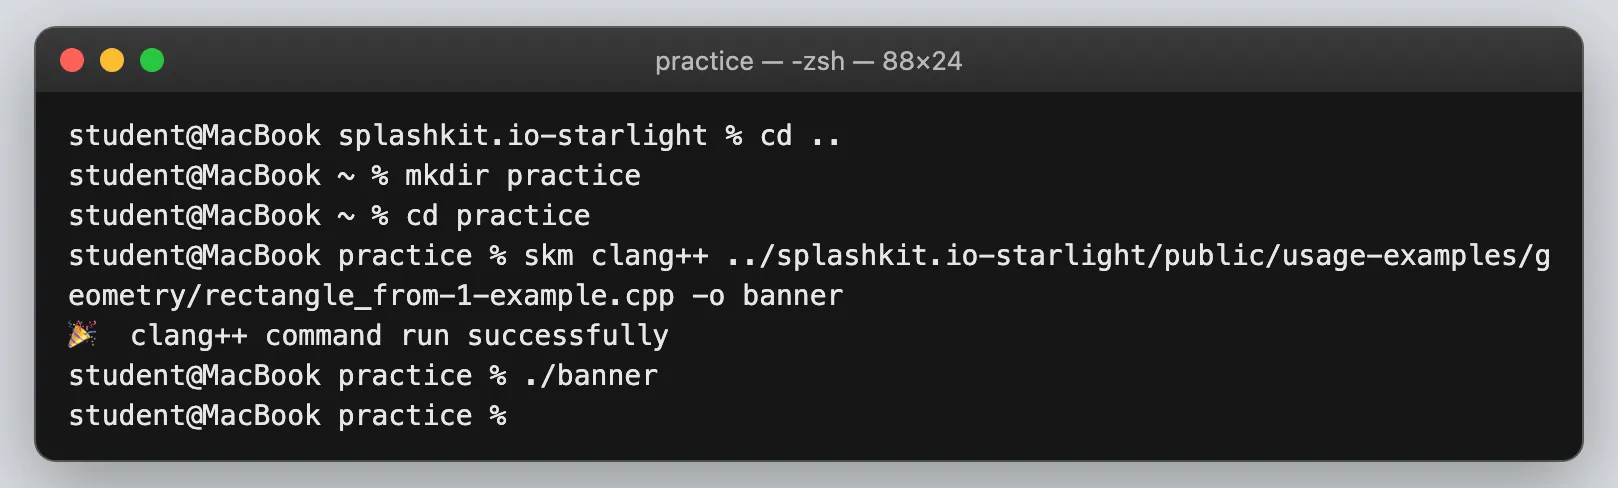
From the project folder, compile and run it in a practice folder:
cd ..mkdir practicecd practiceskm clang++ ../splashkit.io-starlight/public/usage-examples/geometry/rectangle_from-1-example.cpp -o banner./bannerskm clang++ compiles the file with SplashKit’s libraries, and -o banner names the program
banner. A success message means it compiled. Then ./banner opens the window. Close the window to
stop the program.
C# has two styles, and every example needs both. Save them as
rectangle_from-1-example-top-level.cs and rectangle_from-1-example-oop.cs. The top-level version
writes SplashKit’s types with a SplashKitSDK. prefix, such as SplashKitSDK.Rectangle. The
object-oriented version writes every function with a SplashKit. prefix.
using SplashKitSDK;using static SplashKitSDK.SplashKit;
OpenWindow("Banner Rectangle", 800, 400);
// A rectangle record keeps a shape's position and size together in one variableSplashKitSDK.Rectangle banner = RectangleFrom(100, 80, 600, 120);
while (!QuitRequested()){    ProcessEvents();
    ClearScreen(ColorWhite());
    FillRectangle(ColorDodgerBlue(), banner);    DrawRectangle(ColorBlack(), banner);
    // The record's fields hold the numbers that were passed in    DrawText("Banner x: " + (int)banner.X, ColorBlack(), 100, 240);    DrawText("Banner y: " + (int)banner.Y, ColorBlack(), 100, 270);    DrawText("Banner width: " + (int)banner.Width, ColorBlack(), 100, 300);    DrawText("Banner height: " + (int)banner.Height, ColorBlack(), 100, 330);
    RefreshScreen(60);}
CloseAllWindows();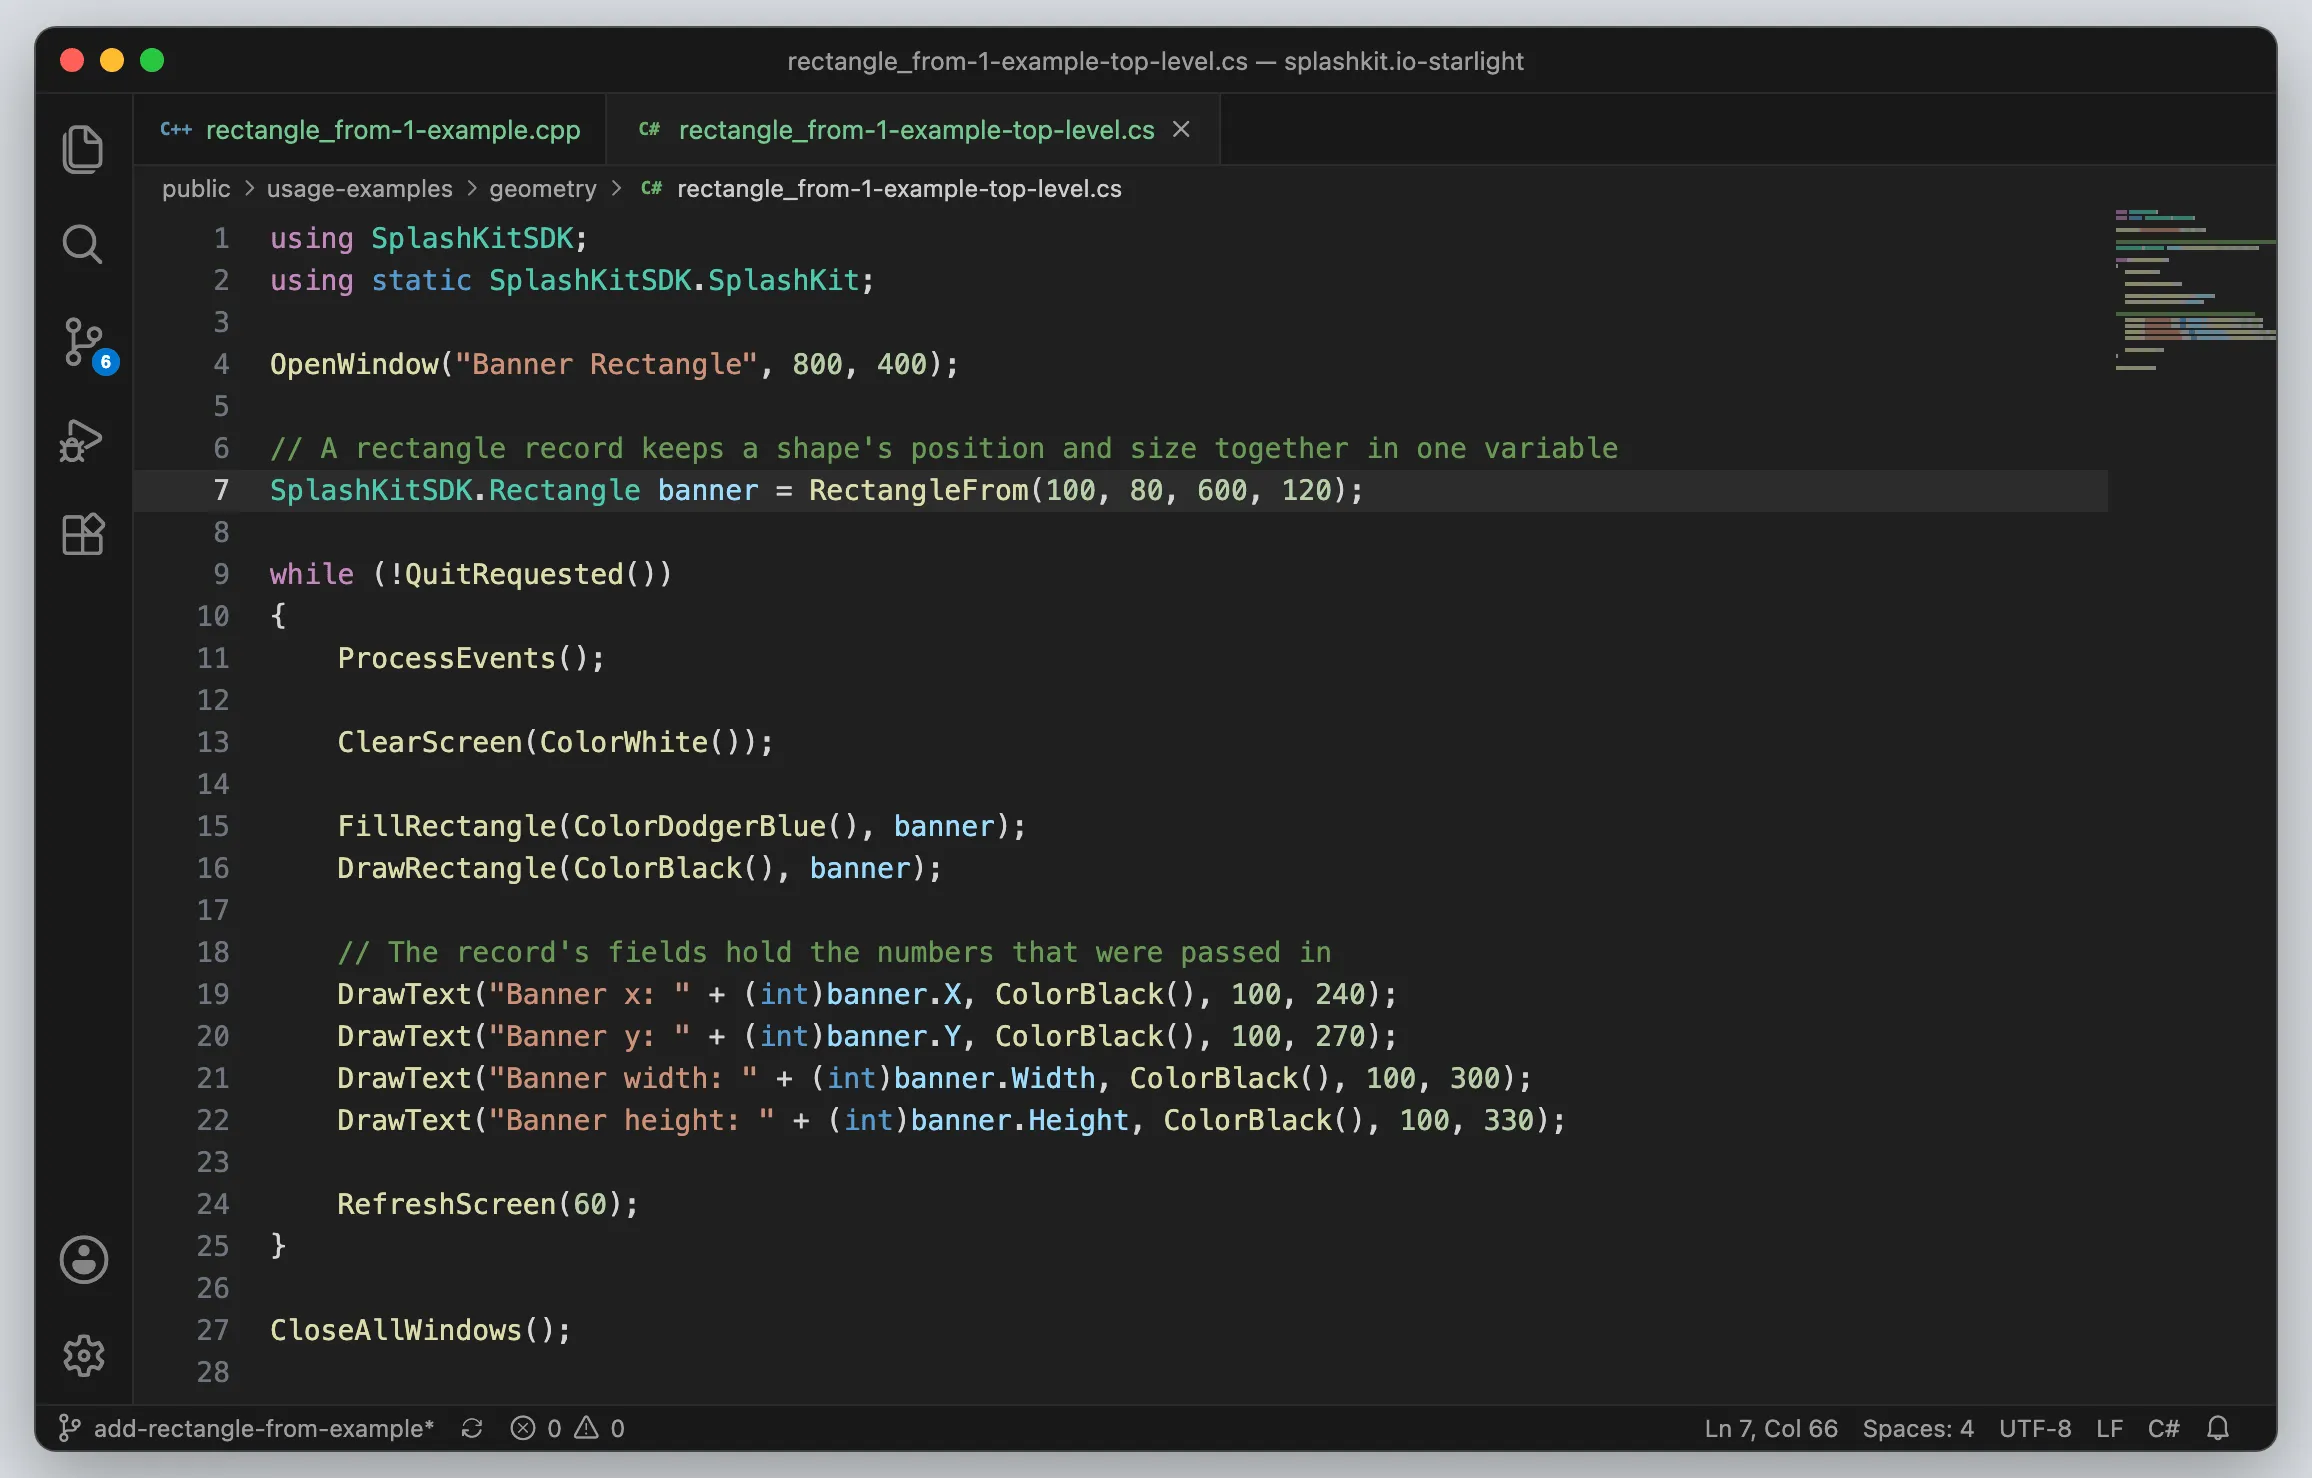
using SplashKitSDK;
namespace RectangleFromExample{    public static class Program    {        public static void Main()        {            SplashKit.OpenWindow("Banner Rectangle", 800, 400);
            // A rectangle record keeps a shape's position and size together in one variable            Rectangle banner = SplashKit.RectangleFrom(100, 80, 600, 120);
            while (!SplashKit.QuitRequested())            {                SplashKit.ProcessEvents();
                SplashKit.ClearScreen(Color.White);
                SplashKit.FillRectangle(Color.DodgerBlue, banner);                SplashKit.DrawRectangle(Color.Black, banner);
                // The record's fields hold the numbers that were passed in                SplashKit.DrawText("Banner x: " + (int)banner.X, Color.Black, 100, 240);                SplashKit.DrawText("Banner y: " + (int)banner.Y, Color.Black, 100, 270);                SplashKit.DrawText("Banner width: " + (int)banner.Width, Color.Black, 100, 300);                SplashKit.DrawText("Banner height: " + (int)banner.Height, Color.Black, 100, 330);
                SplashKit.RefreshScreen(60);            }
            SplashKit.CloseAllWindows();        }    }}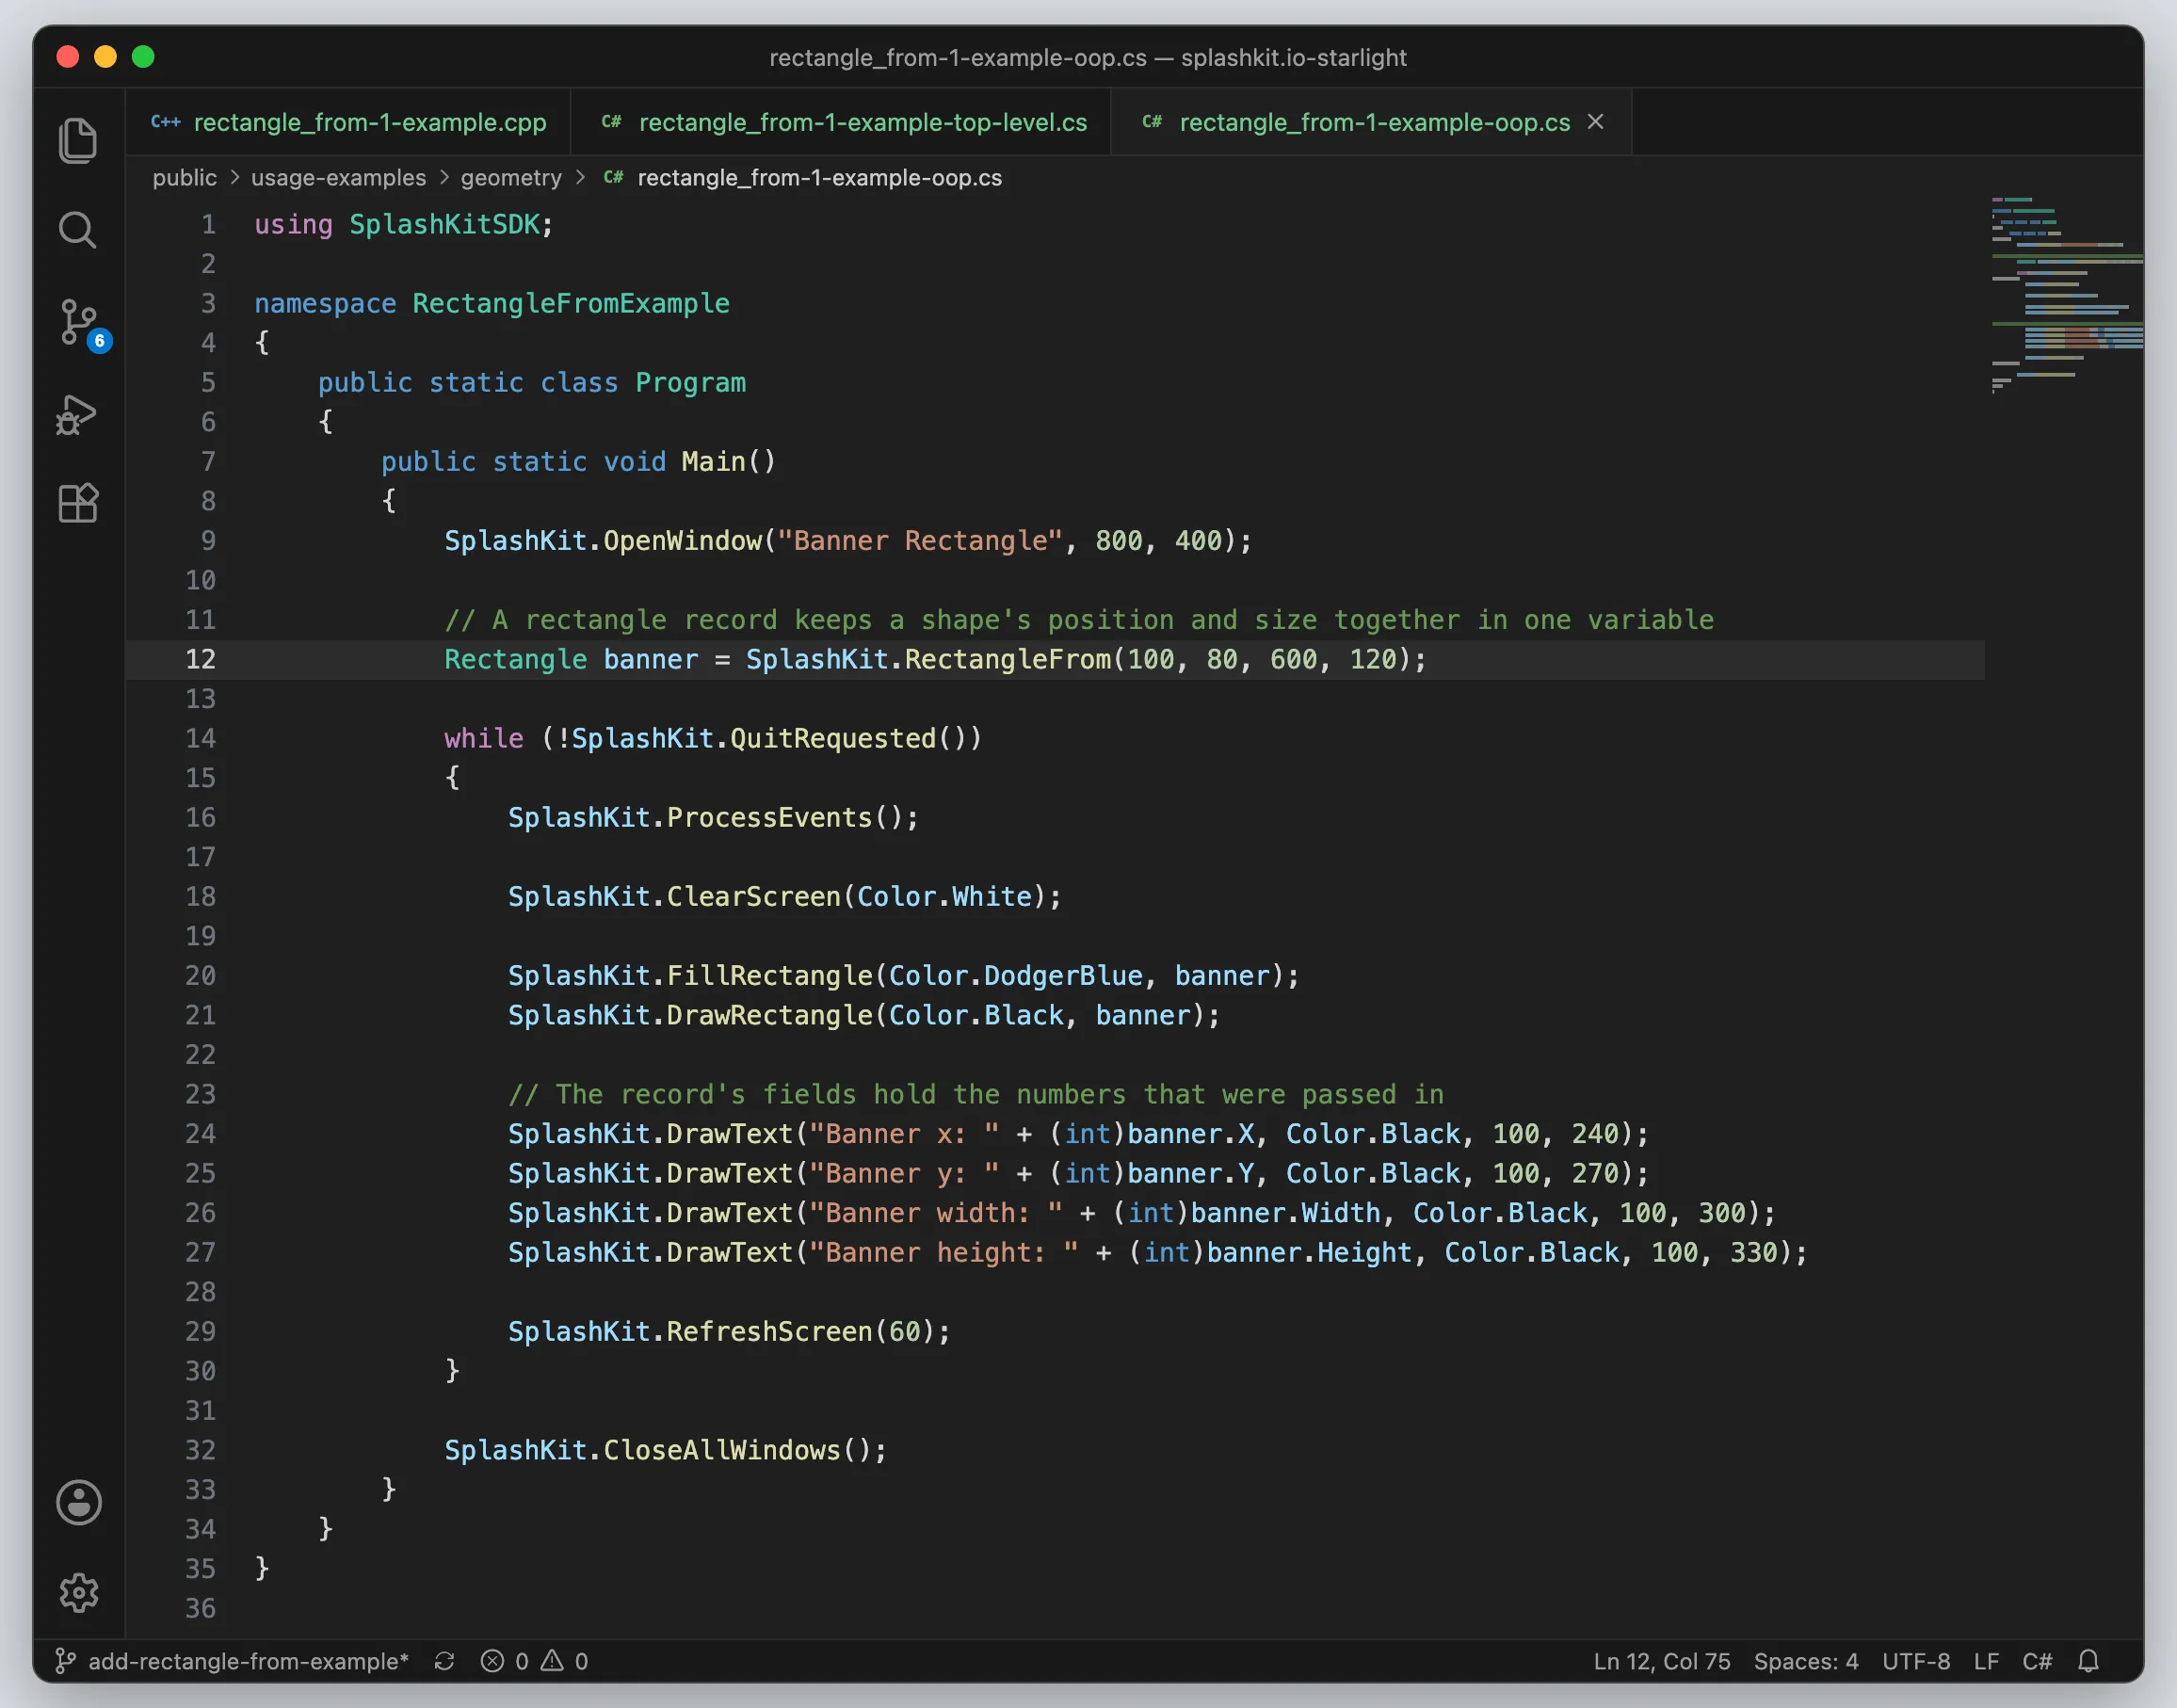
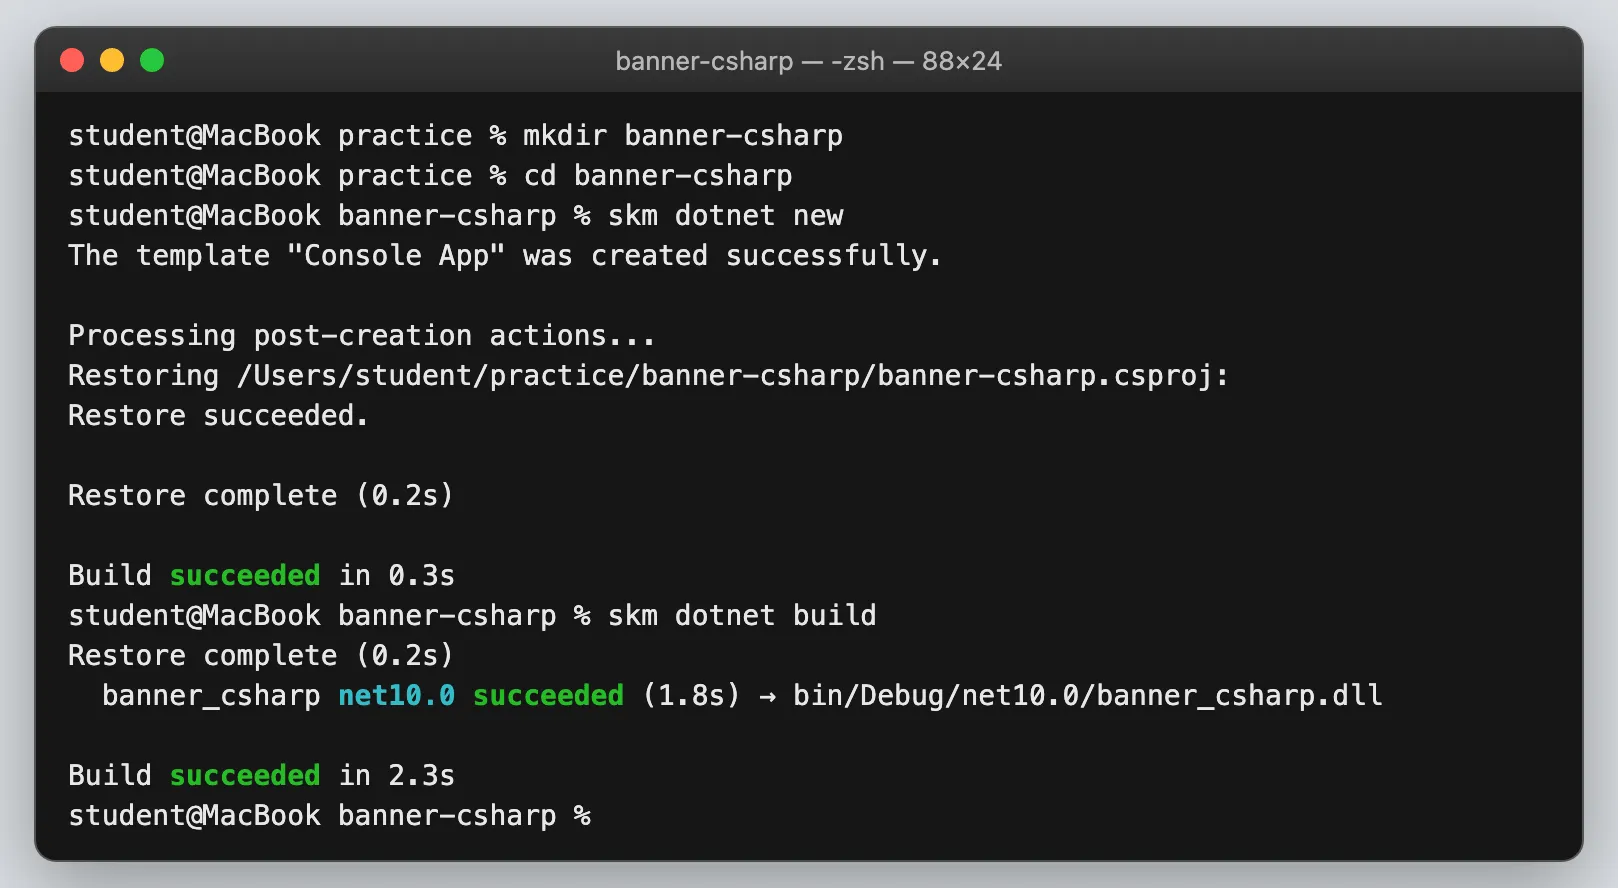
To run C# code, make a small project in your practice folder. If you have no practice folder, run
mkdir practice next to the project first.
mkdir banner-csharpcd banner-csharpskm dotnet newOpen the new Program.cs, replace everything in it with one of the versions above, and save. Then
run it:
skm dotnet runskm dotnet build only compiles. skm dotnet run compiles and opens the window. The two styles
cannot share one project, so test them one at a time: put the other version into Program.cs and
run it again.
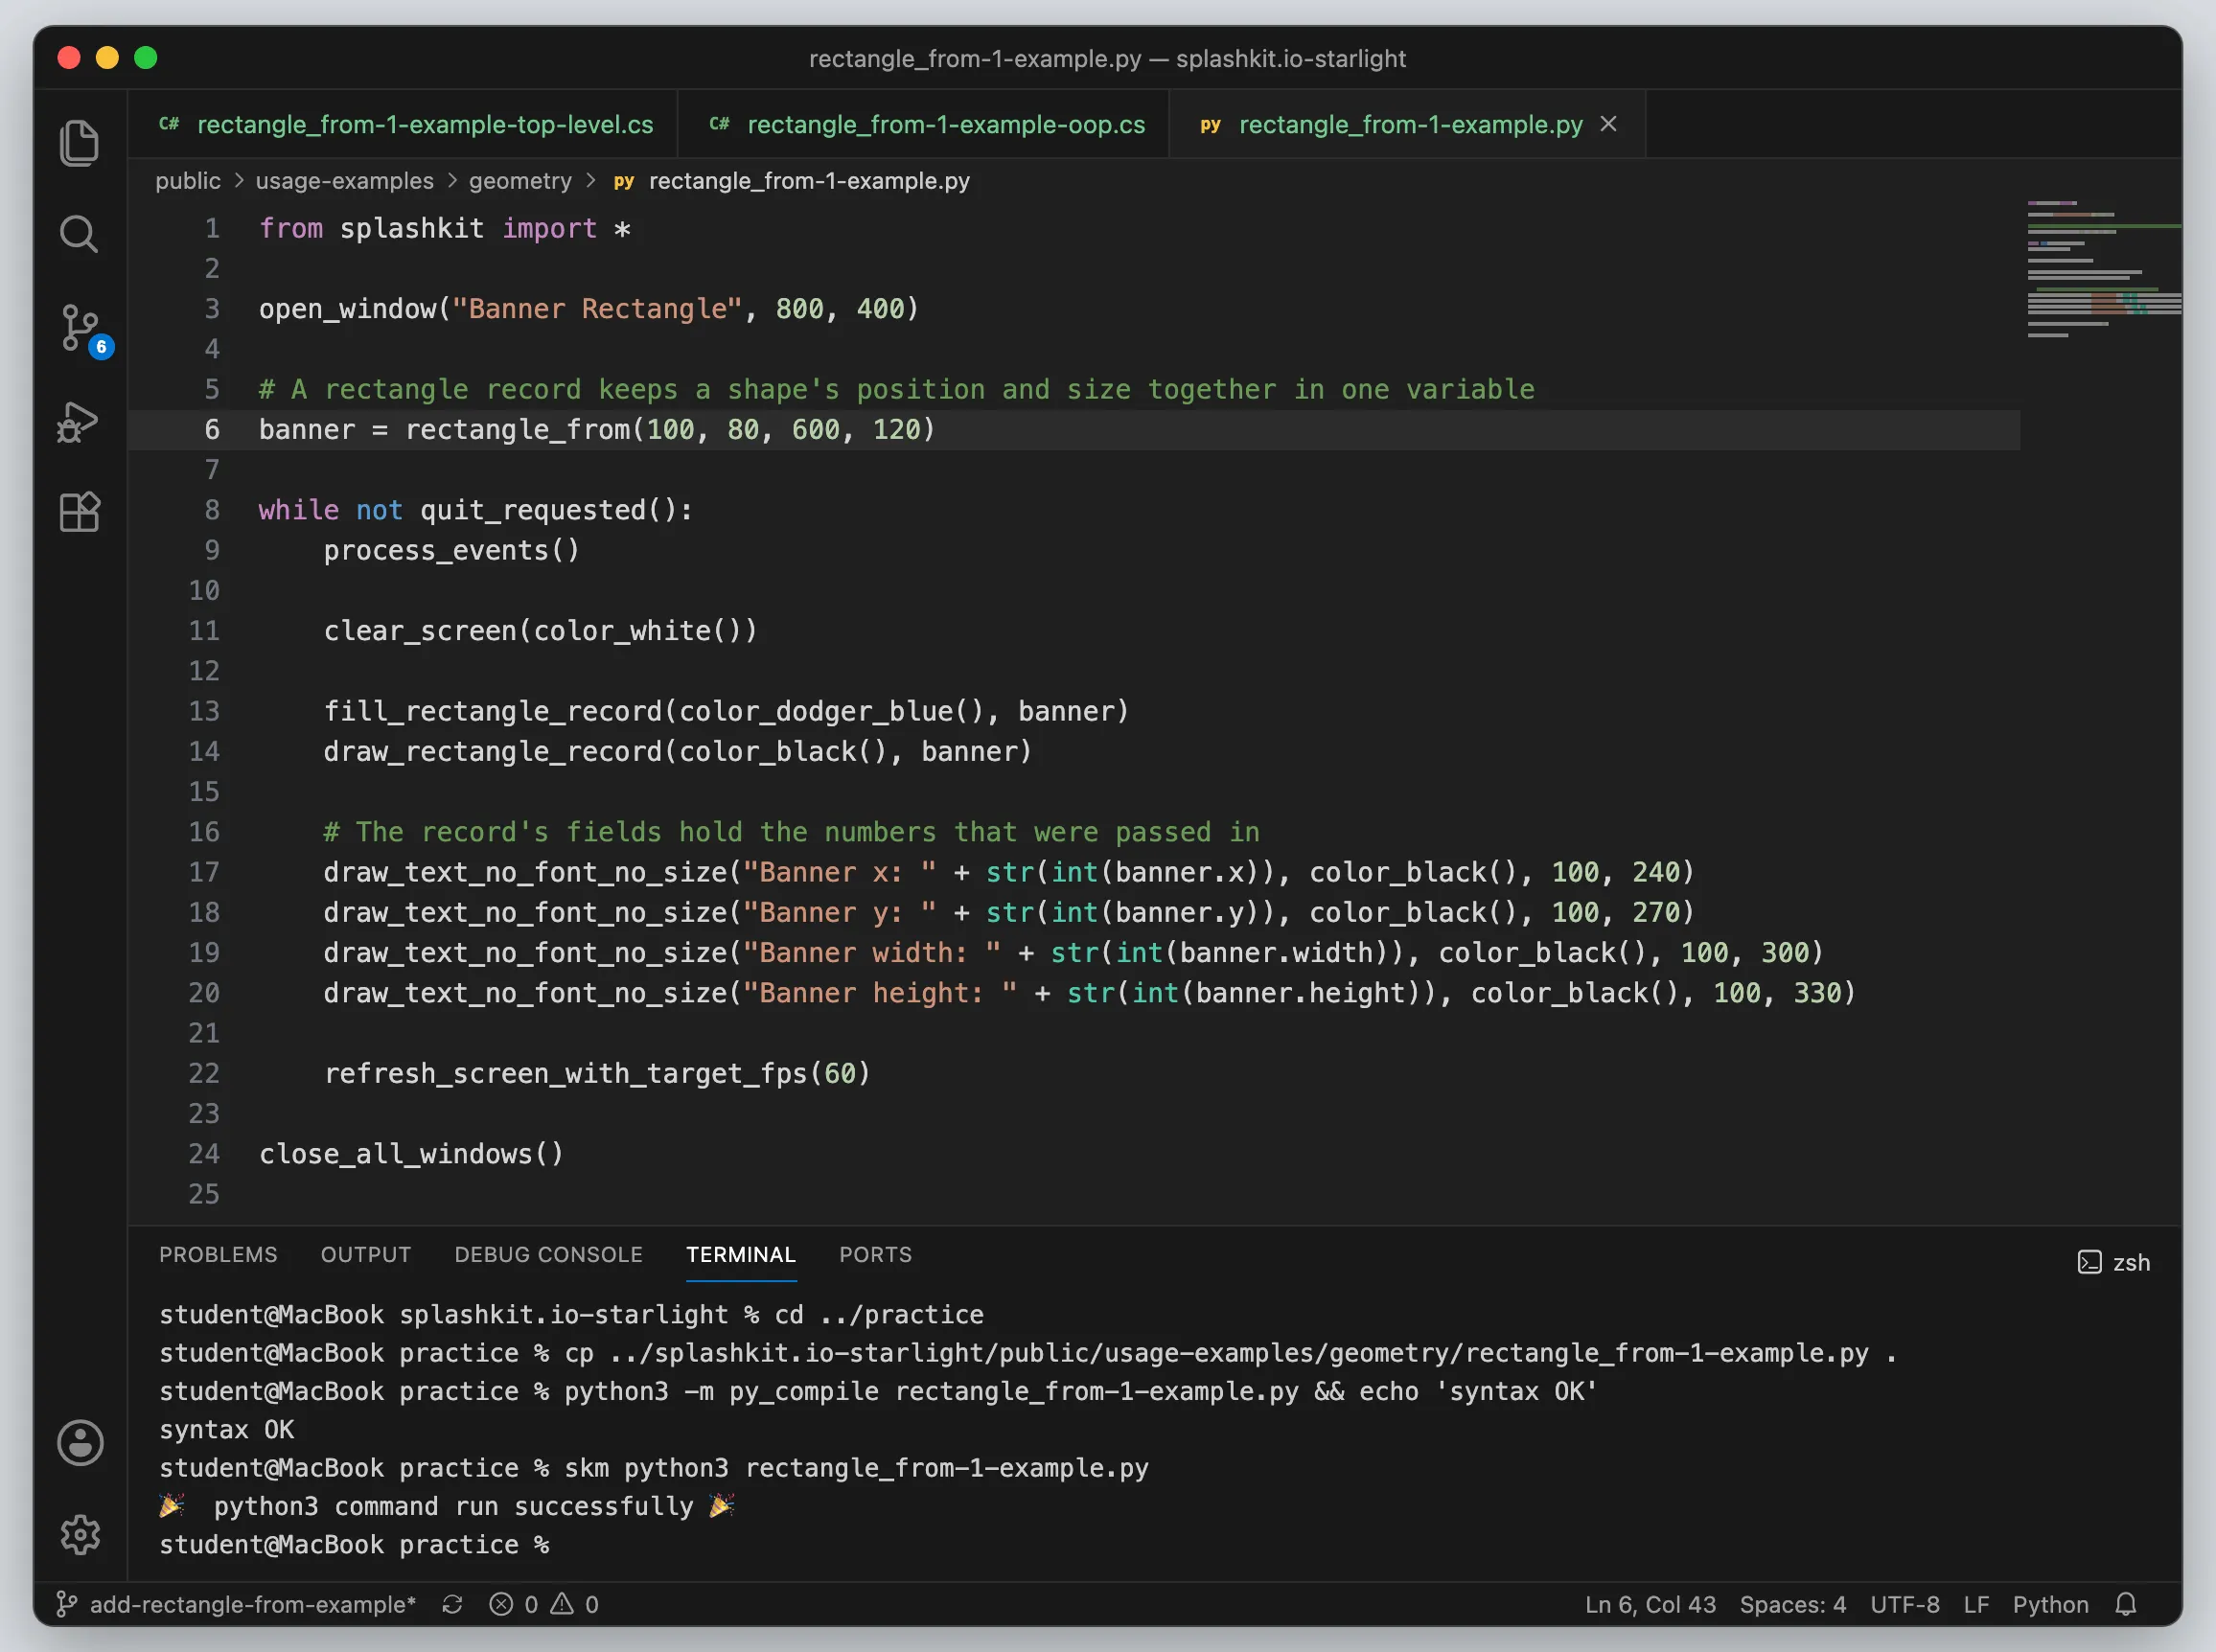
Save this as rectangle_from-1-example.py. Python has no overloading, so some SplashKit functions
have longer names in Python: fill_rectangle_record, draw_rectangle_record,
draw_text_no_font_no_size and refresh_screen_with_target_fps. Open the Python tab under
Signatures on each function’s API page to check its exact name.
from splashkit import *
open_window("Banner Rectangle", 800, 400)
# A rectangle record keeps a shape's position and size together in one variablebanner = rectangle_from(100, 80, 600, 120)
while not quit_requested():    process_events()
    clear_screen(color_white())
    fill_rectangle_record(color_dodger_blue(), banner)    draw_rectangle_record(color_black(), banner)
    # The record's fields hold the numbers that were passed in    draw_text_no_font_no_size("Banner x: " + str(int(banner.x)), color_black(), 100, 240)    draw_text_no_font_no_size("Banner y: " + str(int(banner.y)), color_black(), 100, 270)    draw_text_no_font_no_size("Banner width: " + str(int(banner.width)), color_black(), 100, 300)    draw_text_no_font_no_size("Banner height: " + str(int(banner.height)), color_black(), 100, 330)
    refresh_screen_with_target_fps(60)
close_all_windows()
From the project folder, copy the file into the practice folder, check it for typos, then run it:
cd ../practicecp ../splashkit.io-starlight/public/usage-examples/geometry/rectangle_from-1-example.py .python3 -m py_compile rectangle_from-1-example.py && echo 'syntax OK'skm python3 rectangle_from-1-example.pypy_compile only checks the syntax, so it can not catch a wrong function name. The last command
runs the program through SplashKit. A mistyped function name stops it with a NameError.
11. Take the output picture
Section titled “11. Take the output picture”Every example needs a picture of it running. Use a .png for a window that stays still, like this
one, and a .gif when something moves or reacts to the mouse or keyboard. Name it
rectangle_from-1-example.png and put it in the same folder as the other five files.
Take the screenshot of the running program:
- macOS: press Cmd+Shift+4, then Space, then select the example window. Hold Option as you select it to leave out the window’s shadow. The picture saves to your desktop.
- Windows: press Win+Shift+S and drag a box around the window.
- Linux: most desktops use Print Screen for the whole screen and Alt+Print Screen for one window. Check your desktop’s settings.
Check the picture before you keep it:
- It shows the example window and nothing else. No desktop, dock, other windows, notifications or file paths.
- Nothing in it names you. A username can hide in a terminal prompt or a window title.
- The window’s title describes the example. It is not the function’s name.
Rename the file and move it into public/usage-examples/geometry/.
Check your work
Section titled “Check your work”12. See it on the website
Section titled “12. See it on the website”The website builds its list of examples when npm run dev starts. Stop the website with Ctrl+C in
the first terminal, then start it again:
npm run devOpen localhost:4321/api/geometry/#rectangle-from again. Under Usage there is now a See Code Examples button.
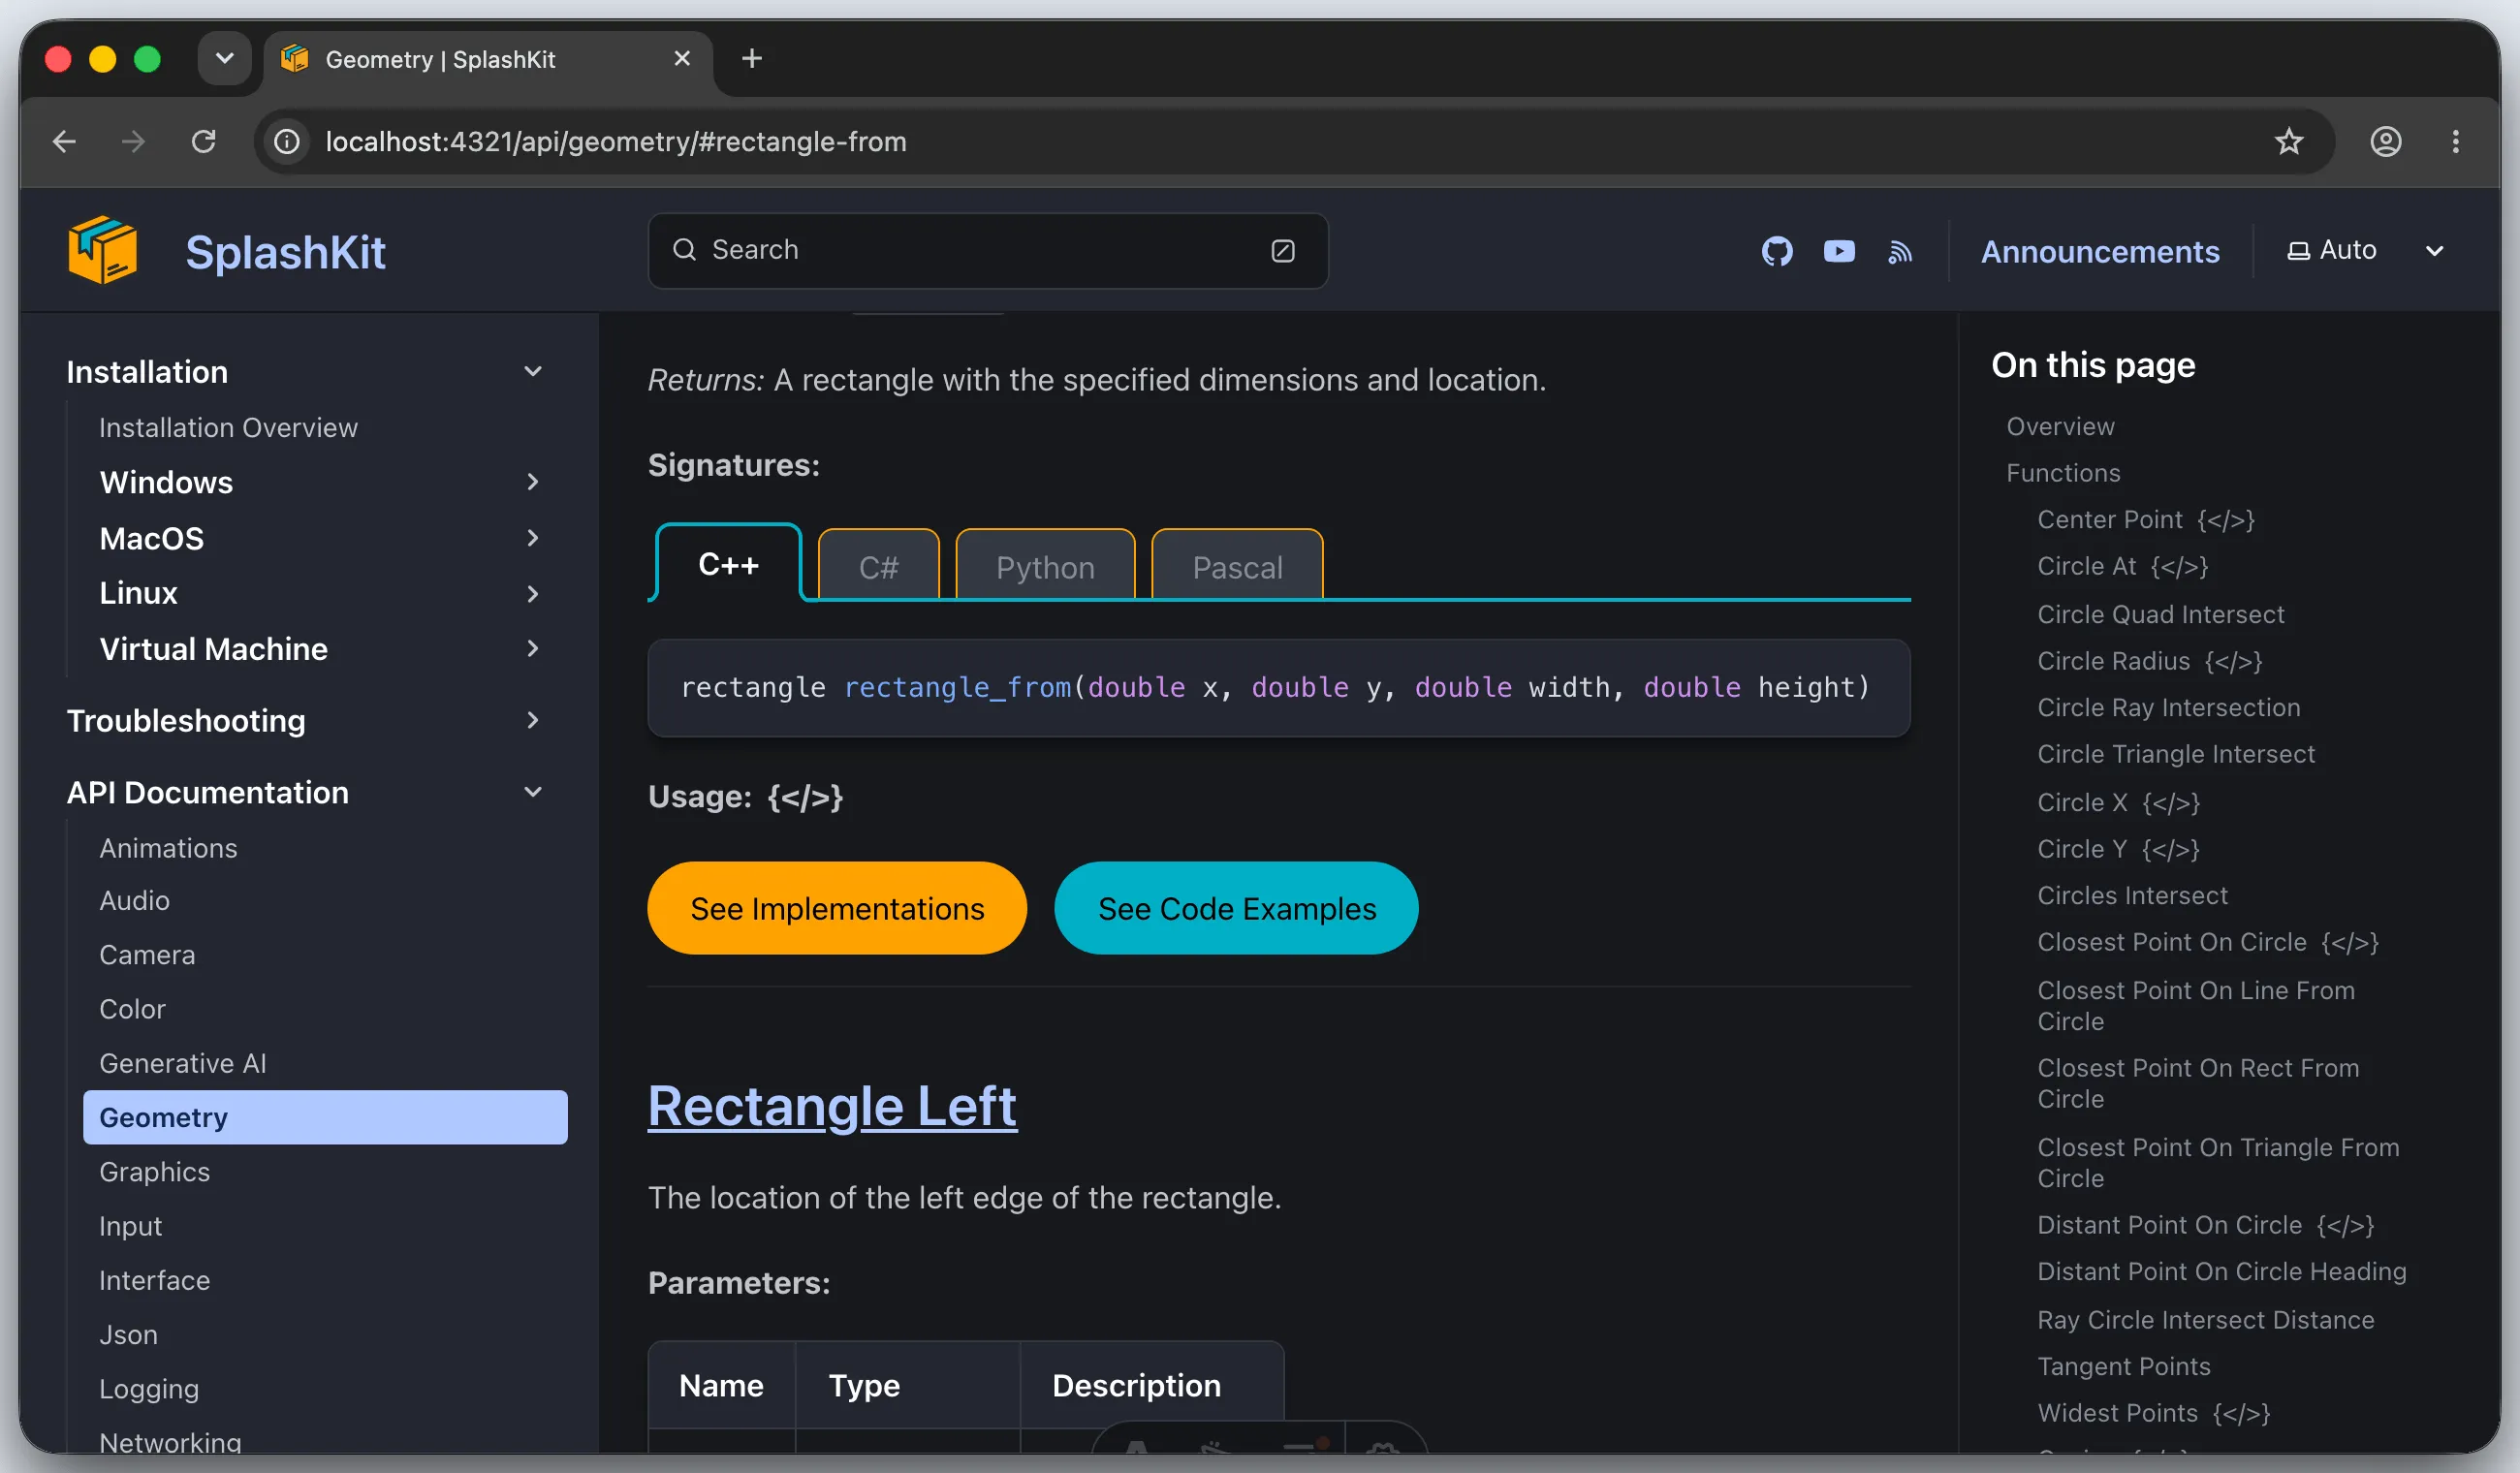
Select it, then check each tab in turn:
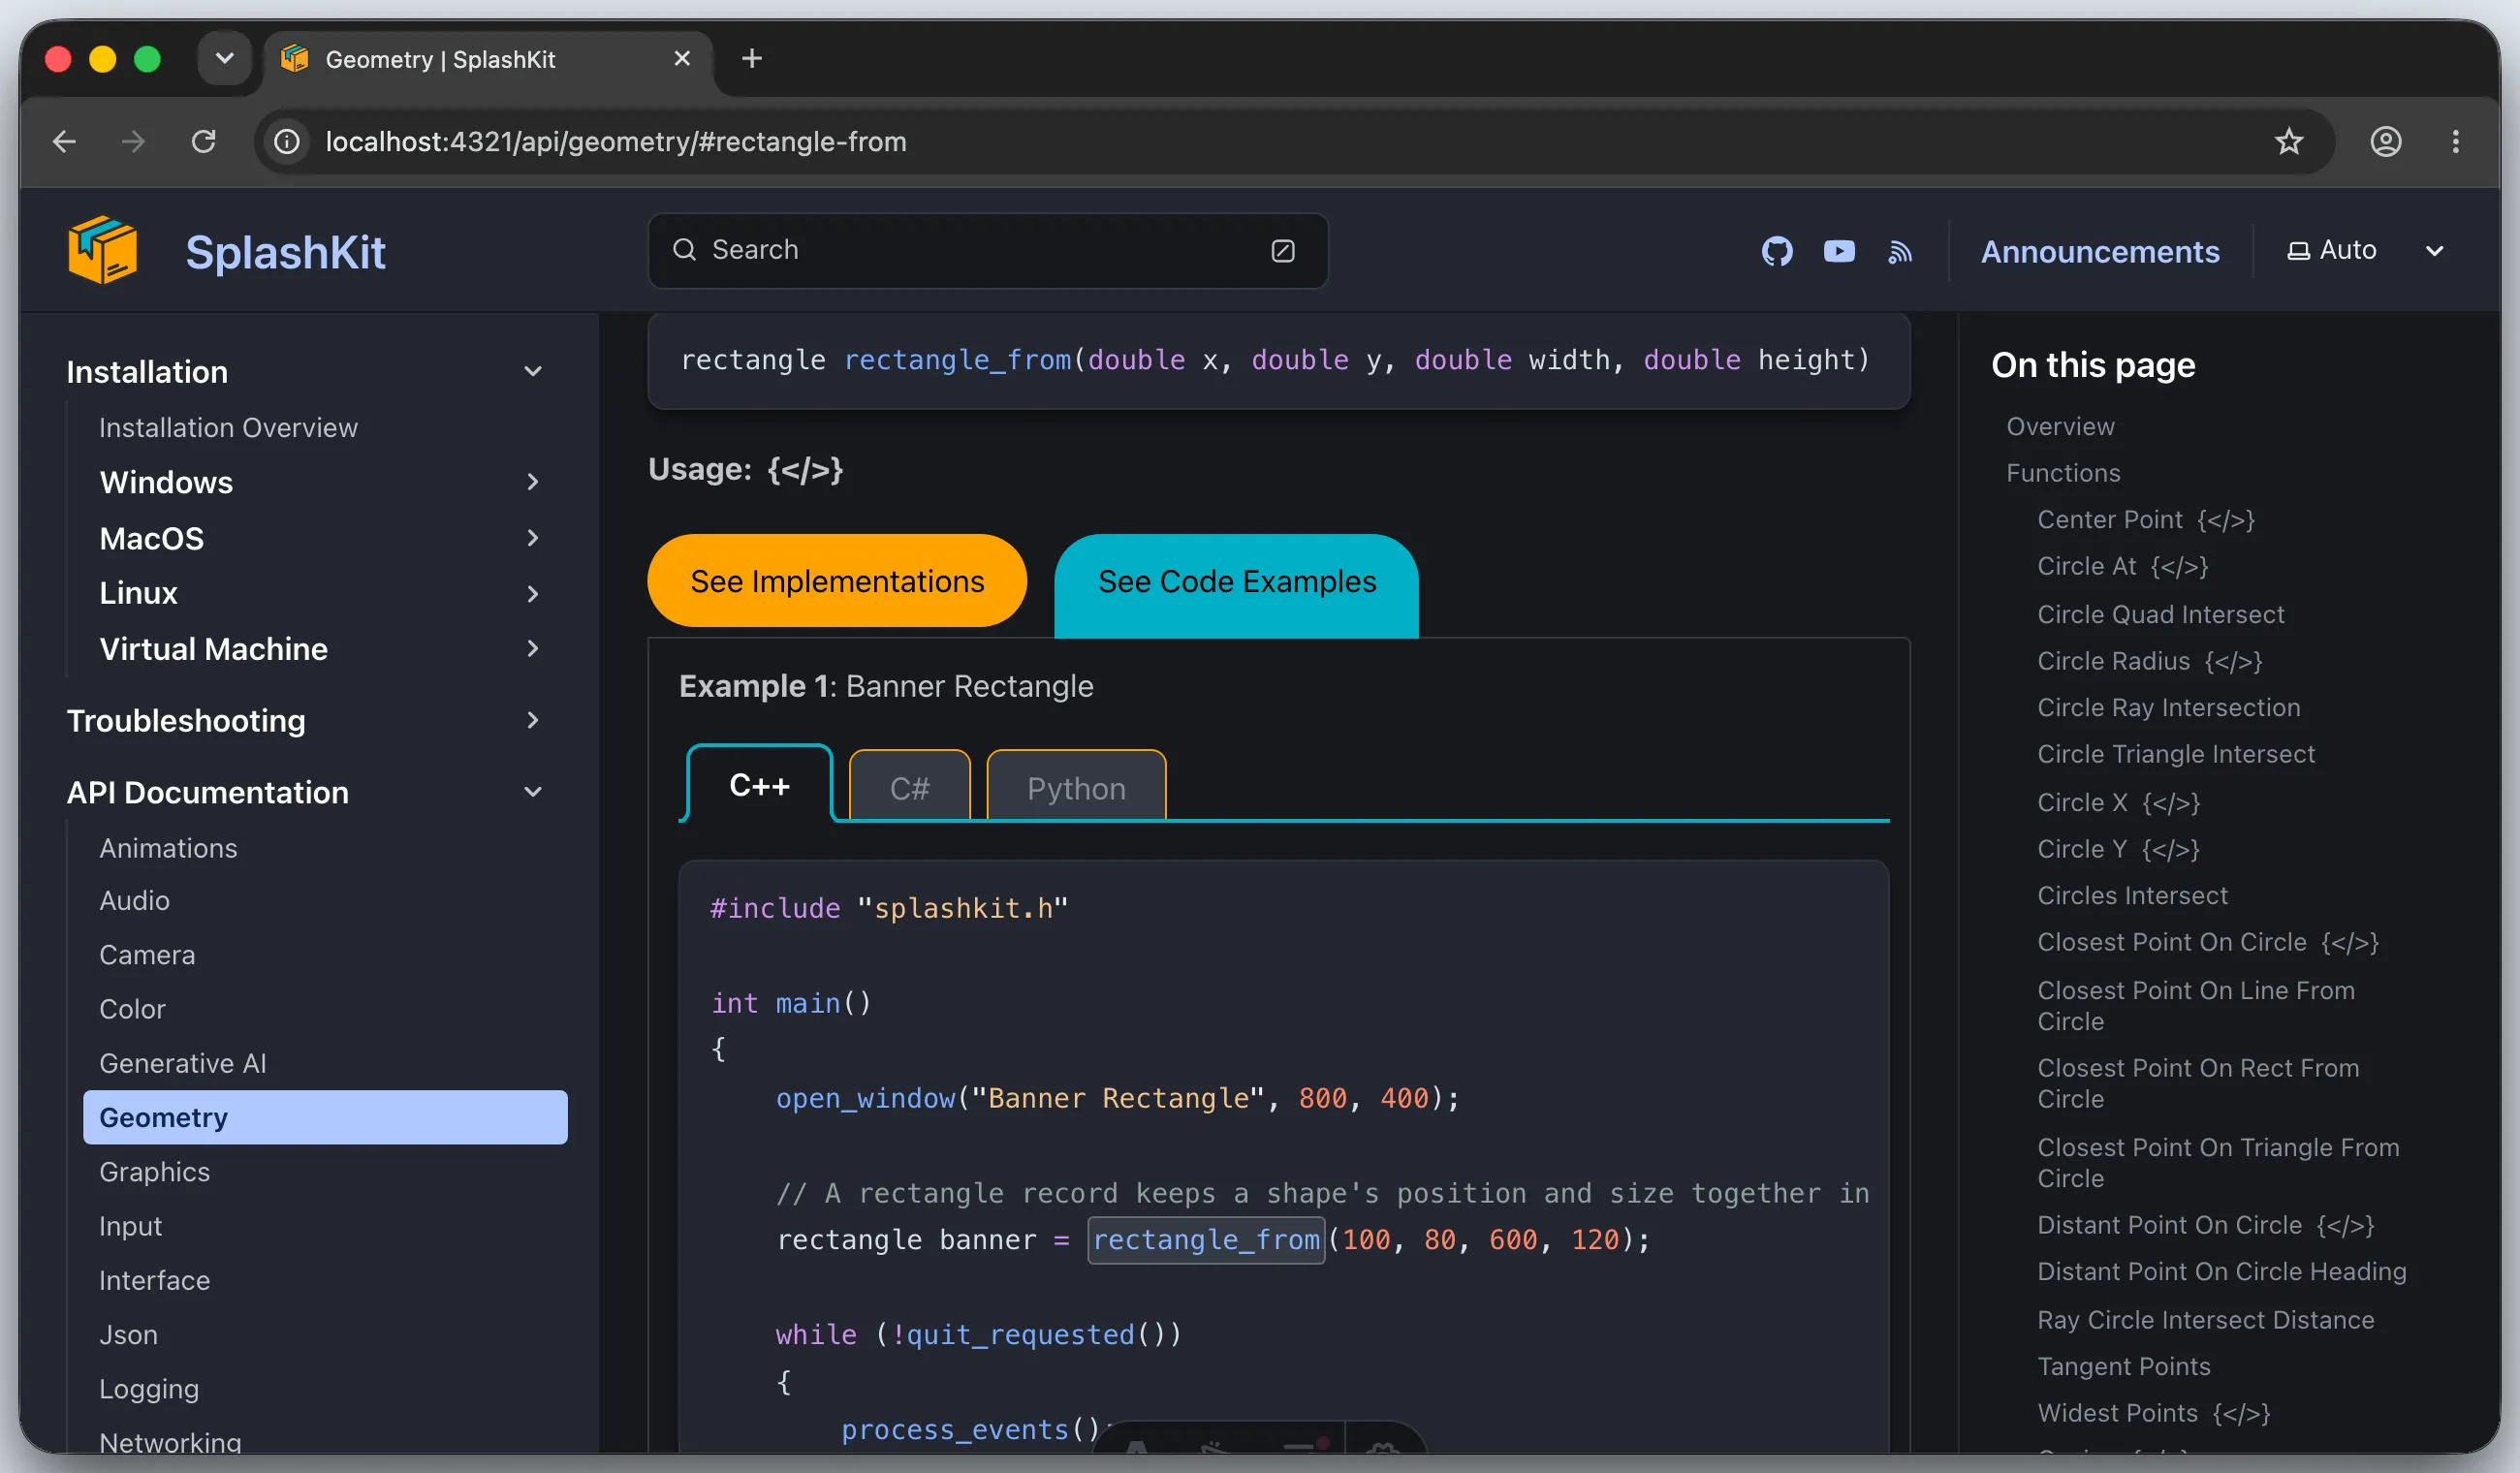
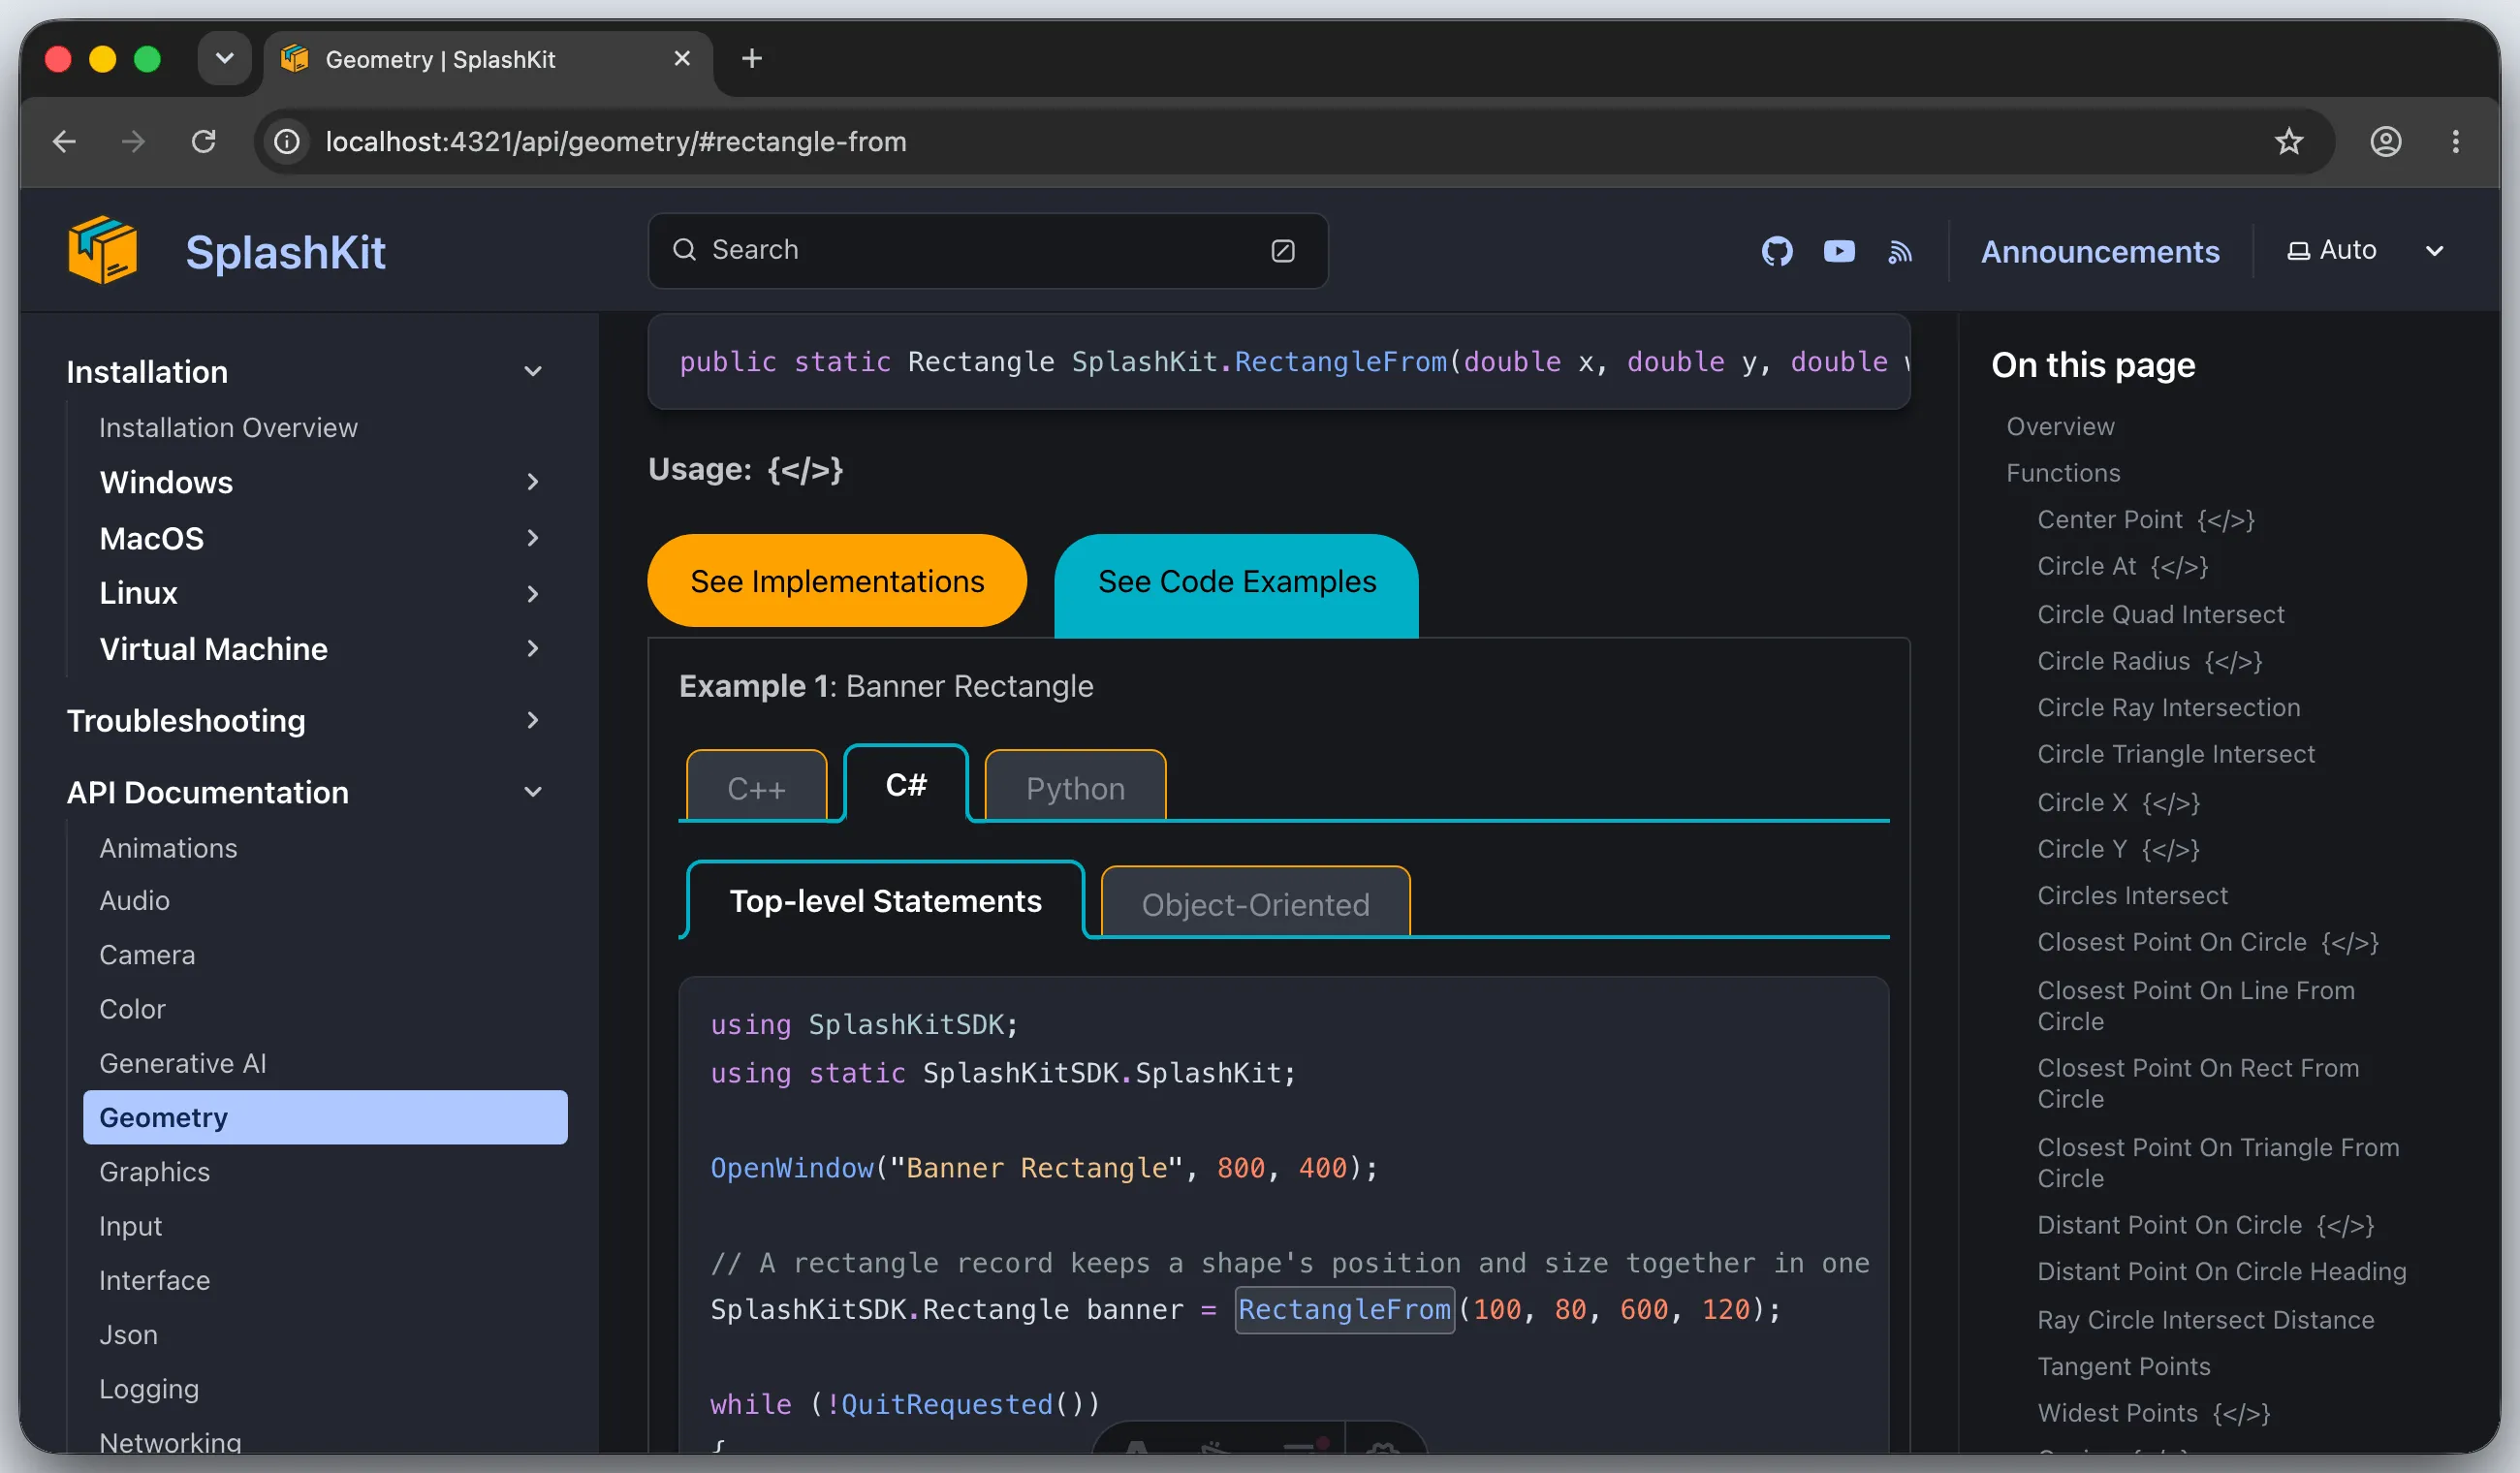
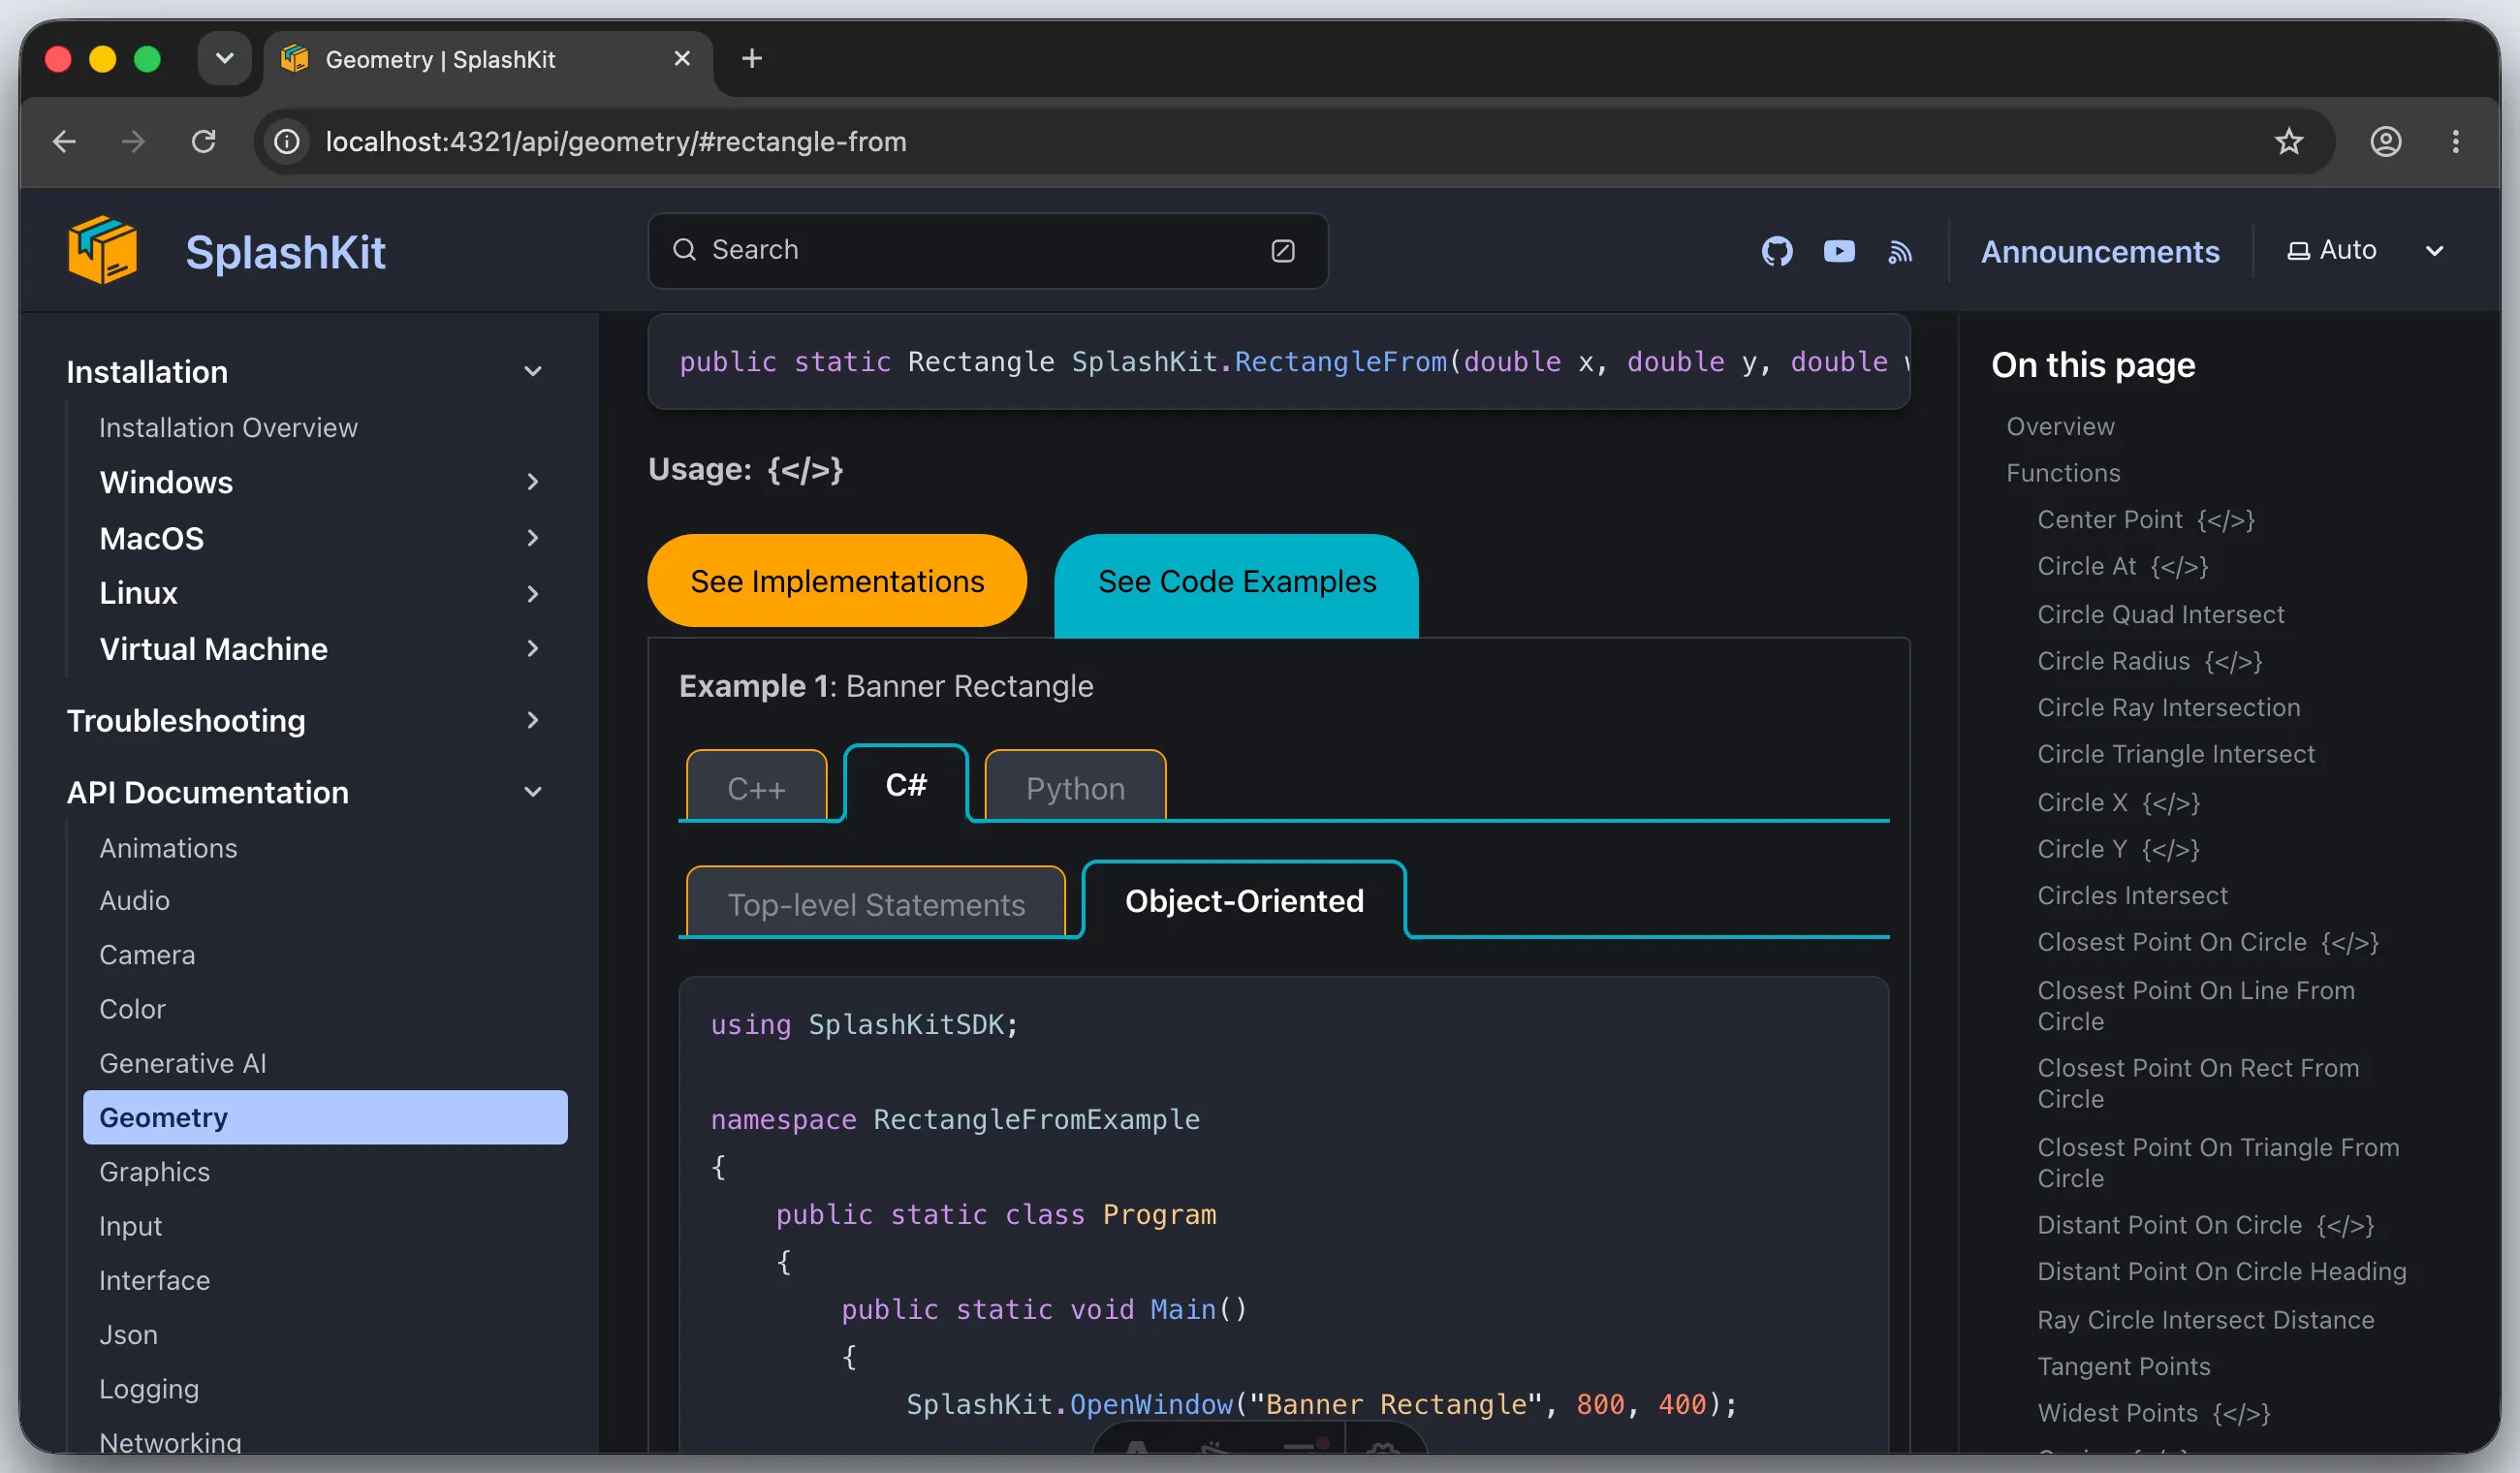
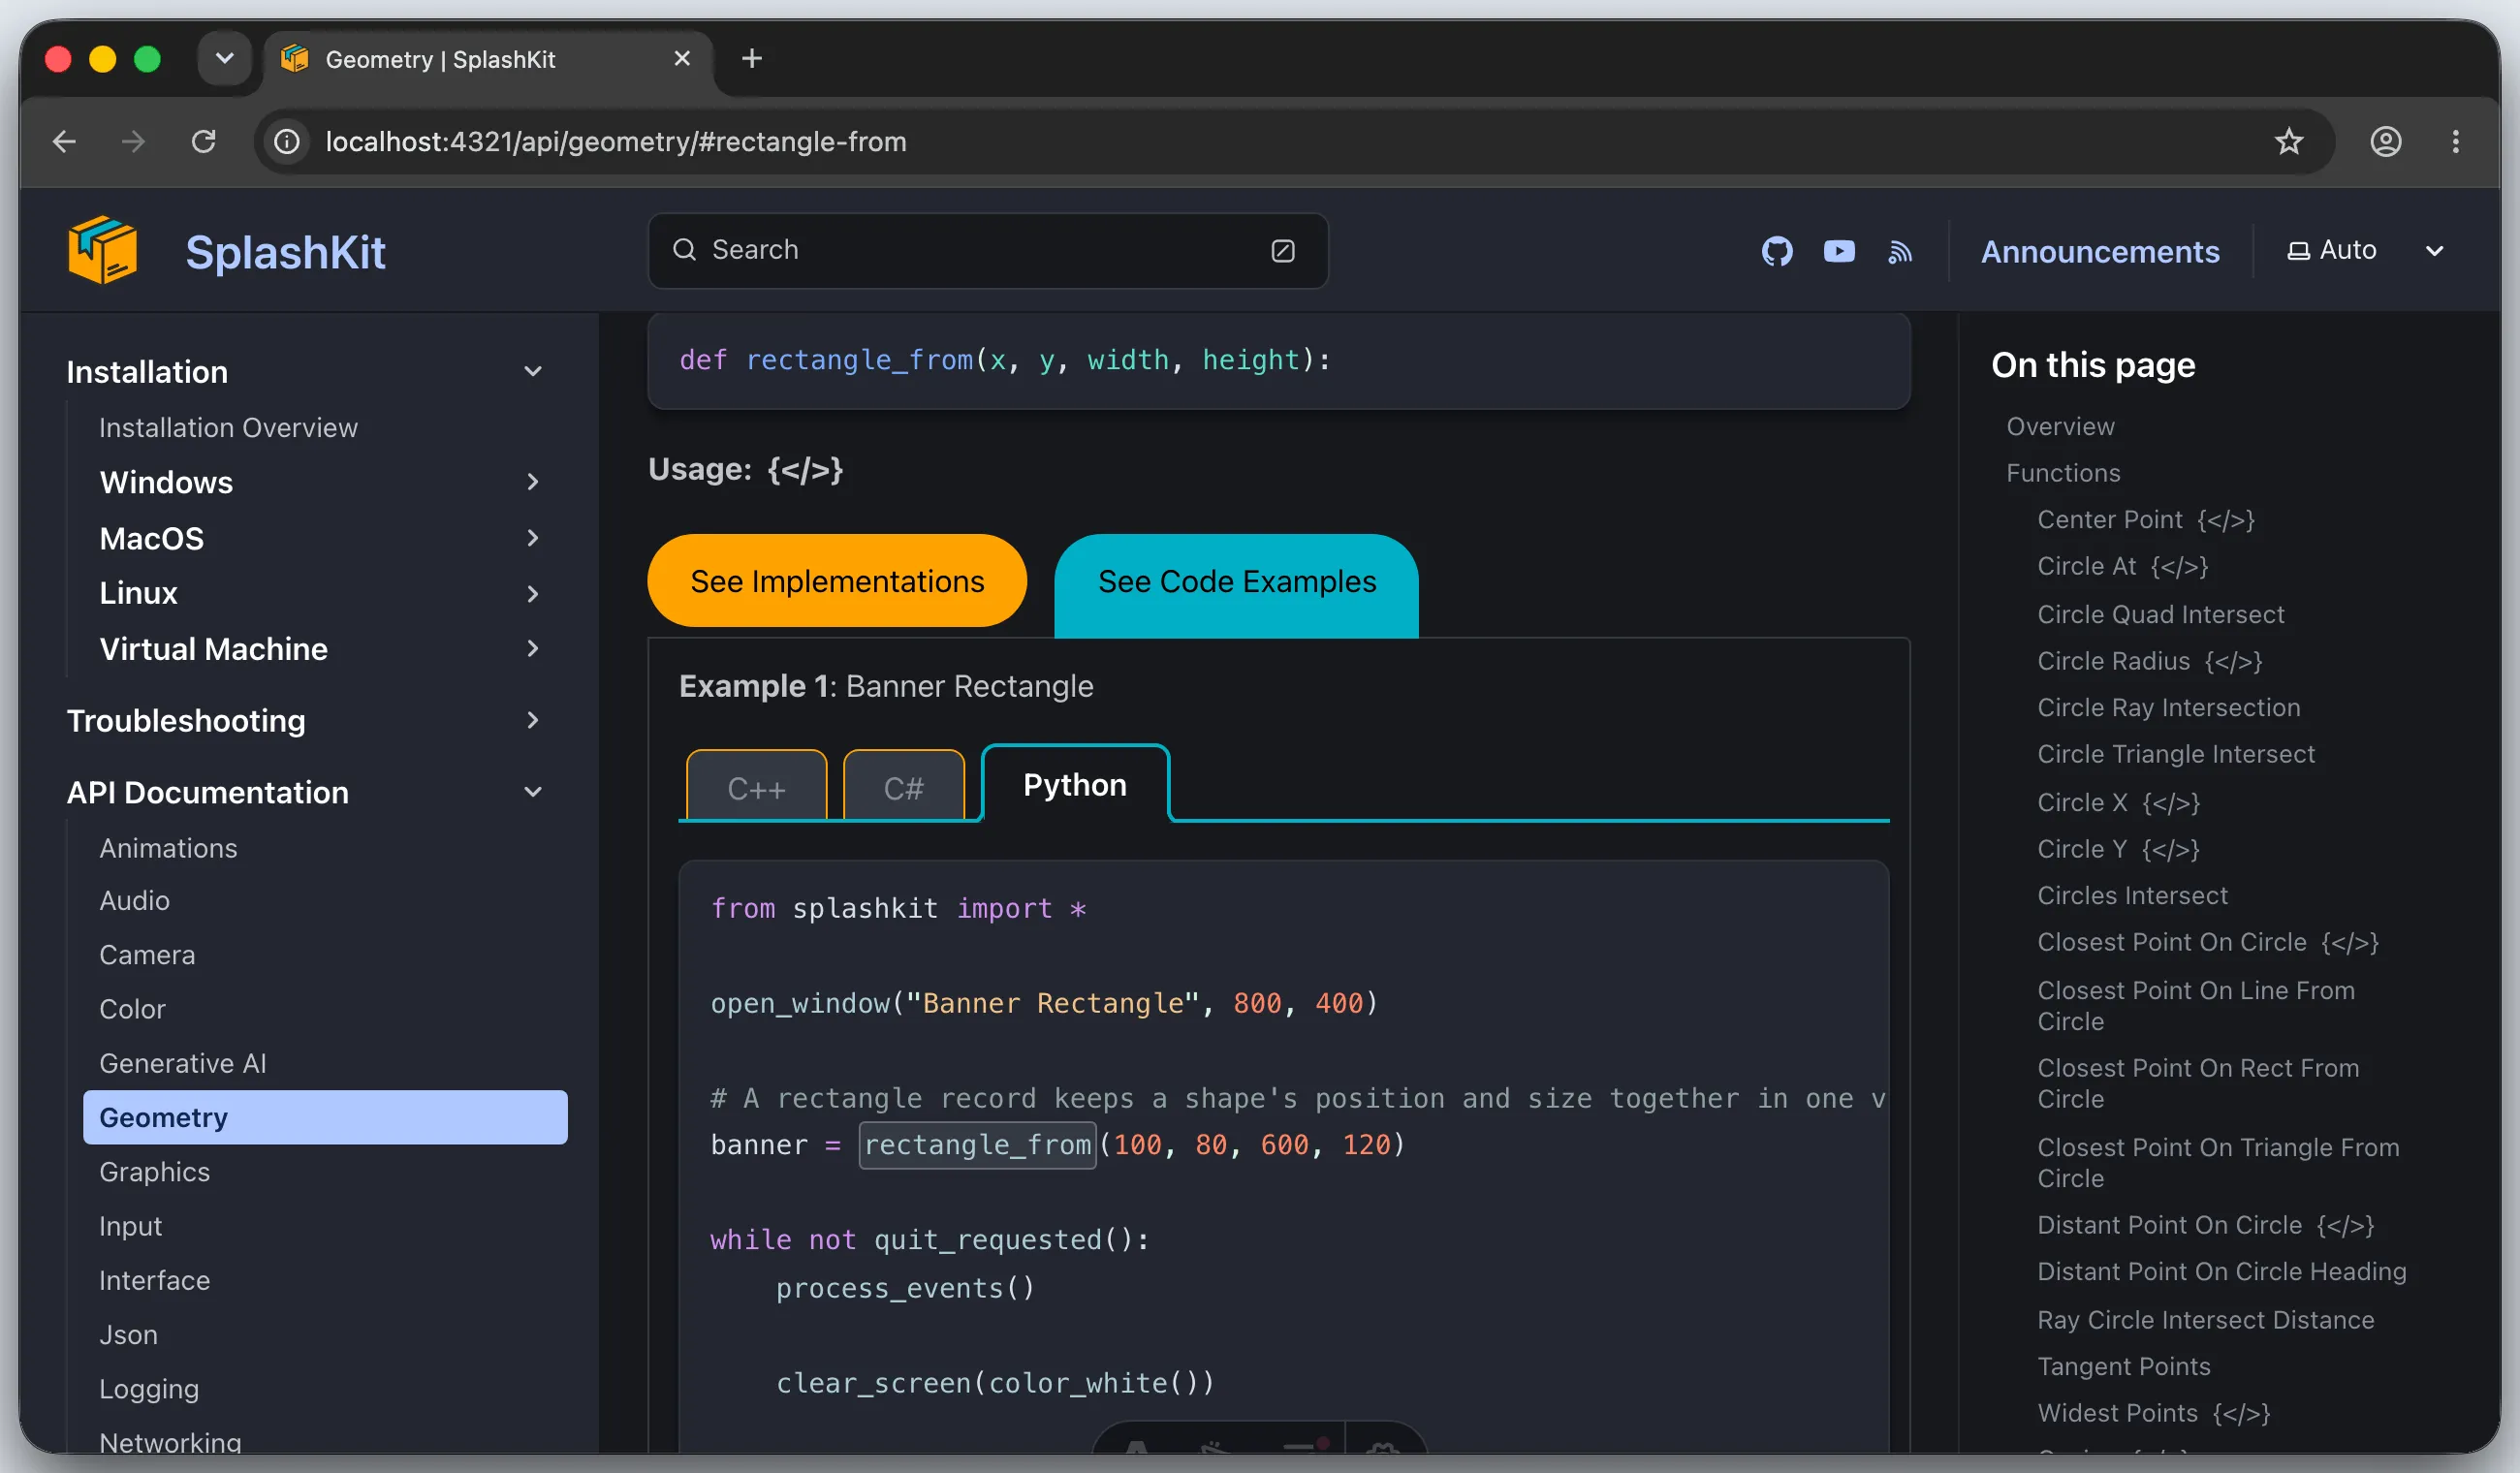
Then scroll to the bottom of the example for the Output picture.
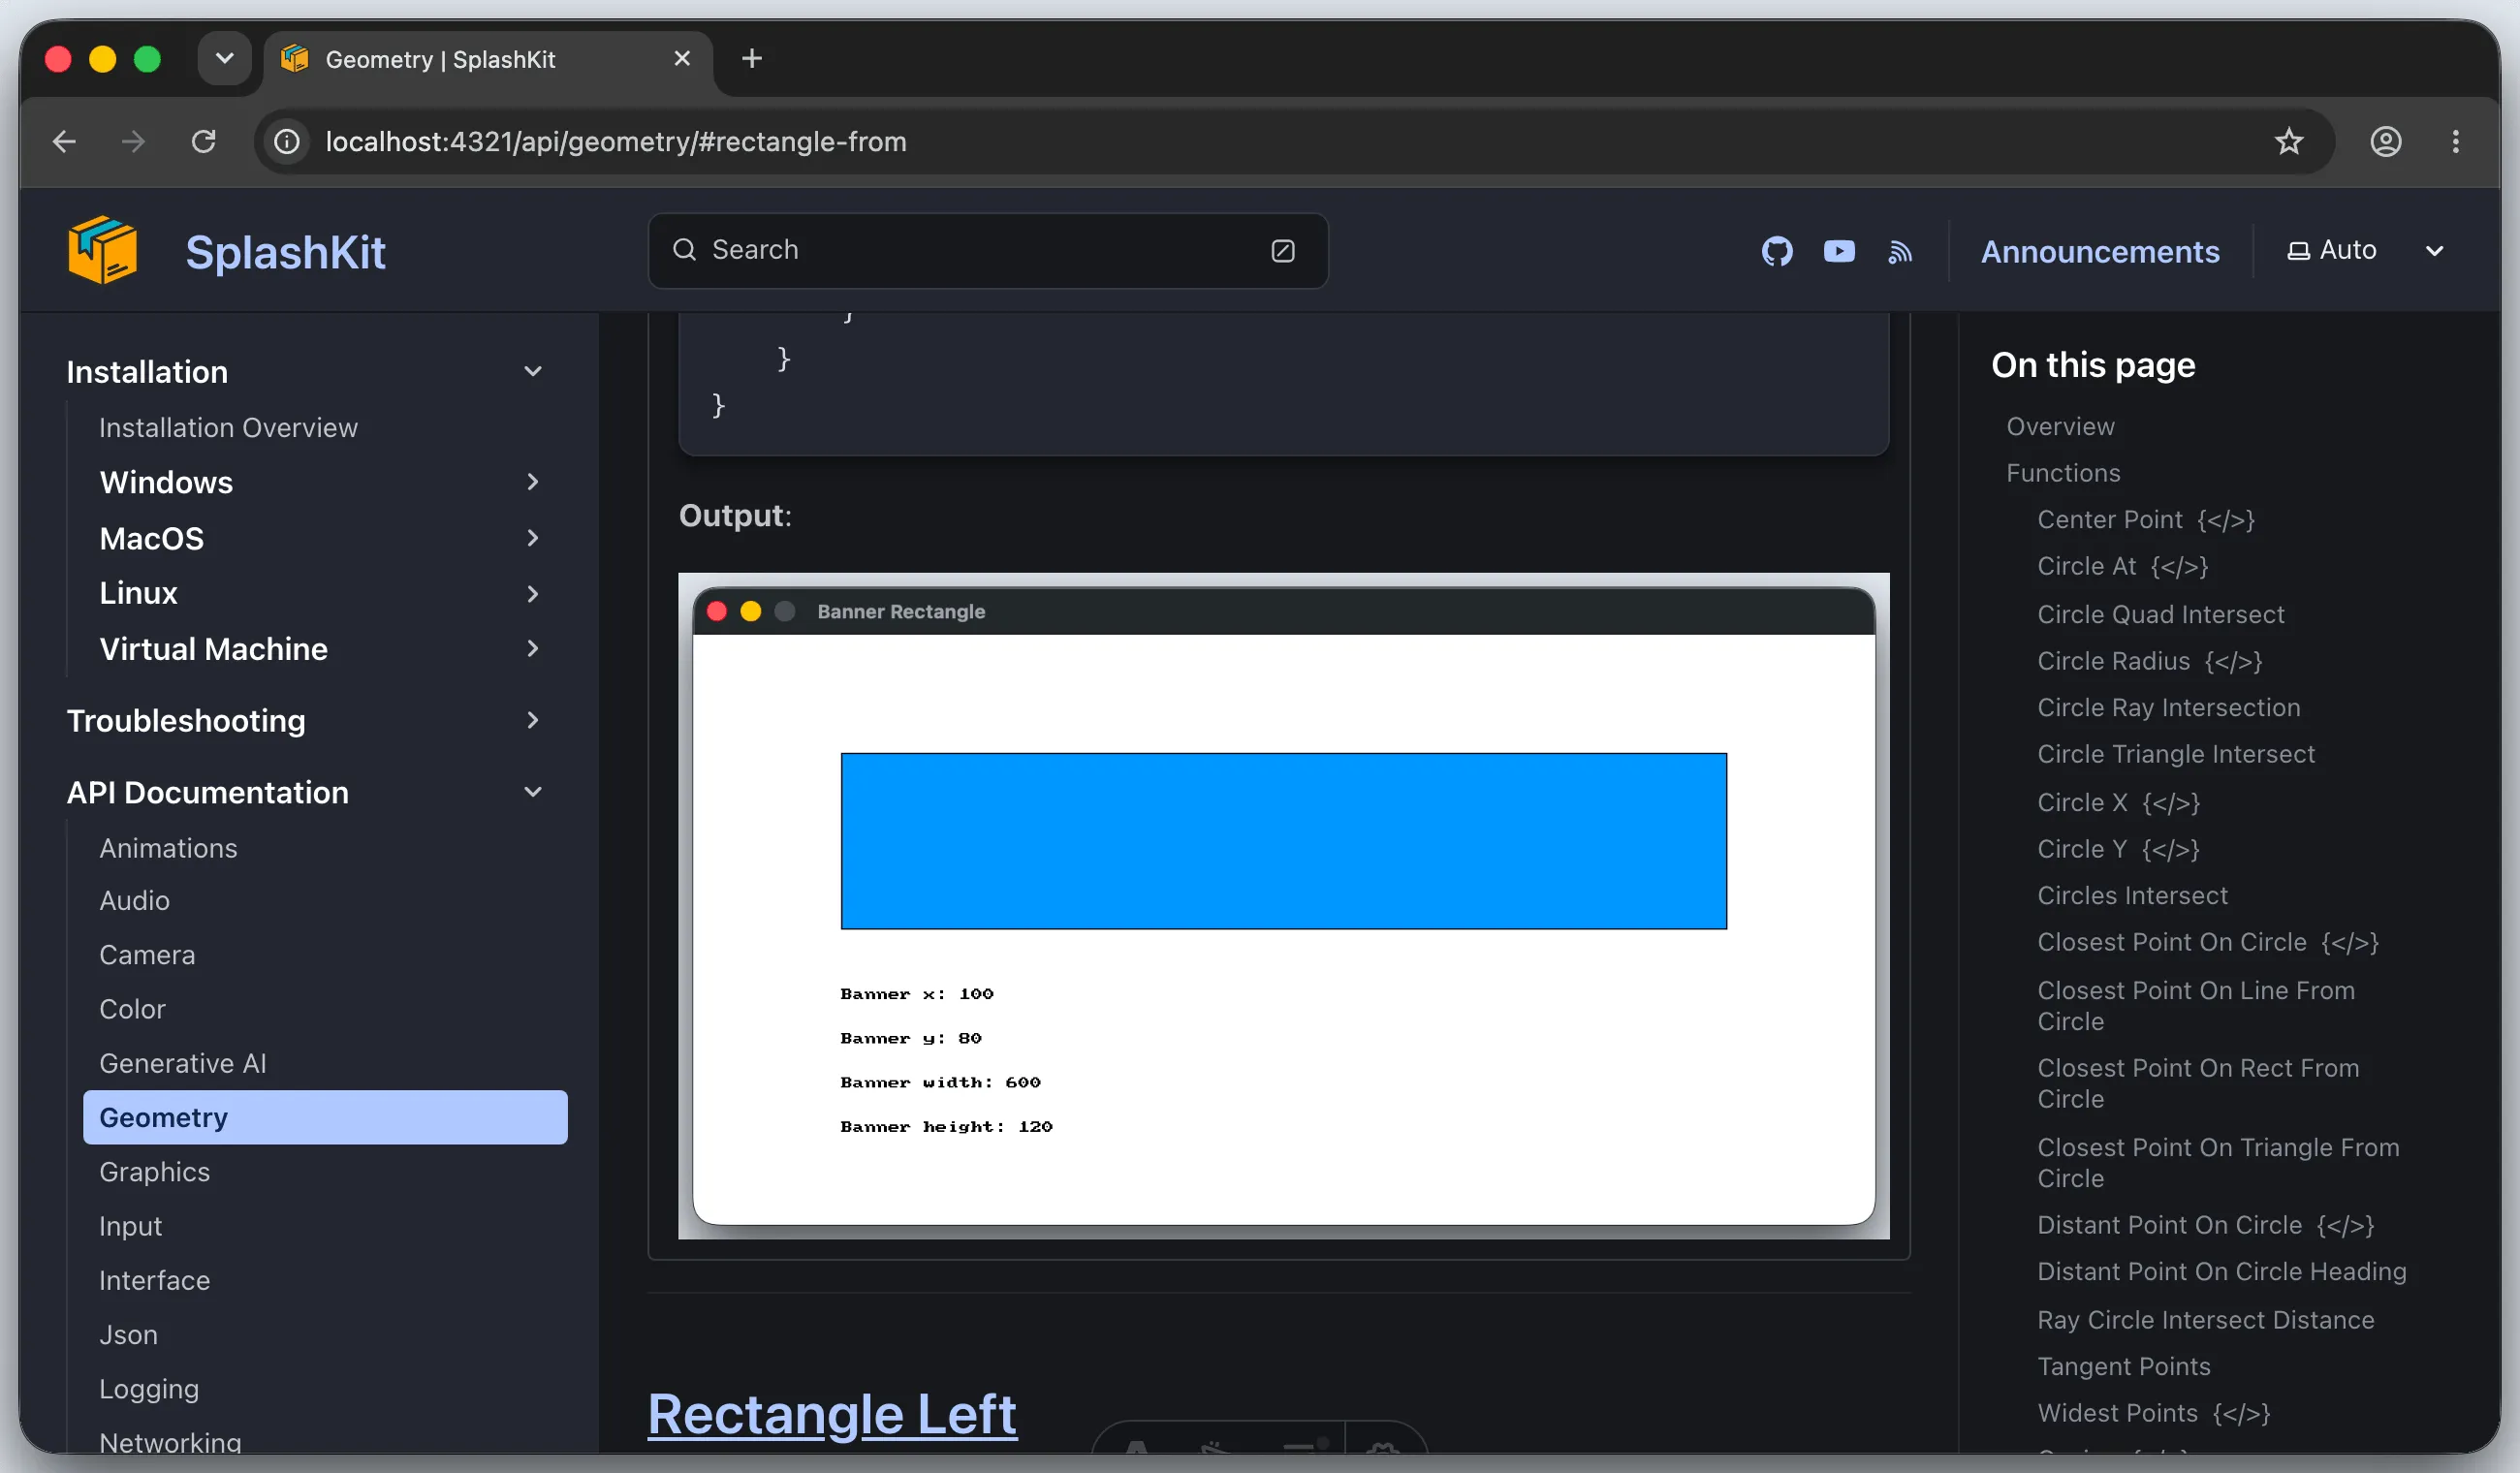
Check these things:
- The heading says Example 1: Banner Rectangle, taken from your
.txtfile. - The C++, C# (both styles) and Python tabs are all there.
- The function’s name is highlighted in every tab. If it is not, the name in your code does not
match. Top-level C# needs
RectangleFrom, object-oriented C# needsSplashKit.RectangleFrom, and Python needsrectangle_from. - The picture shows under Output.
13. Run the build
Section titled “13. Run the build”Before you push, build the whole site the way the hosting service does. The build also checks every link on the site.
npm run buildIt takes a minute or two. Look at the last lines. You want to see All internal links are valid and
Complete!.
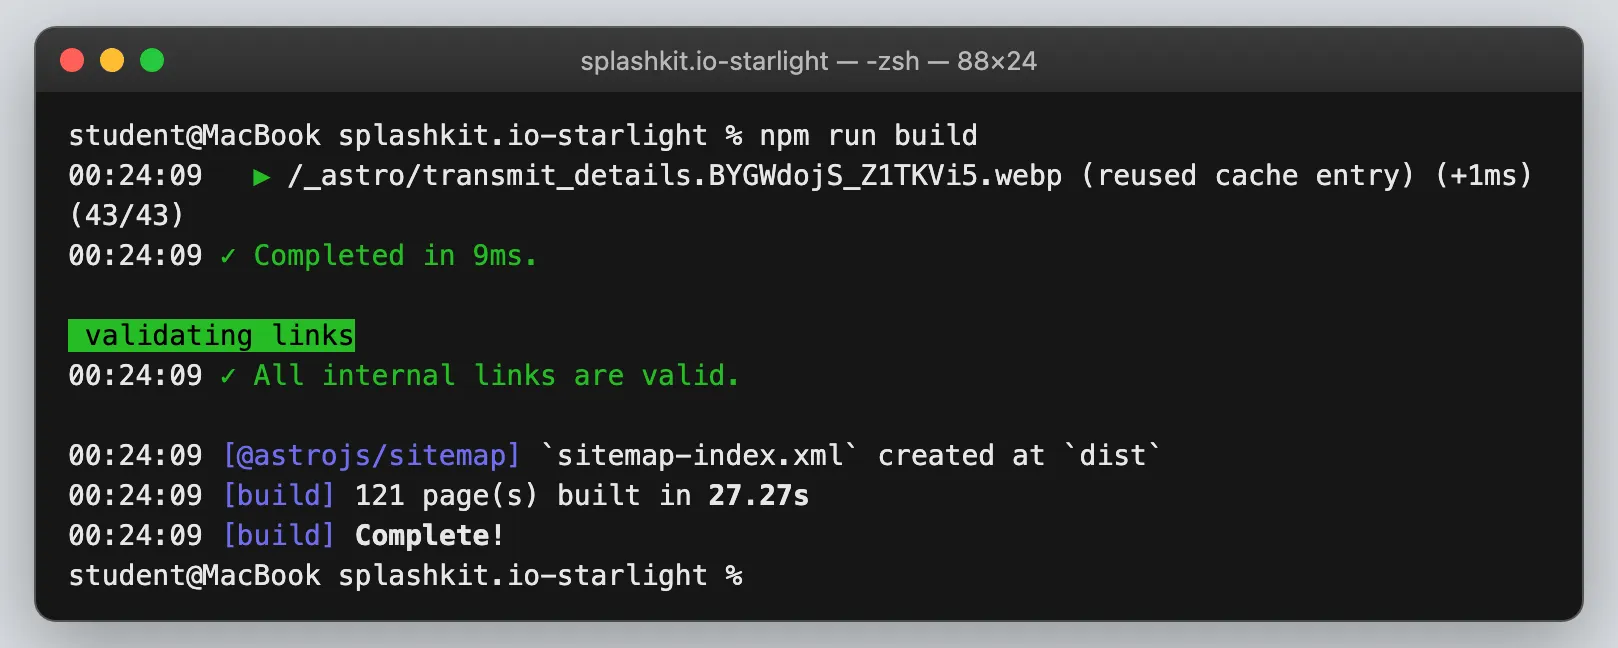
The build rewrites scripts/json-files/usage-example-references.json too, so restore it again
before you commit.
Send it in
Section titled “Send it in”14. Commit your files
Section titled “14. Commit your files”Put the JSON file back, then add your six files and commit them:
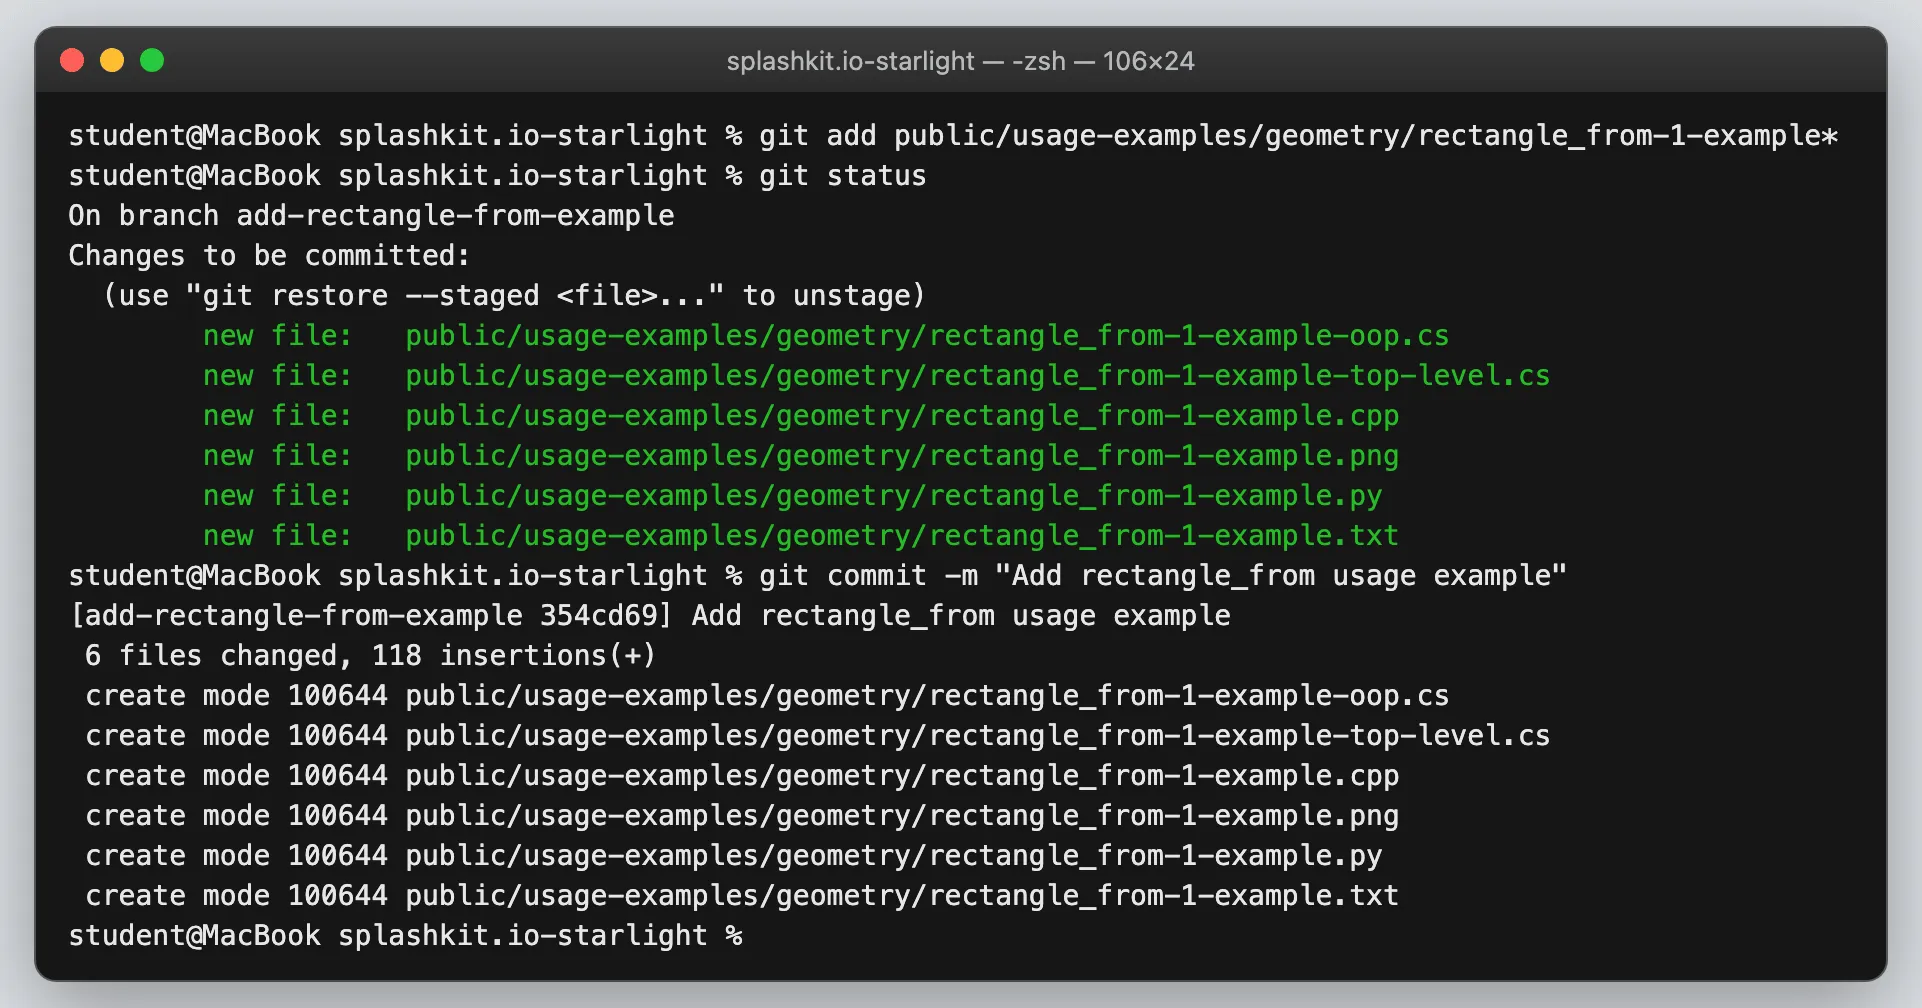
git restore scripts/json-files/usage-example-references.jsongit add public/usage-examples/geometry/rectangle_from-1-example*git statusgit commit -m "Add rectangle_from usage example"The * matches all six files and nothing else, so you cannot add stray files by accident.
git status should list exactly six new files. Keep the message short, in the same style as the
recent history. The command git log --oneline -10 shows it.
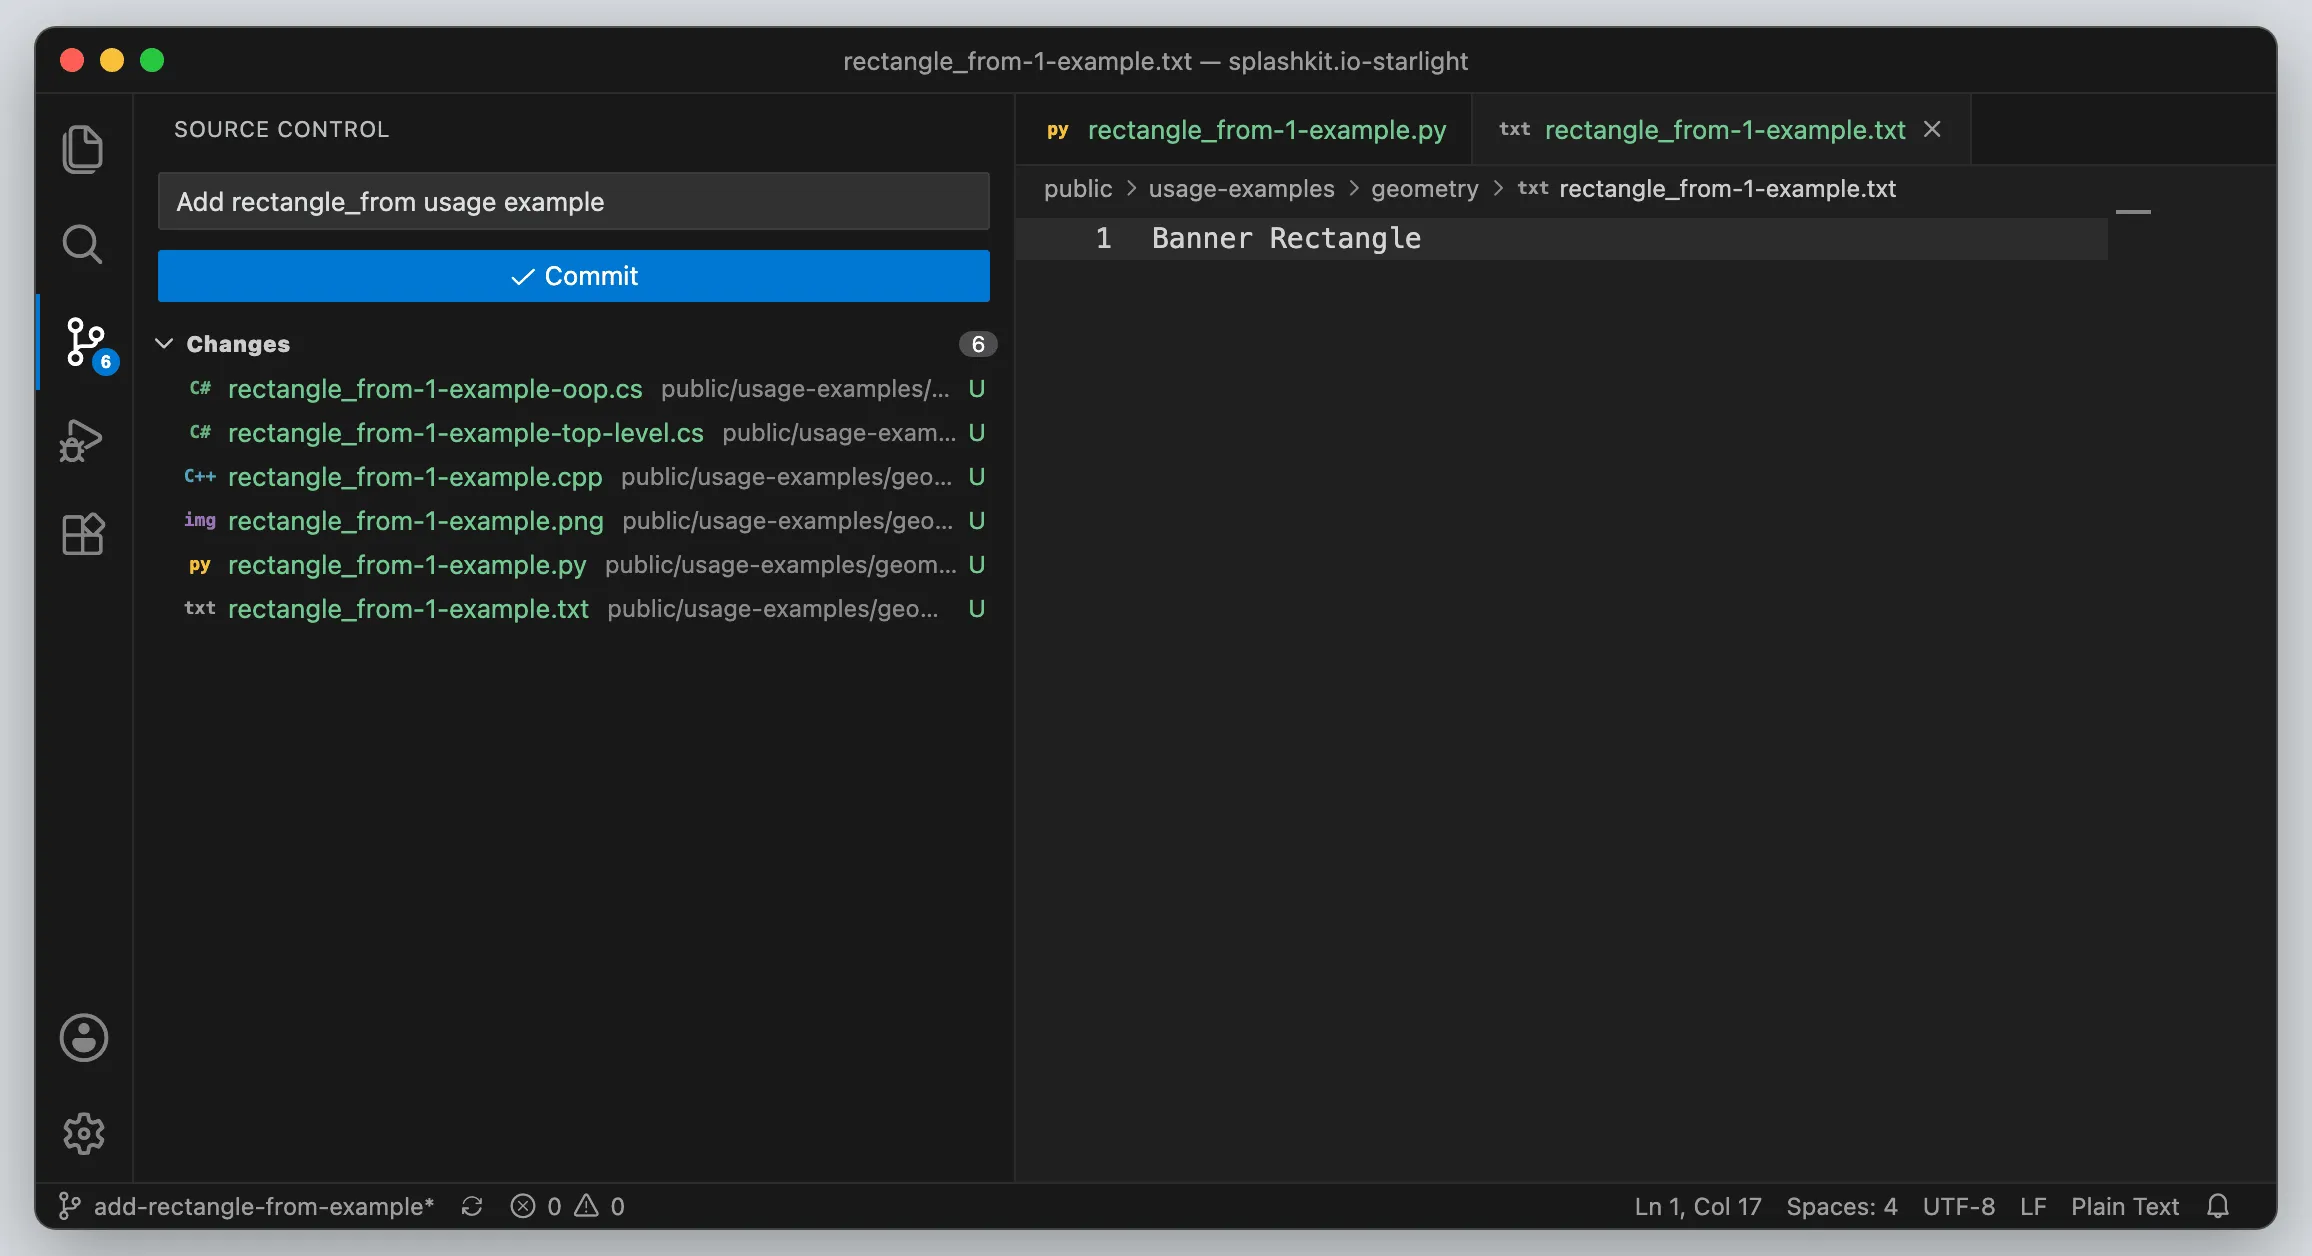
If you prefer buttons, use the Source Control view in VS Code. Check that it lists only your six files, stage them, type the message, and press Commit.
15. Push your branch
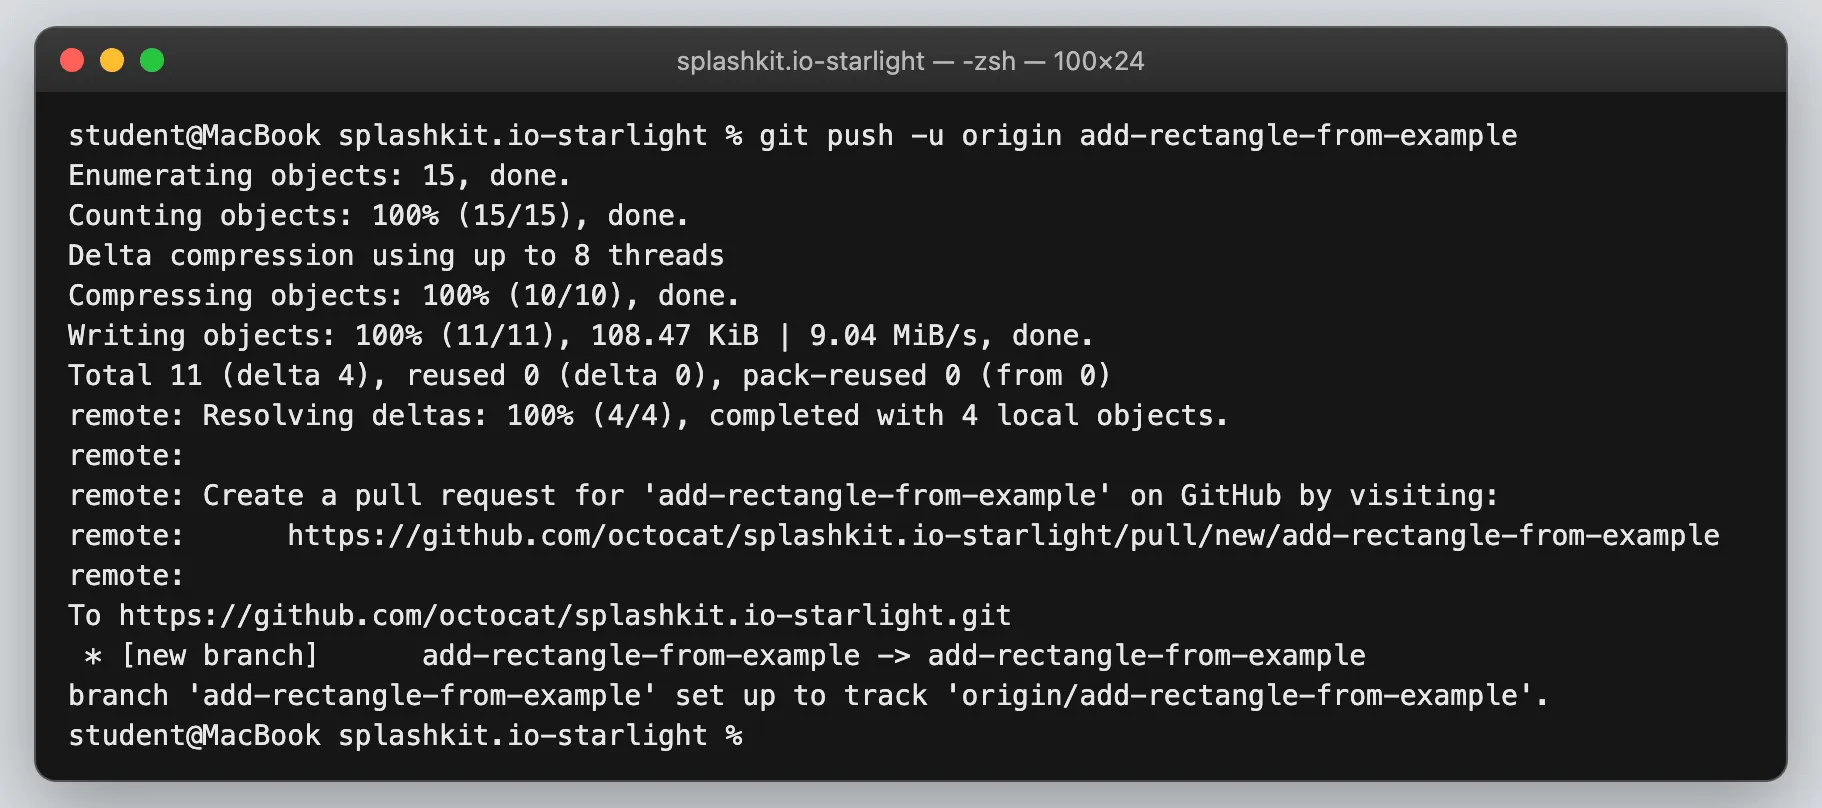
Section titled “15. Push your branch”git push -u origin add-rectangle-from-exampleorigin is your fork. The -u remembers the link between your local branch and the one on GitHub,
so a plain git push works next time. GitHub also prints a link for opening a pull request.
16. Open the pull request
Section titled “16. Open the pull request”Open the link GitHub printed, or go to your fork on GitHub and choose Compare & pull request. Then follow How to Create a Pull Request and fill in the Pull Request Template. Tell your reviewers which languages you ran.
A teammate then reviews your example. The
peer review guide for usage examples
shows what they look for. If they ask for changes, edit the files, then run git add, git commit
and git push again. The pull request updates by itself.
When something goes wrong
Section titled “When something goes wrong”| What you see | Why it happens | What to do |
|---|---|---|
Algolia DocSearch enviroment variables are invalid | The .env file is missing or a line is wrong. | Follow step 5. The message’s spelling is how the site prints it. |
command not found for skm | SplashKit is not installed, or the terminal was open before you installed it. | Use the setup guide, then reopen the terminal. |
Error: No image, gif or webm (audio) files found for followed by your example’s name | The picture is missing, or its name does not match the .txt file. | Name it exactly rectangle_from-1-example.png (or .gif), in the same folder as the .txt file. |
The same error, for draw_circle-2-animation and draw_circle-3-interactive | Those examples on main have no picture. They are not yours. | Ignore them. |
| No See Code Examples button | The part of the filename before the first - is not the function’s unique_global_name. | Check step 7, fix the names, then stop and restart npm run dev. |
| The example shows, but its function name is not highlighted | The name in the code does not match the function’s name in that language. | See the checks in step 12. |
git status lists usage-example-references.json | The website rewrites it. | Run git restore scripts/json-files/usage-example-references.json. |
git status lists banner.dSYM, __pycache__, logs or myeasylog.log | You ran a program inside the project folder. | Delete those leftovers, and run programs from your practice folder next time. |
Permission denied or a 403 error when you push | You are pushing to the team repository instead of your fork. | Run git remote -v. The origin address should have your username in it. |
npm run build fails on links you did not touch | The links were already broken. | See the note in step 13. |
Checklist before you open the pull request
Section titled “Checklist before you open the pull request”- The six files are in the right category folder, named
unique_global_name-1-exampleplus the ending. - The
.txtfile has one line, the title. The window’s title describes the example. - The example runs in C++, in both C# styles and in Python.
- The Python function names match the Python tab on the API page.
- The loop is
while (!quit_requested()), neverwhile (true). - Graphical examples show their results in the window and print nothing to the terminal.
- Comments say why, not what.
- The picture shows the real window, with nothing personal in it.
- The function’s name is highlighted in every tab on your local website.
-
npm run buildpasses, or fails only on links you did not touch. - The commit holds your six files and nothing else.