
splashkit.io GitHub Guide
Set up a Working Environment for SplashKit
Here’s a step-by-step guide on how to set up a working environment for SplashKit with GitHub
1. Install Git
First step is to ensure you have the necessary tools installed on your workspace. Follow the guide in the setting up section and then proceed to step 2
2. Fork a GitHub Repository
-
Log in to GitHub: Go to GitHub and log in with your details.
-
Find the Repository:
Navigate to the appropriate repo for your team:
- SplashKit Website repository.
- SplashKit Online repository.
- SplashKit Core repository.
- Thoth-Tech Documentation Site repository.
-
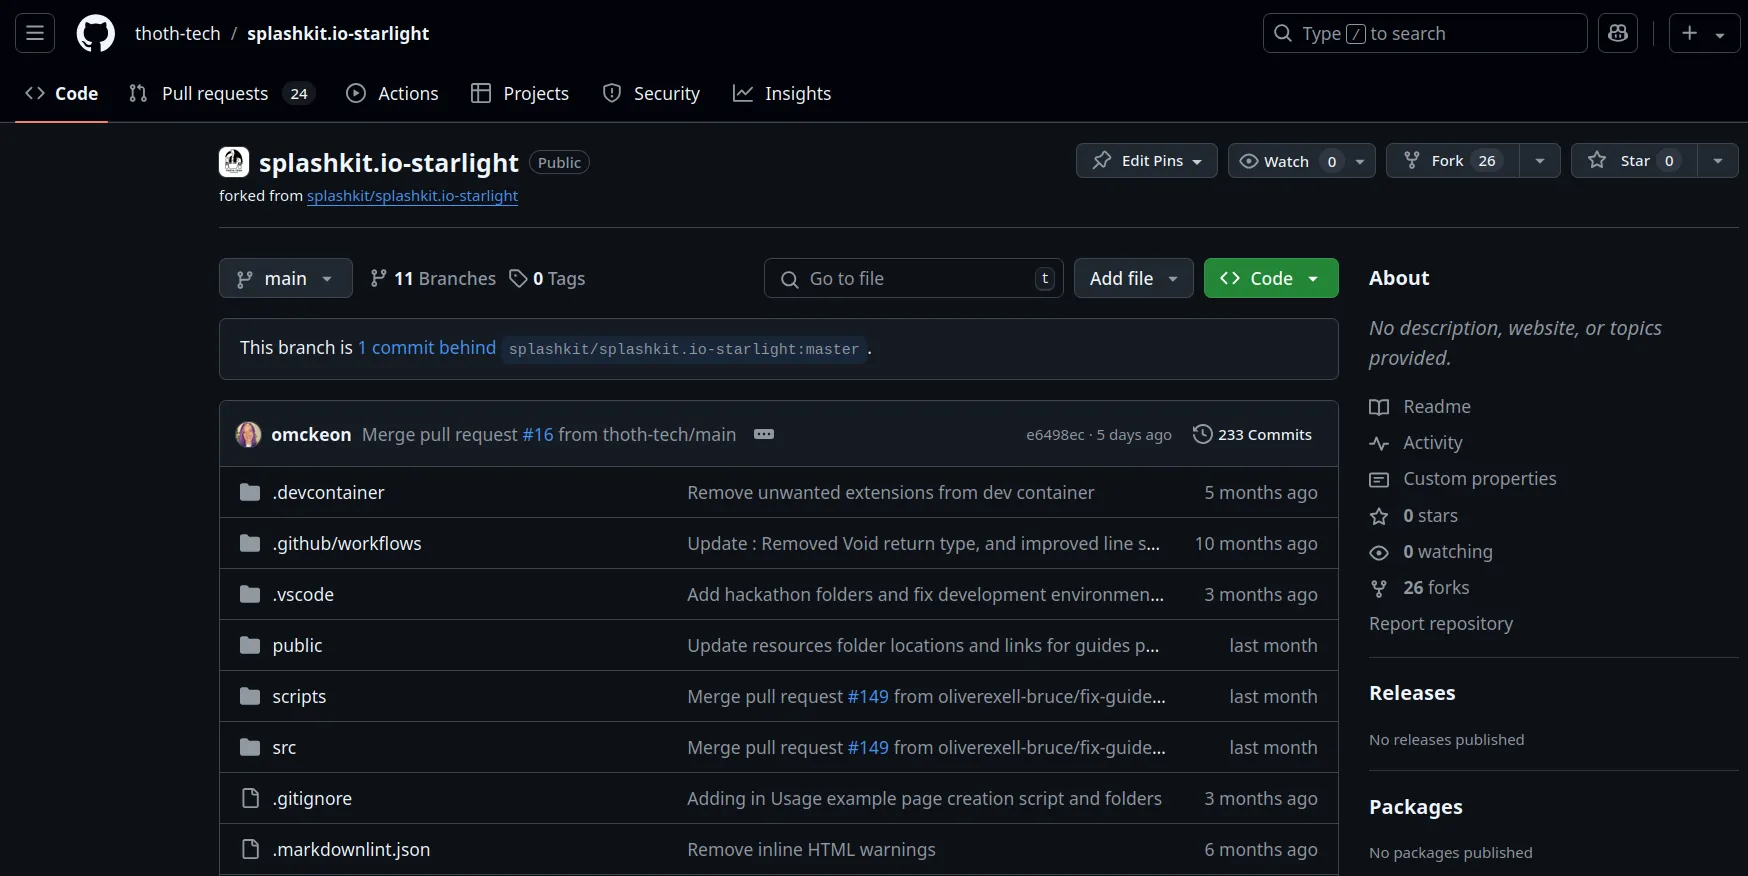
Fork the Repo: Click the “Fork” button at the top right of the repository page and create a new fork of the repository.

3. Clone the Forked Repository
-
Open a terminal on your machine and run the following commands, making sure to replace
USERNAMEwith your own GitHub username:Terminal window git clone https://github.com/USERNAME/splashkit.io-starlight.git -
Then, navigate into the directory:
Terminal window cd splashkit.io-starlightgit remote add upstream https://github.com/thoth-tech/splashkit.io-starlight.git -
Now you’re all set up to start working on the SplashKit.io repo.
-
Open a new VSCode window.
-
Open the command palette by pressing
cmd + shift + p(orctrl + shift + pon Windows/Linux). -
Type
git cloneand paste the URL of your forked repo.
-
When prompted, select the folder location where you want to clone the repo.

-
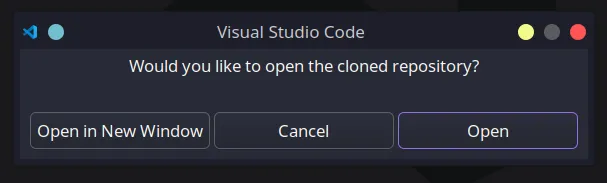
Once the repo is cloned, VSCode will prompt you to open the repo folder location.
Now you’re all set up to start working on the SplashKit.io repo in VSCode.
-
Open GitHub Desktop and click on the
Filetab in the top-left corner, then selectClone Repository.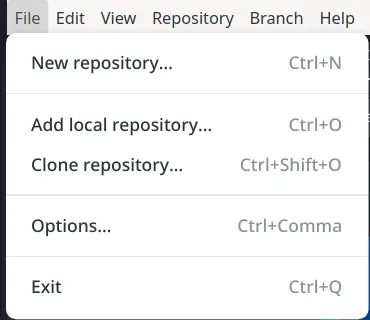
-
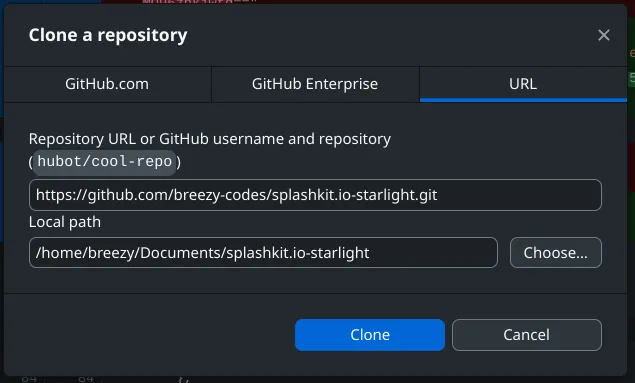
Here you can either filter via your existing repositories, find the forked repo, or paste the URL of the forked repo.
-
Once the repo is cloned, you can open the repo in your preferred code editor.
Open a WSL terminal and change directory to your home with:
cd splashkit-coreNote that this guide clones the repository to the home directory, but feel free to move its location. Now initiate the clone process of your fork with:
git clone --recursive -j2 https://github.com/{user name}/splashkit-core.gitsplashkit-core contains multiple submodules (separate repositories which splashkit-core depends
upon). The --recursive argument ensures that the submodules are also downloaded when calling
clone. Wait for the download to complete before continuing to the next step.
6. Create a Branch for Your Work
To start contributing to the SplashKit.io repo, you’ll need to create a new branch for each contribution. This will keep your changes separate from the main branch. You can create a new branch in a few different ways:
Move into the SplashKit.io directory and create a new branch:
git checkout -b your-branch-nameThen, push the branch to your fork:
git push origin your-branch-nameNow you’re all set up to start working on your new branch.
Open source control by clicking on the icon on the left-hand side of the VSCode window. Then click
on the three dots, go down to Branch, and select Create Branch from.

Then, select to make the new branch from master and name your branch.


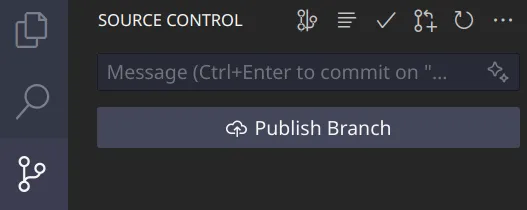
Next, push the branch to your fork by clicking on the Publish Branch button in source control.
Now you’re all set up to start working on your new branch.
Select the Starlight repo in GitHub Desktop, then click on the Current Branch tab and select
New Branch.
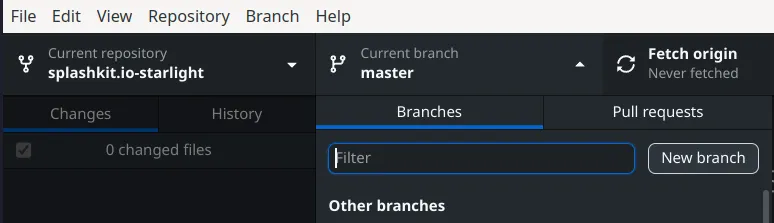
Name your branch and then click Create Branch.

Then push the branch to your fork by clicking on the Publish Branch button.

Now you’re all set up to start working on your new branch.
By creating a new branch for each contribution, you can keep your changes separate from the main branch.
7. Make Changes and Test
Open the files in VS Code, make your changes, and test them locally by running or building your project. You can use the integrated terminal in VS Code to run commands, compile the code, or start the local server.
8. Commit and Push Changes to GitHub
After you’ve made changes, save the files and commit them to your local repository.
-
Check the Status of Your Changes:
Terminal window git statusThis will show the current state of your working directory, including staged, unstaged, and untracked files.
-
Stage your changes for commit:
Terminal window git add . -
Commit Changes: Once your changes are staged, commit them with a meaningful message:
Terminal window git commit -m "Added my new feature" -
Pull Any Remote Changes: Before pushing, ensure your local repository is up-to-date with the latest changes from the main branch:
Terminal window git pull origin main -
Push the changes to your forked repository:
Terminal window git push origin <branch-name>Replace
<branch-name>with the name of your branch.
9. Create a Pull Request (PR)
After pushing your changes, you can create a Pull Request to propose your changes to the original repository.
- Navigate to your forked repository on GitHub.
- Create a Pull Request: There should be an option to “Compare & pull request.” Click it, review your changes, and submit the pull request.
Please refer to the Pull Request Guide for more information on creating a pull request.
Contributing
You should now have everything you need to begin contributing to you team.
Be sure to check out the CONTRIBUTE.md for your team:
Troubleshooting
A lot can go wrong when working within repositories, the following guide contains a few troubleshooting steps you can take to resolve the most common issues.
How to rebase your branch
-
Fetch the Latest Changes from Upstream
First, fetch the latest changes from the upstream repository to ensure your local copy is up-to-date.
Terminal window git fetch upstreamThis command fetches the latest branches and commits from the upstream repository without modifying your local working directory.
-
Check Out the Branch You Want to Rebase
Make sure you’re on the branch that you want to rebase. Use the following command to switch to your branch:
Terminal window git checkout <your-branch-name>Replace
<your-branch-name>with the name of your branch. -
Rebase Your Branch onto the Latest
main(or another target branch)To rebase your branch onto the latest changes from the upstream
mainbranch (or whatever branch you want to base your changes on):Terminal window git rebase upstream/mainThis command applies your branch’s commits on top of the latest changes from the upstream
mainbranch. If you are rebasing onto a different branch (likedevelopment), replacemainwith the appropriate branch name. -
Resolve Conflicts (if necessary)
If there are any conflicts, Git will pause the rebase process and prompt you to resolve them. To see which files are in conflict, run:
Terminal window git statusManually resolve conflicts in your files, then add them to the staging area:
Terminal window git add <file-name>Once all conflicts are resolved, continue the rebase process:
Terminal window git rebase --continueIf you want to abort the rebase and return to the state before the rebase began:
Terminal window git rebase --abort -
Push the Rebasing Changes to Your Fork
Once the rebase is complete, you need to force push the changes to your fork, as the history has been rewritten:
Terminal window git push --force-with-lease origin <your-branch-name>The
--force-with-leaseoption ensures that you don’t accidentally overwrite someone else’s changes in case they pushed while you were rebasing. -
Verify the Rebasing
You can now verify that your branch is rebased and up to date with the upstream changes:
Terminal window git logThis will show the commit history, allowing you to confirm that your commits are on top of the latest upstream changes.
By following these steps, you will have successfully rebased your branch onto the latest
mainbranch (or whichever branch you’re targeting) from the upstream repository.
How to resolve conflicts during a rebase or merge
-
Identify Conflicts
During a rebase or merge, if Git detects conflicts that it cannot resolve automatically, it will pause the process and display a message indicating which files have conflicts. You can check the status to identify which files are in conflict:
Terminal window git statusGit will show the files that are in conflict and need your attention. Conflicted files will appear under the
both modifiedsection. -
Open the Conflicted Files
Open the conflicted files in your preferred text editor (e.g., vscode). In the file, you will see conflict markers that look like this:
<<<<<<< HEAD// Code from your current branch=======/* Code from the branch you are rebasing or merging */>>>>>>> branch-nameHEADcontains the changes from your current branch.- The
=======separates the two conflicting versions. - The text below the
=======represents changes from the branch you are merging or rebasing onto.
-
Manually Resolve the Conflicts
To resolve the conflict, decide whether to keep your changes, the incoming changes, or a combination of both.
- Keep your changes: Delete the lines between
=======and>>>>>>>and remove the conflict markers. - Keep the incoming changes: Delete the lines between
<<<<<<< HEADand=======and remove the conflict markers. - Combine both changes: Modify the conflicting section to include both sets of changes, based on your needs, and then remove the conflict markers.
After resolving the conflicts, the file should look clean and without any conflict markers.
- Keep your changes: Delete the lines between
-
Mark the Conflicts as Resolved
Once you have resolved the conflicts in a file, you need to add the file to the staging area to let Git know that the conflict has been resolved:
Terminal window git add <file-name>Repeat this for all the conflicted files.
-
Continue the Rebase or Merge Process
Once all conflicts are resolved and staged, you can continue the process.
-
If you are in the middle of a rebase, continue with:
Terminal window git rebase --continue -
If you are in the middle of a merge, finalize the merge with:
Terminal window git merge --continue
If at any point you want to abort the rebase or merge due to complications, you can use the following command:
Terminal window git rebase --abortor
Terminal window git merge --abort -
-
Push the Resolved Changes
After resolving the conflicts and completing the rebase or merge, you will need to push the changes back to your remote repository. If you performed a rebase, you will need to force-push the branch since the commit history has been rewritten:
Terminal window git push --force-with-lease origin <your-branch-name>If it was a merge, a normal push will suffice:
Terminal window git push origin <your-branch-name> -
Verify Everything
After pushing, you can verify that everything is resolved and the history is clean:
Terminal window git logThis will show the commit history, confirming that your conflicts were successfully resolved.